Firestore in Datastore mode previously supported the ability to enable Datastore Admin, an optional module with bulk delete and backup features. Datastore Admin was replaced by more reliable alternatives:
- The backup feature was replaced by managed exports and imports.
- The bulk delete feature was replaced by the Bulk Delete Entities template for Dataflow.
Accessing Datastore Admin
If you previously enabled Datastore Admin, you can continue to access
the module by visiting https://ah-builtin-python-bundle-dot-PROJECT_ID.appspot.com/_ah/datastore_admin?app_id=PROJECT_ID, where PROJECT_ID is the ID of your Google Cloud project. If you disable Datastore Admin, you will not be able to
re-enable the module.
Caveats on using Datastore Admin features
- For copy, delete, and backups, recent updates might not be considered.
- All Datastore Admin operations occur within your application, and thus count against your quota.
- We strongly recommend that you disable writes during a backup or restore.
- Existing entities with the same keys will be overwritten during a copy/restore operation. Duplicates are not created if copy/restore operations are performed multiple times. Copy/restore operations do not delete extra data.
- If you use a non-default queue for backup/restore, you can only specify the
target
ah-builtin-python-bundleinqueue.yaml. You cannot use any other targets.
Database access permissions
By default, Datastore Admin can access a Datastore database in the same project and does not require Identity and Access Management permissions for Datastore.
Backing up data
Follow the steps below to create a backup file for future data restores or for exporting.
If you haven't already, create a storage bucket for your project. Optionally, check that the App Engine default service account for the project has access to the bucket via the Access Control List. This may be set already by default and can be overridden, if needed.
(Recommended) Disable Cloud Datastore writes.
Select the entity kinds that you wish to back up.
Click Backup Entities to display the backup form.
Notice that a backup name is supplied and that it includes a datestamp.
You must change this value if you make more than one backup per day because a backup is not made if a backup of the same name already exists.
Notice that the default queue is used for the backup job; you can use this in most cases.
If you use a non-default queue for backup/restore, you can only specify the target
ah-builtin-python-bundleinqueue.yaml. You cannot use any other targets.Select Google Cloud Storage as the backup storage location.
When you choose Cloud Storage, you are prompted for the bucket name where the backups are to be stored, in the format
[BUCKET_NAME]. You can optionally specify the bucket name suffixed with a directory structure, such as[BUCKET_NAME]/backups/foo): If those folders don't already exist, they will be created.Start the backup jobs by clicking Backup Entities. Notice that a job status page is displayed.
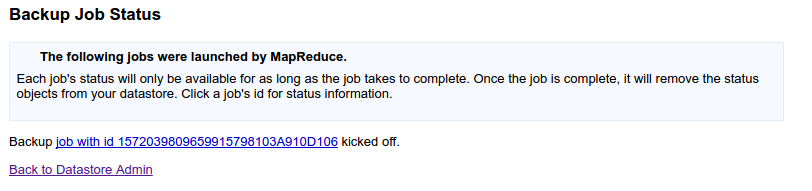
Click Back to Datastore Admin to see the backup status.
After the backup is complete, if you disabled Cloud Datastore writes, re-enable them.
Backup and restore considerations
The backup and restore feature is intended to help you recover from accidental deletes of data or to enable you to export data. You can back up all entities or just the selected kinds of entities, and you can restore from one of these backups when you need to.
Backups are saved to Cloud Storage.
Note that the backup does not contain any indexes. When you restore, the required indexes are automatically rebuilt using the index definitions you uploaded with your application.
You can also use backup files to export your data to other Google Cloud services, such as BigQuery.
Restores do not assign new IDs to entities. Restores use the IDs that existed at backup-time and overwrite any existing entity with the same ID. During a restore, the IDs are reserved as the entities are being restored. This should prevent ID collisions with new entities if writes are enabled while a restore is running. New entities added since the backup are retained.
You can restore all data from a backup or you can restore specific entity kinds from the backup. In addition, you can also use this feature to restore a backup of one application's data to some other application, provided that you use Cloud Storage for your backups.
Aborting a backup
If backup jobs are currently running, they appear in a Pending Backups list in the Cloud Datastore Admin screen.
To stop these running backups:
- Open Datastore Admin
- In the Pending Backups section, select the backup in the list and click Abort.
When you abort a backup job, App Engine attempts to delete backup data that has
been saved up to that point. However, in some cases, some files can remain after
the abort. You can locate these files in the location you chose for your backups
in Google Cloud Storage and safely delete them after the abort completes. The
names of such files start with the following pattern:
datastore_backup_[BUCKET_NAME].
Finding information about a backup
You might want to find out details about a backup, such as which entity kinds it contains, where it was saved in Google Cloud Storage, and its starting and ending time. To display this backup information:
- Open Datastore Admin
- Select one or more backups in the Backups or Pending Backups list.
- Click Info to display information for those backups.
- Click Back to return to the main Cloud Datastore Admin screen.
Restoring data
To restore from a backup:
- (Recommended) Disable Cloud Datastore writes for your application. It's normally a good idea to do this to avoid conflicts between the restore and any new data written to Cloud Datastore.
- Open Datastore Admin
- In the list of available backups, select the backup that you want to restore from.
- Click Restore.
- In the advisory page that is displayed, notice the list of entities with checkboxes. By default, all of the entities will be restored. Uncheck the checkbox next to each entity that you don't want to restore.
- Also in the advisory page, notice that the default queue, with its
pre-configured performance settings, is used for the restore job. Change this
to another queue that you have configured differently if you need different
queue performance characteristics, making sure the queue chosen does not have
any target specified in
queue.yamlother thanah-builtin-python-bundle. - Start the restore by clicking Restore. Notice that a job status page is displayed.
- Click Back to Datastore Admin to see the status of the restore.

- After the restore is complete, if you disabled writes, re-enable Cloud Datastore writes for your application.
Restoring data to another application
If you back up your data using Google Cloud Storage, you can restore backups to applications other than the application used to create the backup.
To restore backup data from a source application to a target application:
Create an Identity and Access Management (IAM) policy on the source application's storage bucket with the following permission:
- Principal: [PROJECT_ID]@appspot.gserviceaccount.com
- Roles:
Storage Legacy Bucket ReaderandStorage Legacy Object Reader
where
[PROJECT_ID]is the project ID of the target application.Make a new backup in the source application.
(Recommended) Disable Cloud Datastore writes for your target application to avoid conflicts between the restored data and any new data written to Cloud Datastore.
In the textbox next to the button labelled Import Backup Information specify the source application's bucket containing the backup, in the format
/gs/[BUCKET_NAME].
Alternatively, supply the file handle for a specific backup: To view the file handle for a backup, open the Admin page for the source application, select the backup, and click Info. You should see the file handle next to the label Handle.Click Import Backup Information.
The resulting selection page shows the available backups for the bucket you specified, unless you specified a backup by its handle. Select the desired backup and click one of the following:- Add to backup list if you want this backup to be retained in the list of available backups for your application.
- Restore from backup if you want to restore from this backup but do not want the backup displayed in the list of available backups for your application.
In the advisory page that is displayed, notice the list of entities with checkboxes. By default, all of the entities will be restored. Uncheck the checkbox next to each entity that you don't want to restore.
Also in the advisory page, notice that the default queue, with its pre-configured performance settings, is used for the restore job. Change this to another queue that you have configured differently if you need different queue performance characteristics.
Start the restore by clicking Restore. Notice that a job status page is displayed.
After the restore is complete, if you disabled Cloud Datastore writes, re-enable them.
Viewing resource usage
Very frequent backups often lead to higher costs. When you run a Cloud Datastore Admin job, you are actually running an underlying MapReduce job. MapReduce jobs cause frontend instance hours to increase on top of Storage operations and Storage usage.
To view your resource usage:
Visit the Google Cloud console App Engine page.
Use the pulldown menus at the top of the page to select the
defaultservice and theah-builtin-python-bundleversion.
Enabling or disabling database writes
It's normally a good idea to disable writes prior to a restore. This helps avoid conflicts between the restore and any new data written to your database.
Disabling writes prevents entities from being changed by
- the Datastore Viewer.
- applications that use the Datastore API.
To enable or disable writes:
Go to the Admin page.
Click Enable writes to enable writes, or Disable writes to disable writes. The button text varies, depending on the state of your project.
Viewing Datastore Admin resource usage
When you run a Datastore Admin job, you are actually running an underlying MapReduce job. MapReduce jobs cause frontend instance hours to increase on top of Storage operations and Storage usage.
To view your resource usage:
Visit the Google Cloud console App Engine page.
Use the pulldown menus at the top of the page to select the
defaultservice and theah-builtin-python-bundleversion.
Disable Datastore Admin access
Run the following command, replacing
PROJECT_IDwith the ID of your Google Cloud project:curl -X DELETE -H "Authorization: Bearer $(gcloud auth print-access-token)" \ https://appengine.googleapis.com/v1/apps/PROJECT_ID/services/default/versions/ah-builtin-python-bundle