Objectives
Use Dataproc Hub to create a single-user JupyterLab notebook environment running on a Dataproc cluster.
Create a notebook and run a Spark job on the Dataproc cluster.
Delete your cluster and preserve your notebook in Cloud Storage.
Before you begin
- The administrator must grant you
notebooks.instances.usepermission (see Set Identity and Access Management (IAM) roles).
Create a Dataproc JupyterLab cluster from Dataproc Hub
Select the User-Managed Notebooks tab on the Dataproc→Workbench page in the Google Cloud console.
Click Open JupyterLab in the row that lists the Dataproc Hub instance created by the administrator.
- If you do not have access to the Google Cloud console, enter the Dataproc Hub instance URL that an administrator shared with you in your web browser.
On the Jupyterhub→Dataproc Options page, select a cluster configuration and zone. If enabled, specify any customizations, then click Create.

After the Dataproc cluster is created, you are redirected to the JupyterLab interface running on the cluster.
Create a notebook and run a Spark job
On the left panel of the JupyterLab interface, click on
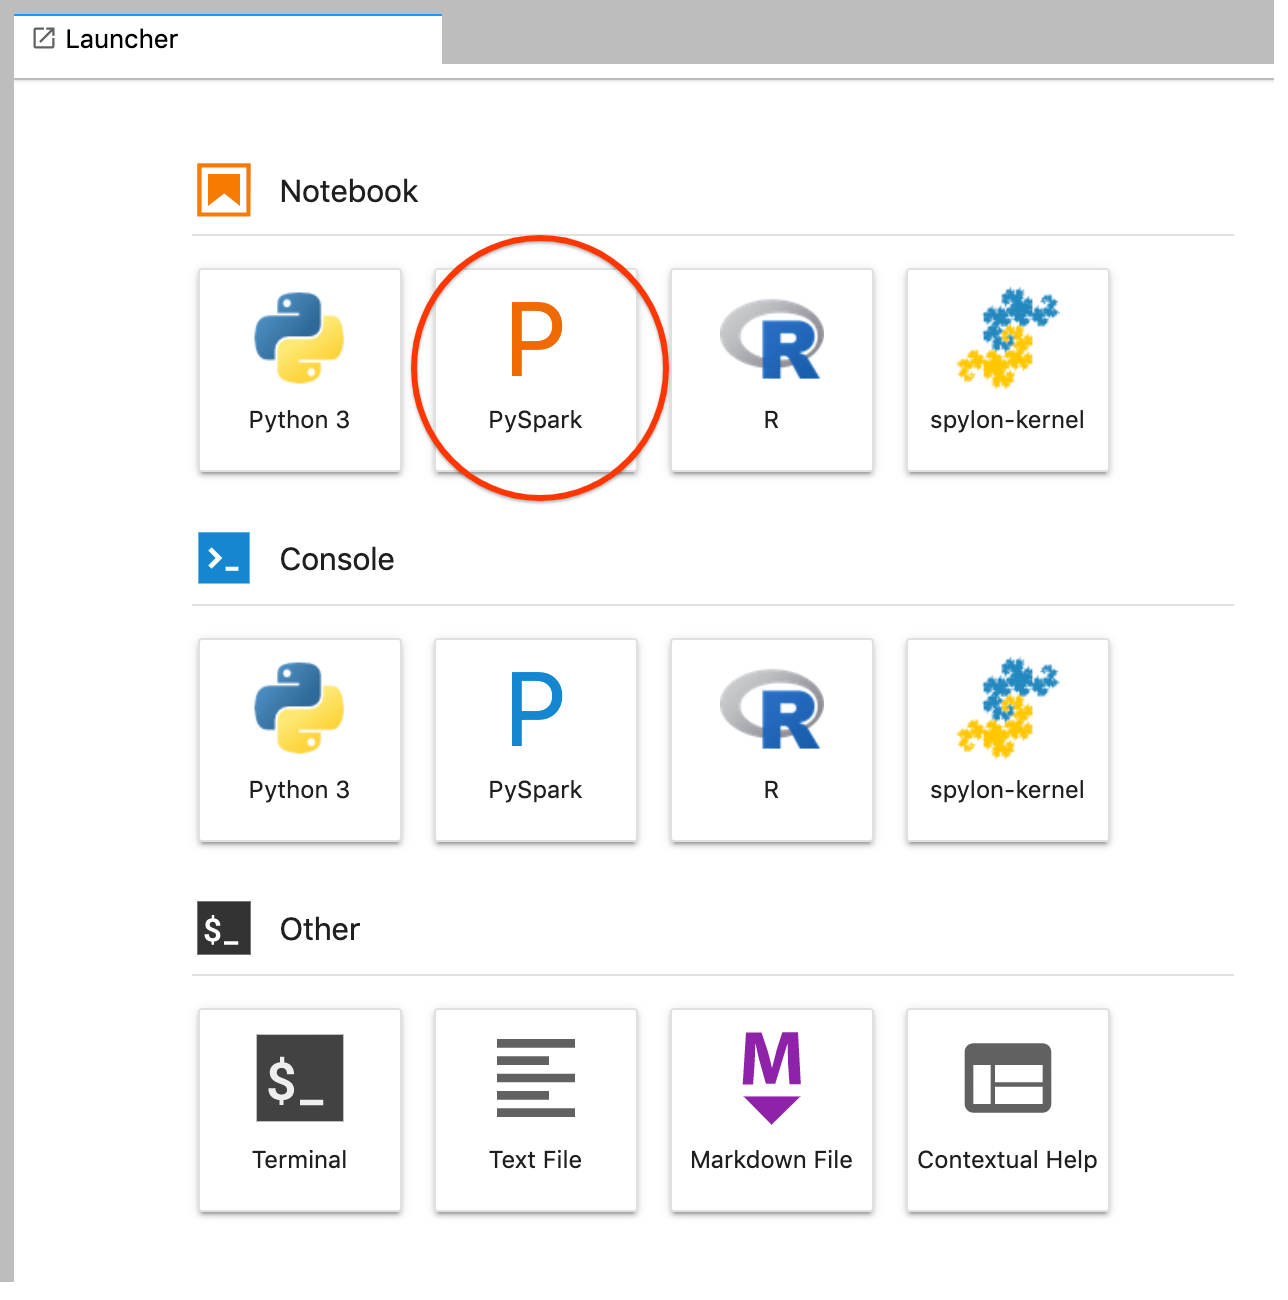
GCS(Cloud Storage).Create a PySpark notebook from the JupyterLab launcher.
The PySpark kernel initializes a SparkContext (using the
scvariable). You can examine the SparkContext and run a Spark job from the notebook.rdd = (sc.parallelize(['lorem', 'ipsum', 'dolor', 'sit', 'amet', 'lorem']) .map(lambda word: (word, 1)) .reduceByKey(lambda a, b: a + b)) print(rdd.collect())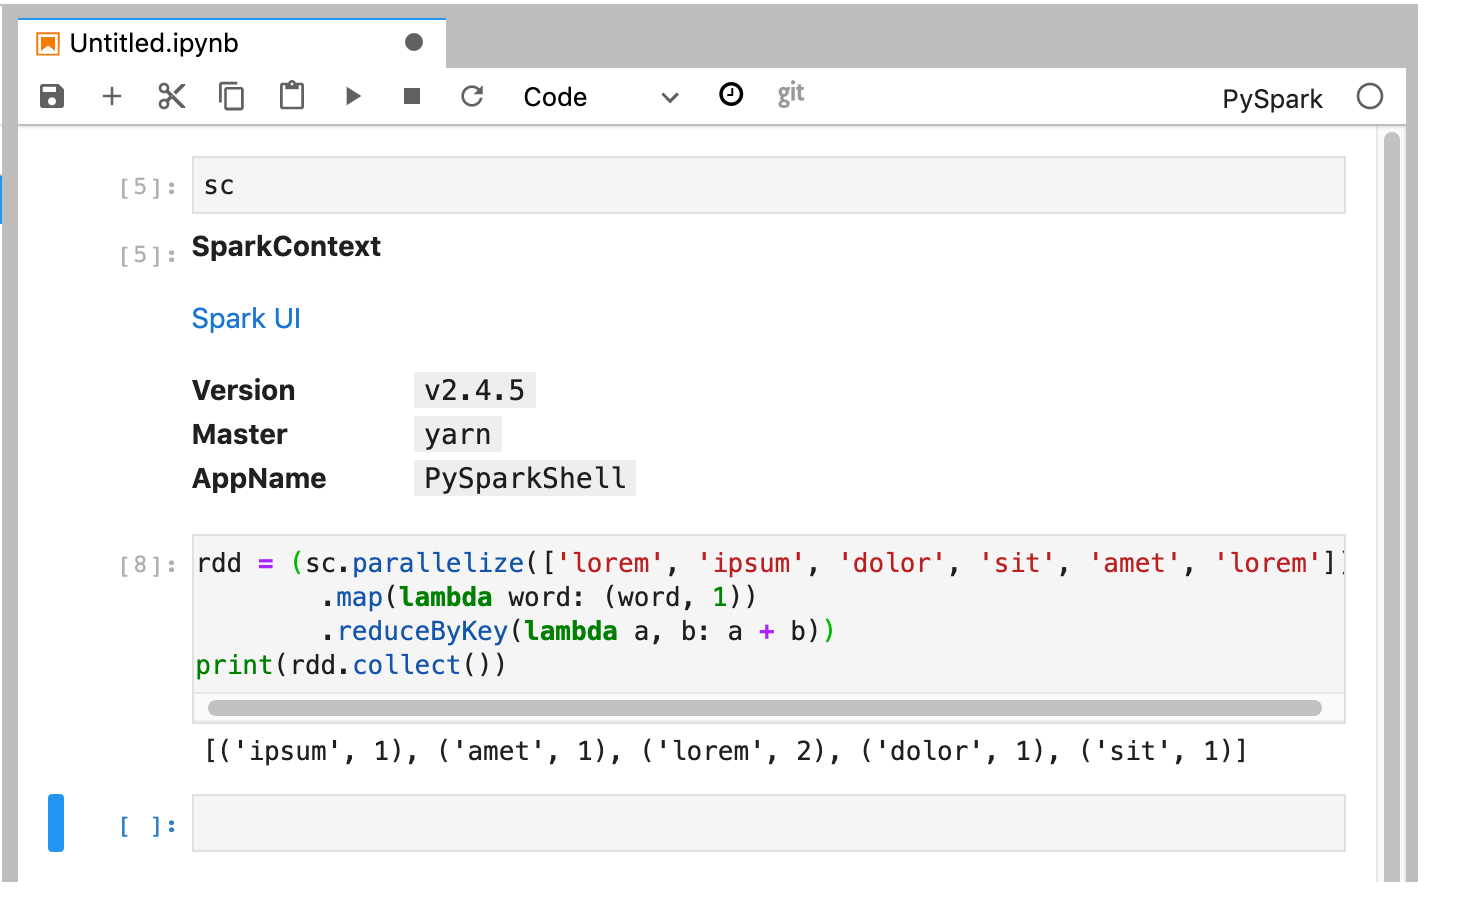
Name and save the notebook. The notebook is saved and remains in Cloud Storage after the Dataproc cluster is deleted.
Shut down the Dataproc cluster
From the JupyterLab interface, select File→Hub Control Panel to open the Jupyterhub page.
Click Stop My Cluster to shut down (delete) the JupyterLab server, which deletes the Dataproc cluster.
What's next
- Explore Spark and Jupyter Notebooks on Dataproc on GitHub.