ジョブの送信

既存の Dataproc クラスタにジョブを送信するには、いくつかの方法があります。たとえば、Dataproc API の jobs.submit を HTTP リクエストまたはプログラム リクエストで使用します。また、ローカル ターミナル ウィンドウまたは Cloud Shell で Google Cloud CLI の gcloud コマンドライン ツールを使用することも、ローカル ブラウザで Google Cloud Console を開いて送信することもできます。また、クラスタ内のマスター インスタンスに SSH で接続し、Dataproc サービスを使用せずにインスタンスから直接ジョブを実行することも可能です。

ジョブの送信方法

Console

ブラウザの Google Cloud コンソールで Dataproc の [ジョブを送信] ページを開きます。

Spark ジョブの例

サンプルの Spark ジョブを送信するには、[ジョブを送信] ページで次のようにフィールドに値を入力します。

  1. クラスタリストから [クラスタ] 名を選択します。
  2. [ジョブタイプ] を Spark に設定します。
  3. [メインクラスまたは JAR] を org.apache.spark.examples.SparkPi に設定します。
  4. [引数] を唯一の引数 1000 に設定します。
  5. file:///usr/lib/spark/examples/jars/spark-examples.jar を [JAR ファイル] に追加します。
    1. file:/// は、Hadoop LocalFileSystem スキームを表します。クラスタの作成時に、Dataproc により /usr/lib/spark/examples/jars/spark-examples.jar がクラスタのマスターノードにインストールされています。
    2. あるいは、いずれかの jar の Cloud Storage パス(gs://your-bucket/your-jarfile.jar)または Hadoop 分散ファイル システムのパス(hdfs://path-to-jar.jar)を指定することもできます。

[送信] をクリックしてジョブを開始します。ジョブが開始されると、ジョブのリストにジョブが追加されます。

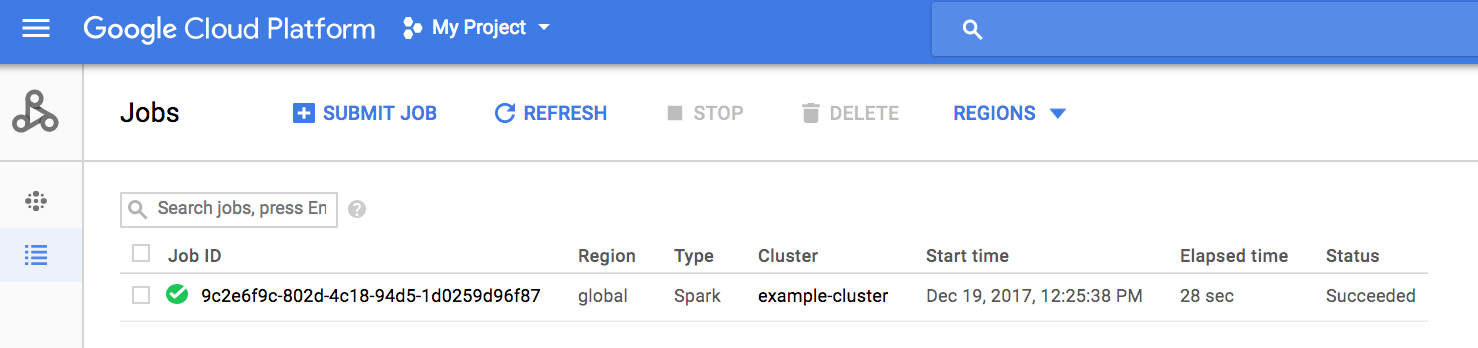
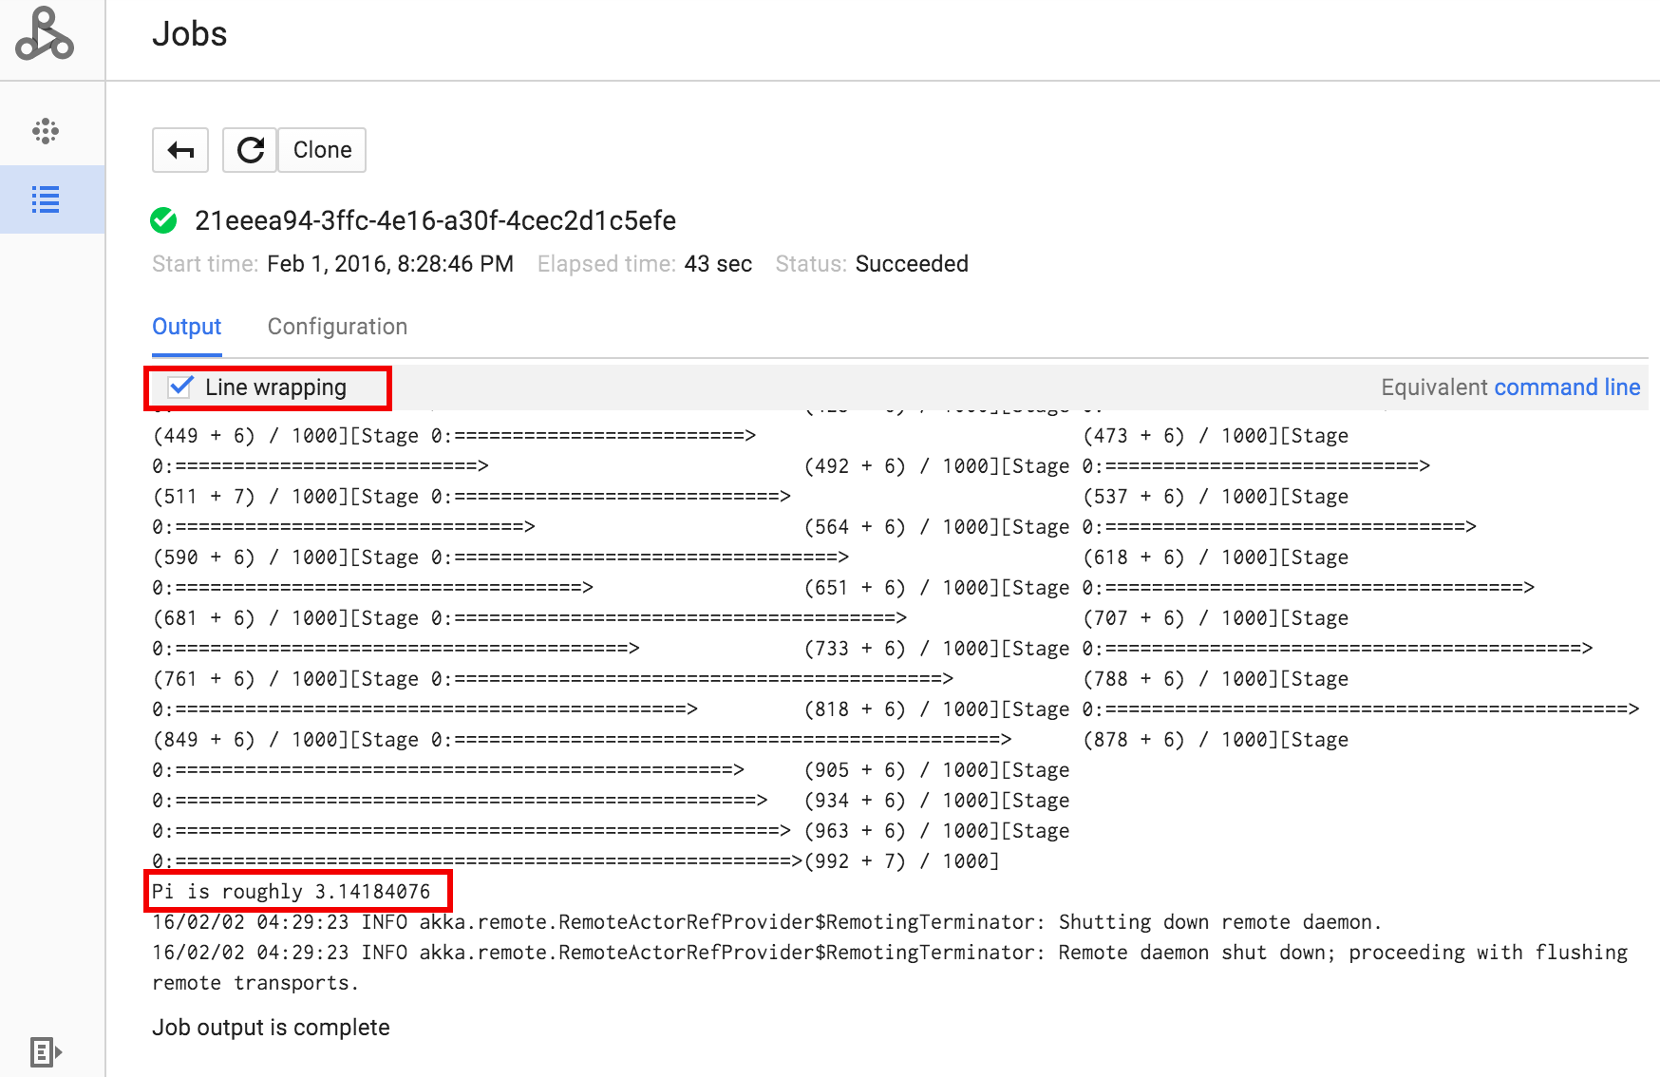
ジョブ ID をクリックして [ジョブ] ページを開くと、ジョブのドライバ出力が表示されます。このジョブはブラウザのウィンドウ幅を超える長い出力行を生成するため、pi の計算結果を表示するには [行の折り返し] チェックボックスをオンにして、すべての出力テキストがウィンドウ内に表示されるようにします。

コマンドラインからジョブのドライバ出力を表示するには、次のように gcloud dataproc jobs wait コマンドを使用します(詳細については、ジョブ出力を表示する - GCLOUD COMMAND をご覧ください)。プロジェクト ID をコピーして、--project フラグの値として貼り付け、ジョブ ID([ジョブ] リストに表示されています)をコピーして、最後の引数として貼り付けます。

gcloud dataproc jobs wait job-id \
    --project=project-id \
    --region=region

次に、上の手順で送信したサンプルの SparkPi ジョブのドライバ出力のスニペットを示します。

...
2015-06-25 23:27:23,810 INFO [dag-scheduler-event-loop]
scheduler.DAGScheduler (Logging.scala:logInfo(59)) - Stage 0 (reduce at
SparkPi.scala:35) finished in 21.169 s

2015-06-25 23:27:23,810 INFO [task-result-getter-3] cluster.YarnScheduler
(Logging.scala:logInfo(59)) - Removed TaskSet 0.0, whose tasks have all
completed, from pool

2015-06-25 23:27:23,819 INFO [main] scheduler.DAGScheduler
(Logging.scala:logInfo(59)) - Job 0 finished: reduce at SparkPi.scala:35,
took 21.674931 s

Pi is roughly 3.14189648
...
Job [c556b47a-4b46-4a94-9ba2-2dcee31167b2] finished successfully.

driverOutputUri:
gs://sample-staging-bucket/google-cloud-dataproc-metainfo/cfeaa033-749e-48b9-...
...

gcloud

Dataproc クラスタにジョブを送信するには、ターミナル ウィンドウまたは Cloud Shell で gcloud CLI の gcloud dataproc jobs submit コマンドをローカルに実行します。

gcloud dataproc jobs submit job-command \
    --cluster=cluster-name \
    --region=region \
    other dataproc-flags \
    -- job-args
PySpark ジョブ送信の例
  1. Cloud Storage にある一般公開されている hello-world.py を一覧表示します。
    gsutil cat gs://dataproc-examples/pyspark/hello-world/hello-world.py
    
    ファイルの一覧表示:

    #!/usr/bin/python
    import pyspark
    sc = pyspark.SparkContext()
    rdd = sc.parallelize(['Hello,', 'world!'])
    words = sorted(rdd.collect())
    print(words)
    
  2. Pyspark ジョブを Dataproc に送信します。
    gcloud dataproc jobs submit pyspark \
        gs://dataproc-examples/pyspark/hello-world/hello-world.py \
        --cluster=cluster-name  \
        --region=region
    
    ターミナル出力:
    Waiting for job output...
    …
    ['Hello,', 'world!']
    Job finished successfully.
    
Spark ジョブ送信の例
  1. Dataproc クラスタ上のマスターノードにプリインストールされている SparkPi サンプルを実行します。
    gcloud dataproc jobs submit spark \
        --cluster=cluster-name \
        --region=region \
        --class=org.apache.spark.examples.SparkPi \
        --jars=file:///usr/lib/spark/examples/jars/spark-examples.jar \
        -- 1000
    
    ターミナル出力:
    Job [54825071-ae28-4c5b-85a5-58fae6a597d6] submitted.
    Waiting for job output…
    …
    Pi is roughly 3.14177148
    …
    Job finished successfully.
    …
    

REST

このセクションでは、Dataproc の jobs.submit API を使用して pi の近似値を計算する Spark ジョブを送信する方法を説明します。

リクエストのデータを使用する前に、次のように置き換えます。

HTTP メソッドと URL:

POST https://dataproc.googleapis.com/v1/projects/project-id/regions/region/jobs:submit

リクエストの本文(JSON):

{
  "job": {
    "placement": {
      "clusterName": "cluster-name"
    },
    },
    "sparkJob": {
      "args": [
        "1000"
      ],
      "mainClass": "org.apache.spark.examples.SparkPi",
      "jarFileUris": [
        "file:///usr/lib/spark/examples/jars/spark-examples.jar"
      ]
    }
  }
}

リクエストを送信するには、次のいずれかのオプションを展開します。

次のような JSON レスポンスが返されます。

{
  "reference": {
    "projectId": "project-id",
    "jobId": "job-id"
  },
  "placement": {
    "clusterName": "cluster-name",
    "clusterUuid": "cluster-Uuid"
  },
  "sparkJob": {
    "mainClass": "org.apache.spark.examples.SparkPi",
    "args": [
      "1000"
    ],
    "jarFileUris": [
      "file:///usr/lib/spark/examples/jars/spark-examples.jar"
    ]
  },
  "status": {
    "state": "PENDING",
    "stateStartTime": "2020-10-07T20:16:21.759Z"
  },
  "jobUuid": "job-Uuid"
}

Java

  1. クライアント ライブラリのインストール
  2. アプリケーションのデフォルト認証情報を設定します。
  3. コードを実行します。
    
    import com.google.api.gax.longrunning.OperationFuture;
    import com.google.cloud.dataproc.v1.Job;
    import com.google.cloud.dataproc.v1.JobControllerClient;
    import com.google.cloud.dataproc.v1.JobControllerSettings;
    import com.google.cloud.dataproc.v1.JobMetadata;
    import com.google.cloud.dataproc.v1.JobPlacement;
    import com.google.cloud.dataproc.v1.SparkJob;
    import com.google.cloud.storage.Blob;
    import com.google.cloud.storage.Storage;
    import com.google.cloud.storage.StorageOptions;
    import java.io.IOException;
    import java.util.concurrent.ExecutionException;
    import java.util.regex.Matcher;
    import java.util.regex.Pattern;
    
    public class SubmitJob {
    
      public static void submitJob() throws IOException, InterruptedException {
        // TODO(developer): Replace these variables before running the sample.
        String projectId = "your-project-id";
        String region = "your-project-region";
        String clusterName = "your-cluster-name";
        submitJob(projectId, region, clusterName);
      }
    
      public static void submitJob(String projectId, String region, String clusterName)
          throws IOException, InterruptedException {
        String myEndpoint = String.format("%s-dataproc.googleapis.com:443", region);
    
        // Configure the settings for the job controller client.
        JobControllerSettings jobControllerSettings =
            JobControllerSettings.newBuilder().setEndpoint(myEndpoint).build();
    
        // Create a job controller client with the configured settings. Using a try-with-resources
        // closes the client,
        // but this can also be done manually with the .close() method.
        try (JobControllerClient jobControllerClient =
            JobControllerClient.create(jobControllerSettings)) {
    
          // Configure cluster placement for the job.
          JobPlacement jobPlacement = JobPlacement.newBuilder().setClusterName(clusterName).build();
    
          // Configure Spark job settings.
          SparkJob sparkJob =
              SparkJob.newBuilder()
                  .setMainClass("org.apache.spark.examples.SparkPi")
                  .addJarFileUris("file:///usr/lib/spark/examples/jars/spark-examples.jar")
                  .addArgs("1000")
                  .build();
    
          Job job = Job.newBuilder().setPlacement(jobPlacement).setSparkJob(sparkJob).build();
    
          // Submit an asynchronous request to execute the job.
          OperationFuture<Job, JobMetadata> submitJobAsOperationAsyncRequest =
              jobControllerClient.submitJobAsOperationAsync(projectId, region, job);
    
          Job response = submitJobAsOperationAsyncRequest.get();
    
          // Print output from Google Cloud Storage.
          Matcher matches =
              Pattern.compile("gs://(.*?)/(.*)").matcher(response.getDriverOutputResourceUri());
          matches.matches();
    
          Storage storage = StorageOptions.getDefaultInstance().getService();
          Blob blob = storage.get(matches.group(1), String.format("%s.000000000", matches.group(2)));
    
          System.out.println(
              String.format("Job finished successfully: %s", new String(blob.getContent())));
    
        } catch (ExecutionException e) {
          // If the job does not complete successfully, print the error message.
          System.err.println(String.format("submitJob: %s ", e.getMessage()));
        }
      }
    }

Python

  1. クライアント ライブラリのインストール
  2. アプリケーションのデフォルト認証情報を設定します。
  3. コードを実行します。
    import re
    
    from google.cloud import dataproc_v1 as dataproc
    from google.cloud import storage
    
    def submit_job(project_id, region, cluster_name):
        # Create the job client.
        job_client = dataproc.JobControllerClient(
            client_options={"api_endpoint": f"{region}-dataproc.googleapis.com:443"}
        )
    
        # Create the job config. 'main_jar_file_uri' can also be a
        # Google Cloud Storage URL.
        job = {
            "placement": {"cluster_name": cluster_name},
            "spark_job": {
                "main_class": "org.apache.spark.examples.SparkPi",
                "jar_file_uris": ["file:///usr/lib/spark/examples/jars/spark-examples.jar"],
                "args": ["1000"],
            },
        }
    
        operation = job_client.submit_job_as_operation(
            request={"project_id": project_id, "region": region, "job": job}
        )
        response = operation.result()
    
        # Dataproc job output gets saved to the Google Cloud Storage bucket
        # allocated to the job. Use a regex to obtain the bucket and blob info.
        matches = re.match("gs://(.*?)/(.*)", response.driver_output_resource_uri)
    
        output = (
            storage.Client()
            .get_bucket(matches.group(1))
            .blob(f"{matches.group(2)}.000000000")
            .download_as_bytes()
            .decode("utf-8")
        )
    
        print(f"Job finished successfully: {output}")


Go

  1. クライアント ライブラリのインストール
  2. アプリケーションのデフォルト認証情報を設定します。
  3. コードを実行します。
    import (
    	"context"
    	"fmt"
    	"io"
    	"io/ioutil"
    	"log"
    	"regexp"
    
    	dataproc "cloud.google.com/go/dataproc/apiv1"
    	"cloud.google.com/go/dataproc/apiv1/dataprocpb"
    	"cloud.google.com/go/storage"
    	"google.golang.org/api/option"
    )
    
    func submitJob(w io.Writer, projectID, region, clusterName string) error {
    	// projectID := "your-project-id"
    	// region := "us-central1"
    	// clusterName := "your-cluster"
    	ctx := context.Background()
    
    	// Create the job client.
    	endpoint := fmt.Sprintf("%s-dataproc.googleapis.com:443", region)
    	jobClient, err := dataproc.NewJobControllerClient(ctx, option.WithEndpoint(endpoint))
    	if err != nil {
    		log.Fatalf("error creating the job client: %s\n", err)
    	}
    
    	// Create the job config.
    	submitJobReq := &dataprocpb.SubmitJobRequest{
    		ProjectId: projectID,
    		Region:    region,
    		Job: &dataprocpb.Job{
    			Placement: &dataprocpb.JobPlacement{
    				ClusterName: clusterName,
    			},
    			TypeJob: &dataprocpb.Job_SparkJob{
    				SparkJob: &dataprocpb.SparkJob{
    					Driver: &dataprocpb.SparkJob_MainClass{
    						MainClass: "org.apache.spark.examples.SparkPi",
    					},
    					JarFileUris: []string{"file:///usr/lib/spark/examples/jars/spark-examples.jar"},
    					Args:        []string{"1000"},
    				},
    			},
    		},
    	}
    
    	submitJobOp, err := jobClient.SubmitJobAsOperation(ctx, submitJobReq)
    	if err != nil {
    		return fmt.Errorf("error with request to submitting job: %w", err)
    	}
    
    	submitJobResp, err := submitJobOp.Wait(ctx)
    	if err != nil {
    		return fmt.Errorf("error submitting job: %w", err)
    	}
    
    	re := regexp.MustCompile("gs://(.+?)/(.+)")
    	matches := re.FindStringSubmatch(submitJobResp.DriverOutputResourceUri)
    
    	if len(matches) < 3 {
    		return fmt.Errorf("regex error: %s", submitJobResp.DriverOutputResourceUri)
    	}
    
    	// Dataproc job output gets saved to a GCS bucket allocated to it.
    	storageClient, err := storage.NewClient(ctx)
    	if err != nil {
    		return fmt.Errorf("error creating storage client: %w", err)
    	}
    
    	obj := fmt.Sprintf("%s.000000000", matches[2])
    	reader, err := storageClient.Bucket(matches[1]).Object(obj).NewReader(ctx)
    	if err != nil {
    		return fmt.Errorf("error reading job output: %w", err)
    	}
    
    	defer reader.Close()
    
    	body, err := ioutil.ReadAll(reader)
    	if err != nil {
    		return fmt.Errorf("could not read output from Dataproc Job: %w", err)
    	}
    
    	fmt.Fprintf(w, "Job finished successfully: %s", body)
    
    	return nil
    }
    

Node.js

  1. クライアント ライブラリのインストール
  2. アプリケーションのデフォルト認証情報を設定します。
  3. コードを実行します。
    const dataproc = require('@google-cloud/dataproc');
    const {Storage} = require('@google-cloud/storage');
    
    // TODO(developer): Uncomment and set the following variables
    // projectId = 'YOUR_PROJECT_ID'
    // region = 'YOUR_CLUSTER_REGION'
    // clusterName = 'YOUR_CLUSTER_NAME'
    
    // Create a client with the endpoint set to the desired cluster region
    const jobClient = new dataproc.v1.JobControllerClient({
      apiEndpoint: `${region}-dataproc.googleapis.com`,
      projectId: projectId,
    });
    
    async function submitJob() {
      const job = {
        projectId: projectId,
        region: region,
        job: {
          placement: {
            clusterName: clusterName,
          },
          sparkJob: {
            mainClass: 'org.apache.spark.examples.SparkPi',
            jarFileUris: [
              'file:///usr/lib/spark/examples/jars/spark-examples.jar',
            ],
            args: ['1000'],
          },
        },
      };
    
      const [jobOperation] = await jobClient.submitJobAsOperation(job);
      const [jobResponse] = await jobOperation.promise();
    
      const matches =
        jobResponse.driverOutputResourceUri.match('gs://(.*?)/(.*)');
    
      const storage = new Storage();
    
      const output = await storage
        .bucket(matches[1])
        .file(`${matches[2]}.000000000`)
        .download();
    
      // Output a success message.
      console.log(`Job finished successfully: ${output}`);

クラスタに直接ジョブを送信する

Dataproc サービスを使用せずにクラスタで直接ジョブを実行する場合は、クラスタのマスターノードに SSH で接続し、マスターノードでジョブを実行します。

VM マスター インスタンスへの SSH 接続を確立した後、クラスタのマスターノード上のターミナル ウィンドウで次のコマンドを実行します。

  1. Spark シェルを開きます。
  2. 一般公開されている Cloud Storage ファイルにある Python で記述された(7 行の)「hello-world」ファイルの行数をカウントする簡単な Spark ジョブを実行します。
  3. shell を終了します。

    user@cluster-name-m:~$ spark-shell
    ...
    scala> sc.textFile("gs://dataproc-examples"
    + "/pyspark/hello-world/hello-world.py").count
    ...
    res0: Long = 7
    scala> :quit
    

Dataproc で bash ジョブを実行する

使用するエンジンが最上位の Dataproc ジョブタイプとしてサポートされていないか、スクリプトから hadoopspark-submit を使用するジョブの起動前に追加の調整や引数の計算が必要な場合は、bash スクリプトを Dataproc ジョブとして実行できます。

Pig の例

次のように hello.sh という bash スクリプトを Cloud Storage にコピーしたとします。

gsutil cp hello.sh gs://${BUCKET}/hello.sh

pig fs コマンドは Hadoop パスを使用するため、Cloud Storage から file:/// として指定された宛先にスクリプトをコピーし、HDFS ではなくローカル ファイル システムに配置します。後続の sh コマンドでは、ローカル ファイル システムが自動的に参照され、接頭辞の file:/// は必要ありません。

gcloud dataproc jobs submit pig --cluster=${CLUSTER} --region=${REGION} \
    -e='fs -cp -f gs://${BUCKET}/hello.sh file:///tmp/hello.sh; sh chmod 750 /tmp/hello.sh; sh /tmp/hello.sh'

あるいは、--jars 引数を送信する Dataproc ジョブにより、ジョブの存続期間用に作成された一時ディレクトリにファイルがステージングされるため、Cloud Storage シェル スクリプトを --jars 引数として指定できます。

gcloud dataproc jobs submit pig --cluster=${CLUSTER} --region=${REGION} \
    --jars=gs://${BUCKET}/hello.sh \
    -e='sh chmod 750 ${PWD}/hello.sh; sh ${PWD}/hello.sh'

なお、--jars 引数はローカルのスクリプトを参照できます。

gcloud dataproc jobs submit pig --cluster=${CLUSTER} --region=${REGION} \
    --jars=hello.sh \
    -e='sh chmod 750 ${PWD}/hello.sh; sh ${PWD}/hello.sh'