Cloud Memorystore: Now with Redis version 4.0 support and manual failover API
Gopal Ashok
Product Manager, Memorystore
After announcing the general availability of Cloud Memorystore for Redis last year, we have seen tremendous growth across various industries, especially in gaming and retail. Cloud Memorystore for Redis lets Google Cloud Platform (GCP) customers use a fully managed, in-memory data store service. Cloud Memorystore automates all administrative tasks to manage your Redis instances, including provisioning, scaling, and monitoring, so you can focus on building apps with low latency and high availability.
We are excited to announce Cloud Memorystore support for Redis version 4.0 (in beta) and a new manual failover API here at RedisConf 2019.
You can see here how to access the new version:
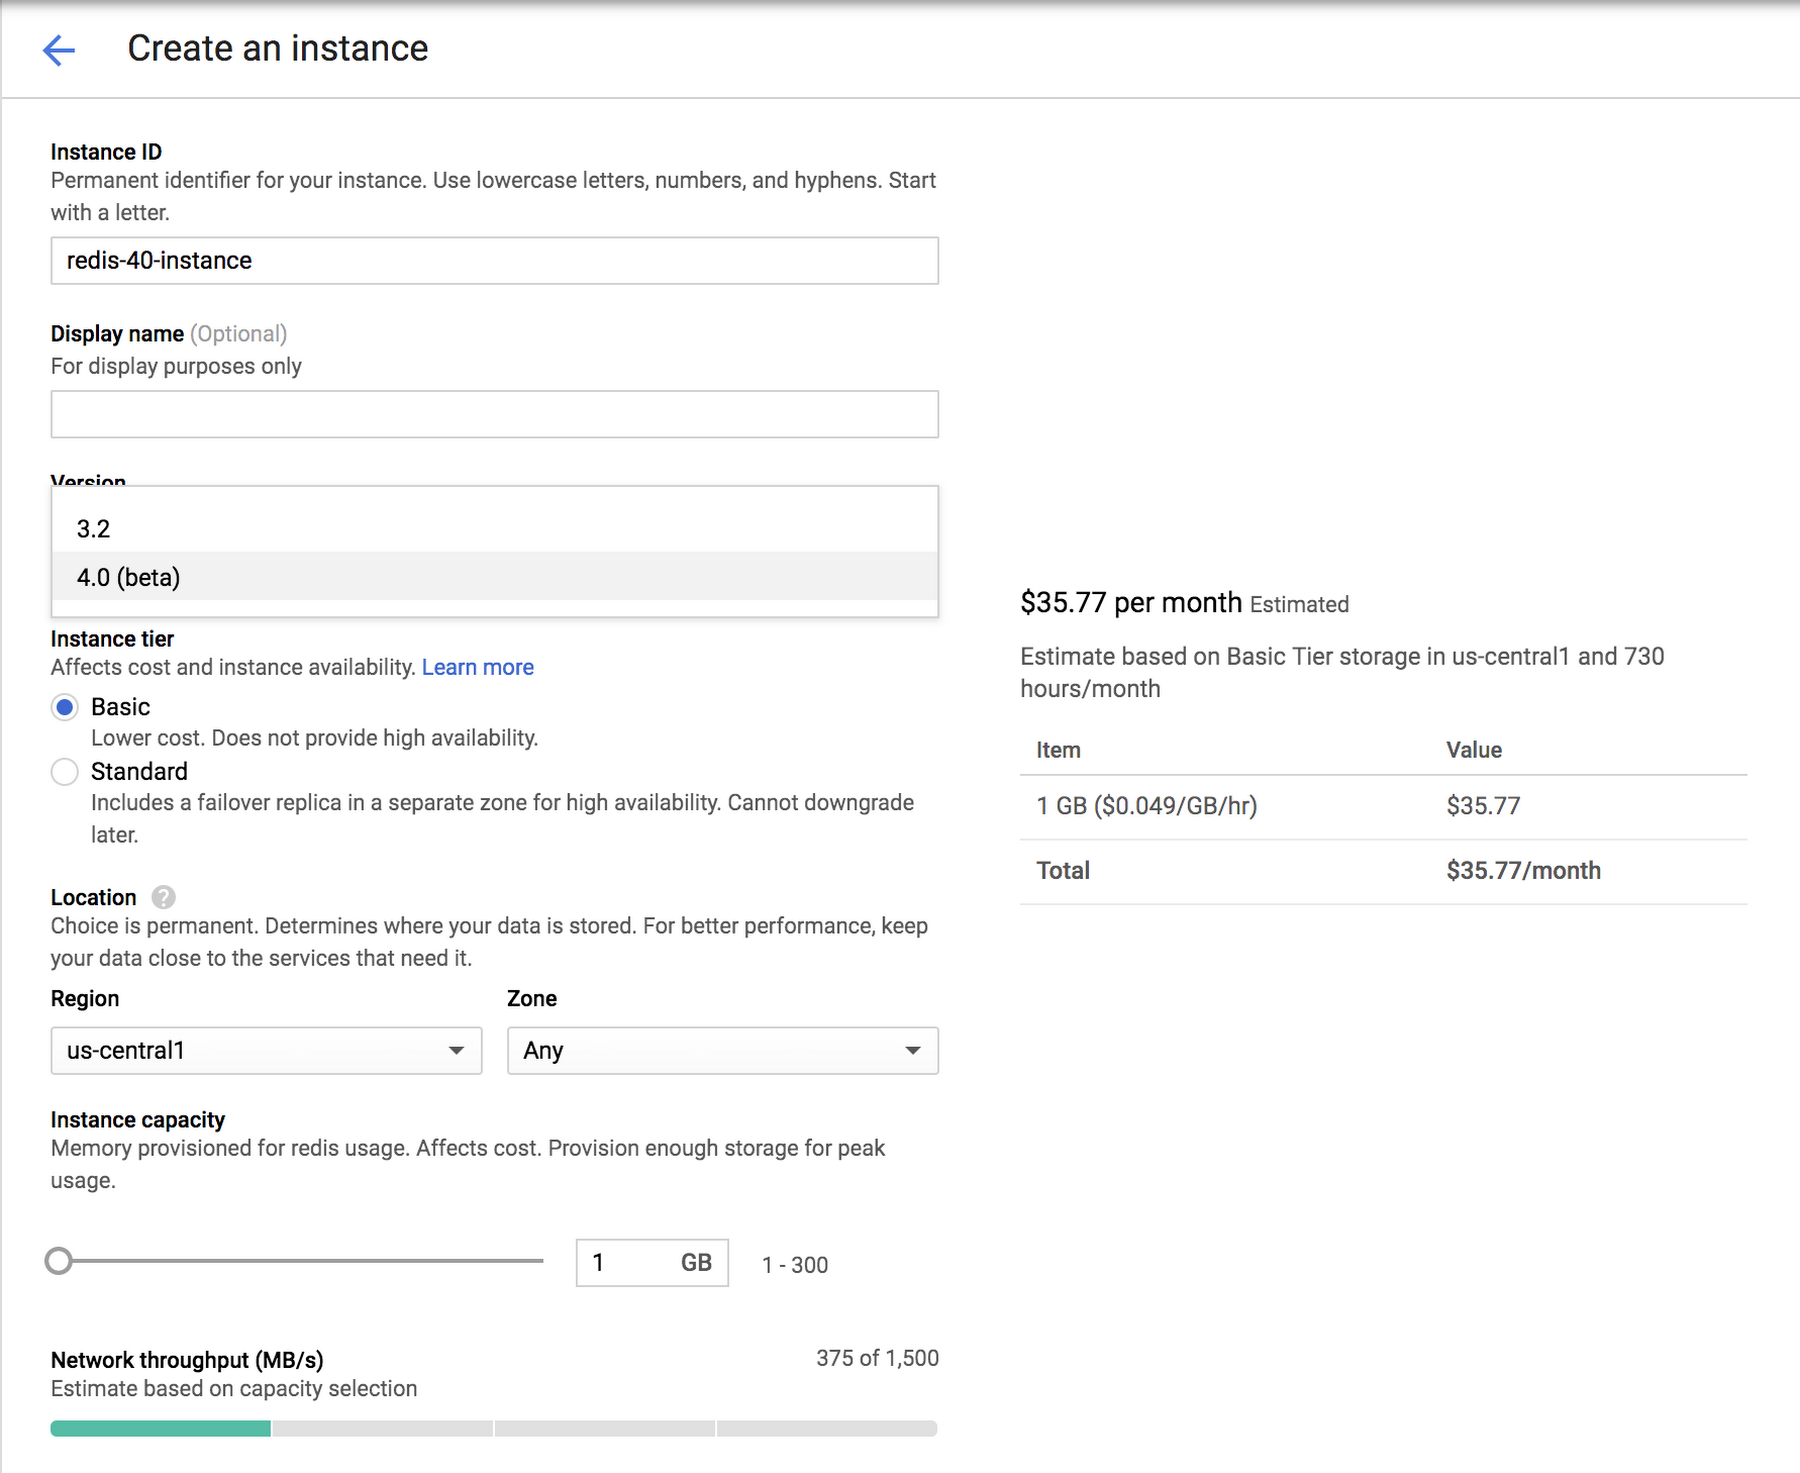
What’s new with Redis 4.0
Key features added in Redis version 4.0 include:
- Caching improvement. Redis introduced a least frequently used (LFU) algorithm, which can provide a more accurate estimation of caching usage than least recently used (LRU) caching.
- Active memory defragmentation. Redis can now defragment memory while online. This helps with actively reclaiming unused memory, which prevents unnecessary crashes.
We’ve also added a manual failover API to Cloud Memorystore so you can test its failover behavior. Before deploying applications in production using Cloud Memorystore, it’s important to test the behavior of the client and the application when a failover happens. With the new API, it’s easy to trigger a failover and observe the application behavior so you can plan accordingly for backup and restore purposes.
We exposed Redis metrics to Stackdriver in the previous release, so that you can easily debug Redis issues in your application. To make it easier to debug client-side issues, we’ve partnered with OpenCensus to automatically collect traces and metrics from your app. The traces and metrics are available in a variety of back-end monitoring tools, including Stackdriver, so you can get an even more detailed picture of Redis performance. You can learn more about Cloud Memorystore and OpenCensus in this video:

Learn more about Cloud Memorystore for Redis here and see various deployment scenarios for running Cloud Memorystore on GCP here.