| title | description | author | tags | date_published |
|---|---|---|---|---|
Create Data Catalog tags by inspecting BigQuery data with Cloud Data Loss Prevention |
Learn how to inspect BigQuery data using Cloud Data Loss Prevention and automatically create Data Catalog tags for sensitive elements with results from inspection scans. |
imadethis,mesmacosta |
database, Cloud DLP, Java, PII |
2020-04-27 |
Marcelo Costa and Scott Ellis | Google
Contributed by Google employees.
Cloud Data Loss Prevention (Cloud DLP) can help you to discover, inspect, and classify sensitive elements in your data. The results of these inspections can be valuable as tags in Data Catalog. This tutorial shows how to inspect BigQuery data using the Cloud Data Loss Prevention API and then use the Data Catalog API to create tags at the column level with the sensitive elements found.
This tutorial includes instructions to create a Cloud DLP inspection template to define what data elements to inspect for, the JDBC driver used to connect to BigQuery, and the number of worker threads used to parallelize the work. Such an implementation, connecting to the data source with JDBC, allows for changing the data source to alternatives like MySQL, SQL Server, or PostgreSQL. You can also customize or adjust this script to change the tag fields to better fit your use case.
For a related solution that uses Dataflow to inspect data on a larger scale, see Create Data Catalog tags on a large scale by inspecting BigQuery data with Cloud DLP using Dataflow.
- Enable Cloud Data Loss Prevention, BigQuery, and Cloud Data Catalog APIs.
- Create a Cloud DLP inspection template.
- Create an automated process that uses Cloud DLP findings to label and tag BigQuery table columns.
- Use these labels and tags in your code.
- Use Cloud Data Catalog to quickly understand where sensitive data exists in your BigQuery table columns.
This tutorial uses billable components of Google Cloud, including the following:
- BigQuery
- Cloud Data Loss Prevention
- Data Catalog
Use the pricing calculator to generate a cost estimate based on your projected usage.
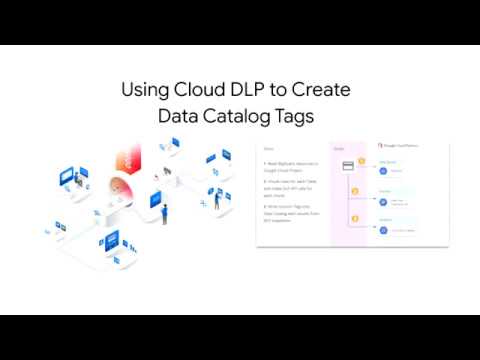
The following diagram shows the architecture of the solution:

You can also watch a video demonstration of running the script:
-
Select or create a Google Cloud project.
-
Make sure that billing is enabled for your project.
-
Enable the Data Catalog, BigQuery, and Cloud Data Loss Prevention APIs.
You can use the open source script BigQuery Fake PII Creator to create BigQuery tables with example personally identifiable information (PII).
Create the inspection template in Cloud DLP:
-
Go to the Cloud DLP Create template page.
-
Set up the infoTypes. This is an example. You may choose any from the list available:
-
Finish creating the inspection template:


The script code is available from this GitHub repository.
Run the following commands to download the latest Simba BigQuery driver, extract it, install it with Maven, and delete the
temporary lib files:
curl -o SimbaJDBCDriverforGoogleBigQuery.zip https://storage.googleapis.com/simba-bq-release/jdbc/SimbaJDBCDriverforGoogleBigQuery42_1.2.2.1004.zip && \
unzip -qu SimbaJDBCDriverforGoogleBigQuery.zip -d lib && \
mvn install:install-file  \
-Dfile=lib/GoogleBigQueryJDBC42.jar \
-DgroupId=com.simba \
-DartifactId=simba-jdbc \
-Dversion=1.0 \
-Dpackaging=jar \
-DgeneratePom=true && \
rm -rf lib
If you want to connect to other databases, you may adapt the script to use different JDBC drivers.
Create a service account with the following:
- BigQuery Admin
- Data Catalog Admin
- DLP Administrator
export GOOGLE_APPLICATION_CREDENTIALS="[PATH_TO_YOUR_CREDENTIALS].json"
If you run this on Compute Engine, you can also use the virtual machine's default service account, but you need to assign the permissions listed above.
| Parameter | Description |
|---|---|
dbType |
The database type. "bigquery" is currently the only type supported. |
dbName |
The name of the dataset that you want to scan. This parameter is optional for BigQuery; if you don't use it, or if you leave it blank, then all datasets in the project are scanned. |
tableName |
The name of the table that you want to scan. This parameter is optional for BigQuery; if you don't use it, or if you leave it blank, then all tables are scanned. |
threadPoolSize |
Number of worker threads. This code uses 1 thread per table, regardless of this setting. If you are scanning multiple tables, increasing this number means that more than one table can be processed in parallel. |
limitMax |
Maximum number of rows to scan per table. |
minThreshold |
Minimum number of findings per infoType in a given column before it will be tagged. For example, if this is set at 10 and only 9 items are found, the column won't be tagged. |
inspectTemplate |
Cloud DLP inspection template to use. |
projectId |
Your Cloud project ID. |
mvn clean package -DskipTests
java -cp target/dlp-to-datacatalog-tags-0.1-jar-with-dependencies.jar com.example.dlp.DlpDataCatalogTagsTutorial \
-dbType "bigquery" \
-limitMax 1000 \
-dbName research2 \
-projectId my-project \
-threadPoolSize 5 \
-inspectTemplate "projects/my-project/inspectTemplates/inspect_template_dlp_demo" \
-minThreshold 100
After the script finishes, you can go to Data Catalog and search for sensitive data:

By clicking each table, you can see which columns were marked as sensitive:

The easiest way to avoid incurring charges to your Google Cloud account for the resources used in this tutorial is to delete the project you created.
To delete the project, follow the steps below:
-
In the Cloud Console, go to the Projects page.
-
In the project list, select the project that you want to delete and click Delete project.
-
In the dialog, type the project ID, and then click Shut down to delete the project.

- Learn about Cloud Data Loss Prevention.
- Learn about Data Catalog.
- For a related solution that uses Dataflow to inspect data on a larger scale, see Create Data Catalog tags on a large scale by inspecting BigQuery data with Cloud DLP using Dataflow.
- Try out other Google Cloud features. Have a look at our tutorials.