| title | description | author | tags | date_published |
|---|---|---|---|---|
Automated static website publishing with Cloud Build |
Learn how to automate publishing your static website to Cloud Storage with Cloud Build. |
ahmetb |
Cloud Build, Hosting, Cloud Storage |
2017-03-13 |
Ahmet Alp Balkan | Developer Advocate | Google
Contributed by Google employees.
This tutorial shows how to automate publishing a static HTML website using a custom domain name to Cloud Storage using Cloud Build.
- Automatically publish changes to your static website from the source control repository.
- Make sure you have a custom domain name (e.g., example.com).
- Make sure the source code for your static website is hosted in a GitHub or BitBucket repository.
- Make sure you verified ownership of your domain on
Google Webmaster Central. Do not include
http://orhttps://in the URL for the purposes of this tutorial. - Make sure you have a project in the Cloud Console to host your website.
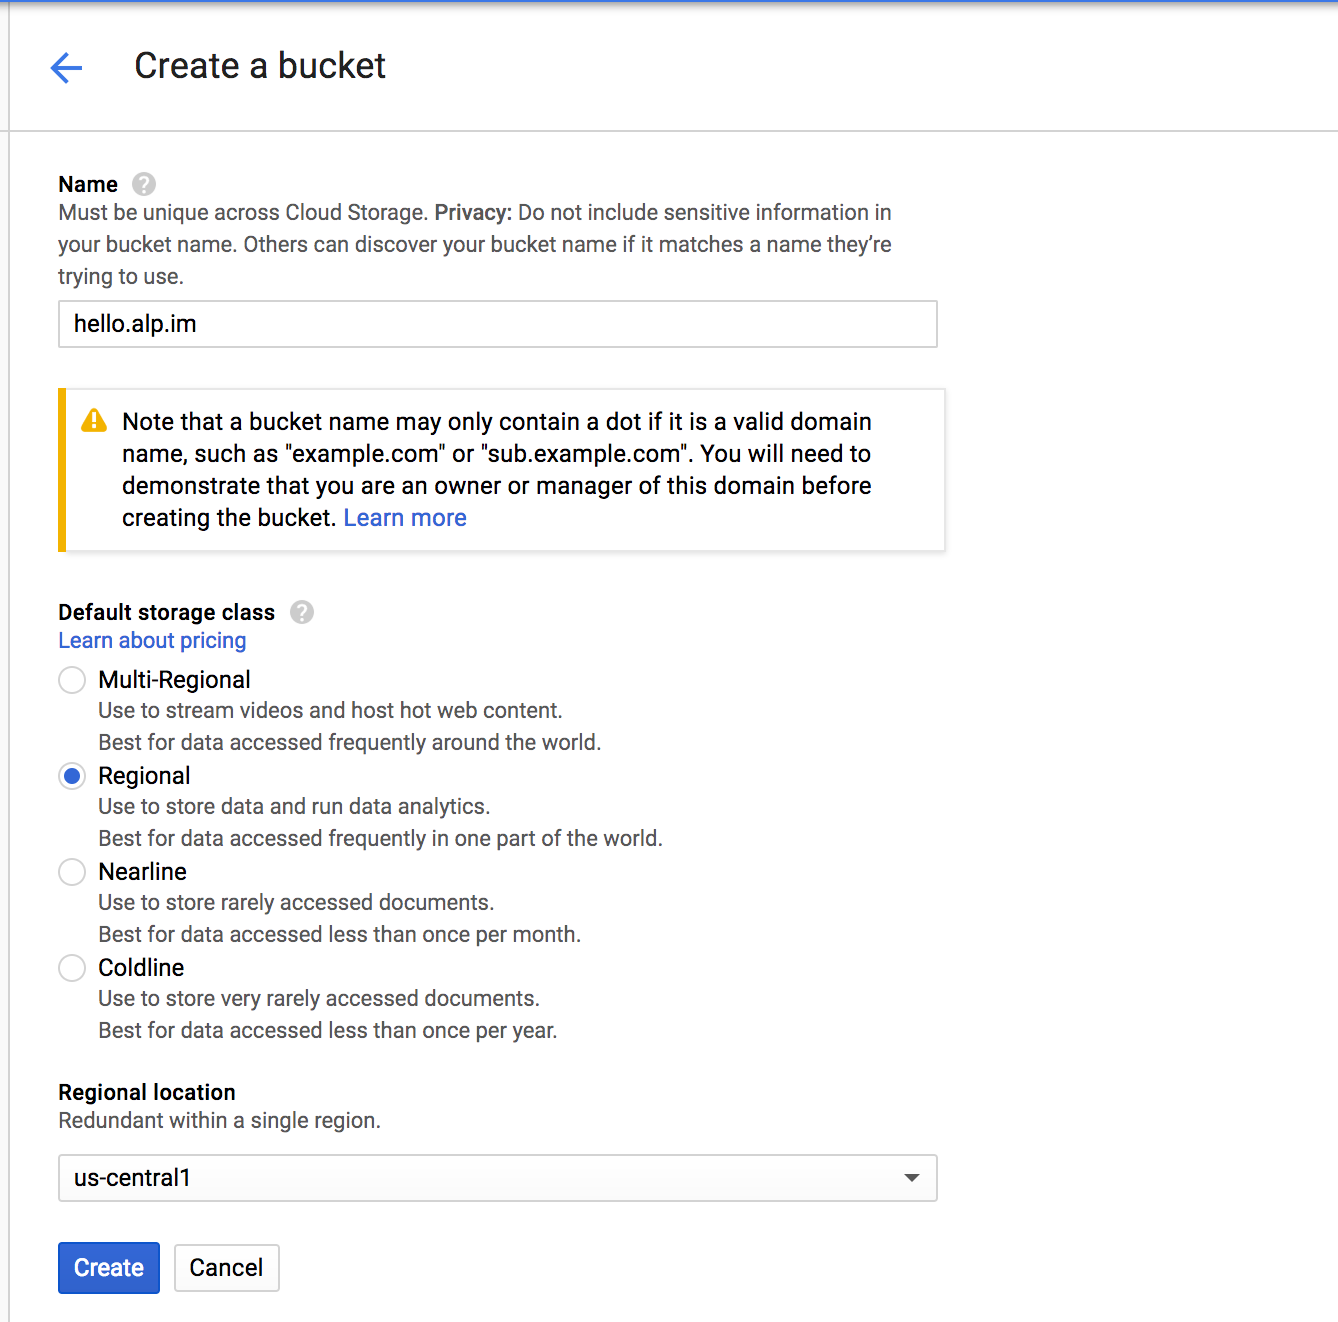
By uploading your website contents as files to Cloud Storage, you can
host your static website on buckets. First, you need to create a
bucket. Head to the Storage section of the Cloud Console and type
in your domain name (e.g., www.example.com) and create the bucket:
After the bucket is created, you need to make it readable by everyone. Go to the Storage Browser on the Cloud Console, click the menu icon to the right of the bucket, and select Edit Object Default Permissions:
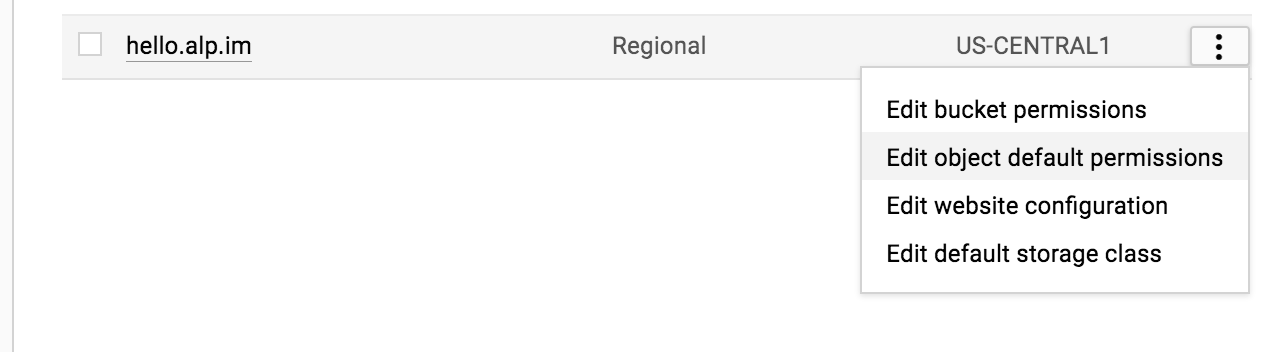
Then add the user allUsers with the Reader role and click Save:

Now, you need to configure the storage bucket to serve a static website. Click the Edit Website Configuration button on the list of buckets:
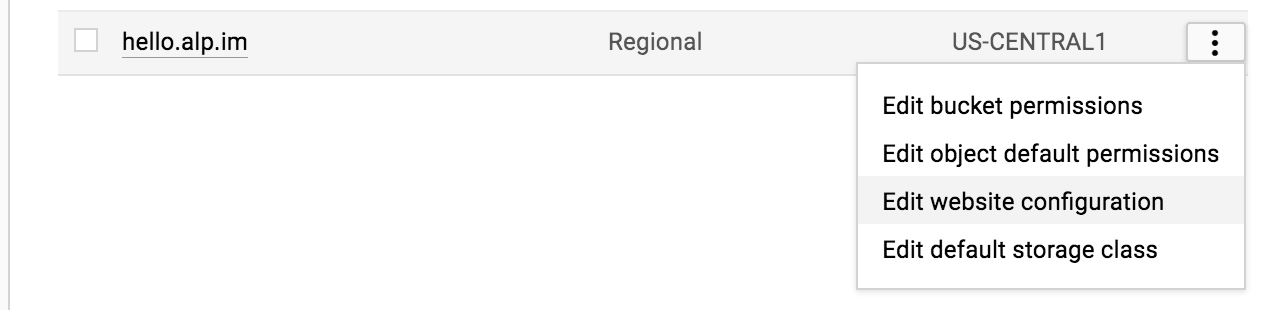
Specify the main page as index.html and click Save:

Now, configure your domain name’s DNS records to create a CNAME record that points to Cloud Storage. This makes clients requesting your website point to Cloud Storage APIs.
You use Cloud Build and its build triggers to upload your website automatically every time you push a new git commit to the source repository.
If you do not have a repository on GitHub, you can fork this sample repository for this tutorial.
-
Go to the Cloud Build → Triggers page.
-
Click Create trigger.
-
Enter a name for your trigger (for example,
publish-website). -
If you forked the sample repository for this tutorial, select Push to a branch as your repository event.
-
Select the repository that contains your source code and build configuration file.
-
Specify the regular expression for the branch that will start your trigger (e.g.,
^master$). -
Choose Cloud build configuration (yaml or json) as your build configuration file type.
-
In the Cloud Build configuration file location field, set the file location to
cloudbuild.yamlafter the/. -
Click Create to save your build trigger.
Now, create a cloudbuild.yaml file with the following contents in your
repository. Note that you can add files to your repository on the GitHub website or
by cloning the repository on your development machine:
steps:
  - name: gcr.io/cloud-builders/gsutil
    args: ["-m", "rsync", "-r", "-c", "-d", "./vision/explore-api", "gs://hello.alp.im"]
This YAML file declares a build step with the gsutil -m rsync command and
makes sure that the website is uploaded to the storage bucket. The -m flag
accelerates upload by processing multiple files in parallel, and the -c flag
avoids re-uploading unchanged files.
If you are using the sample repository, you should upload the
./vision/explore-api/ directory. If you would like to upload your entire
repository to the storage bucket, make sure to change this value to . in the
YAML file.
The last command in the args is the name of your storage bucket prefixed with
gs://. Be sure to change this argument to the correct value.
After saving the file, commit and push the changes:
git add cloudbuild.yaml
git commit -m 'Add build configuration'
git push
After you push the cloudbuild.yaml file to your repository and create the build
trigger, you can start the first build manually. Go to the Cloud Console
Triggers section, click Run Trigger, and choose the branch
(for example, master) to build.

Now click the Build history on the left and watch the build job execute and succeed.
Remember that after now, every commit pushed to any branch of your GitHub repository will trigger a new build and publish contents to your website. If you need to change which git branches or tags you use for publishing, you can update the Build Trigger configuration.
Point your browser to your website URL and see if it works:

After you no longer need the artifacts of this tutorial, you can clean up the following resources in the Cloud Console to prevent incurring additional charges:
- Storage: delete bucket named as your website
- Cloud Build → Triggers: delete build trigger
- Development → Repositories: delete mirrored repository