Upgrade Postgres with pglogical and Database Migration Service
Shubha Rajan
Developer Programs Engineer
As many of you are probably aware, Postgres is ending long term support for version 9.6 in November, 2021. However, if you're still using version 9.6, there's no need to panic! Cloud SQL will continue to support version 9.6 for one more year after in-place major version upgrades becomes available. But if you would still like to upgrade right now, Google Cloud's Database Migration Service (DMS) makes major version upgrades for Cloud SQL simple with low downtime.
This method can be used to upgrade from any Postgres version, 9.6 or later. In addition, your source doesn't have to be a Cloud SQL instance. You can set your source to be on-prem, self-managed Postgres, or an AWS source to migrate to Cloud SQL and upgrade to Postgres at the same time!

DMS also supports MySQL migrations and upgrades, but this blog post will focus on Postgres. If you're looking to upgrade a MySQL instance, check out Gabe Weiss's post on the topic.
Why are we here?
You're probably here because Postgres 9.6 will soon reach end of life. Otherwise, you might want to take advantage of the latest Postgres 13 features, like incremental sorting and parallelized vacuuming for indexes. Finally, you might be looking to migrate to Google Cloud SQL, and thinking that you might as well upgrade to the latest major version at the same time.
Addressing version incompatibilities
First, before upgrading, we'll want to look at the breaking changes between major versions. Especially if your goal is to bump up multiple versions at once (for example, upgrading from version 9.6 to version 13) you'll need to account for all of the changes between those versions. You can find these changes by looking at the Release Notes for each version after your current version, up to your target version.
For example, before you begin upgrading a Postgres 9.6 instance, you’ll need to first address the incompatibilities in version 10, including renaming any SQL functions, tools, and options that reference “xlog” to “wal”, removing the ability to store unencrypted passwords on the server, and removing support for floating point timestamps and intervals.
Preparing the source for migration
There are a few steps we'll need to take before our source database engine is ready for a DMS migration. A more detailed overview of these steps can be found in this guide.
First, you must create a database named "postgres" on the source instance. This database may already exist if your source is a Cloud SQL instance.
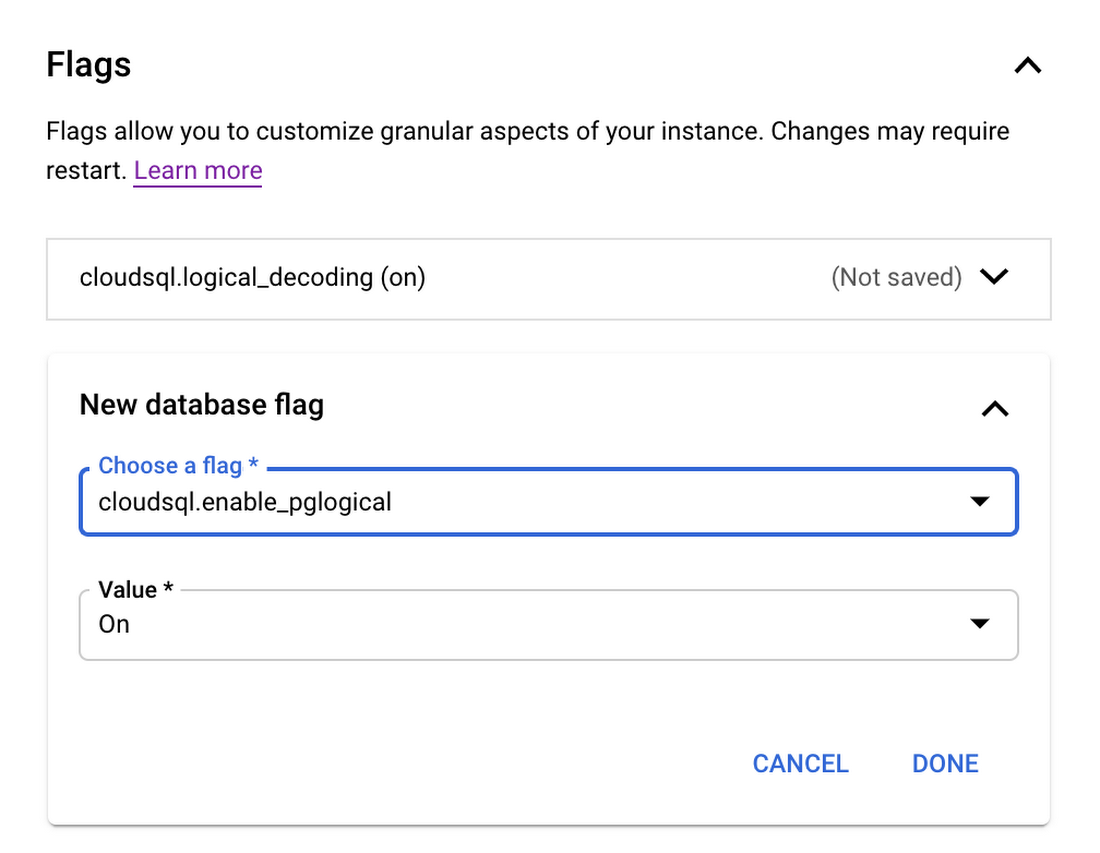
Next, install the pglogical package on your source instance. DMS relies on pglogical to transfer data between your source and target instances. If your source is a Cloud SQL instance, this step is as easy as setting the cloudsql.logical_decoding and cloudsql.enable_pglogical flags to on. Once you have set these flags, restart your instance for them to take effect.
This post will focus on using a Cloud SQL instance as the source, but you can find instructions for RDS instances here, and for on-prem/self-managed instances here. If your source is a self-managed instance (i.e. on Compute Engine), an on-premises instance, or an Amazon RDS/Aurora instance, this process is a little more involved.
Once you have enabled the pglogical flags on the instance, you will need to install the extension on each of your source databases that is not one of the following template databases: template0 and template1. If you are using a source other than Cloud SQL, you can check here to see what source databases need to be excluded.If you're running Postgres 9.6 or later on your source instance, run CREATE EXTENSION IF NOT EXISTS pglogical; on each database in the source instance that will be migrated.
Next, you'll need to grant privileges on the to-be-migrated databases to the user that you'll be using to connect to the source instance during migration. Instructions on how to do this can be found here. When creating the migration job, you will enter the username and password for this user when creating a connection profile.
Creating the migration job in DMS
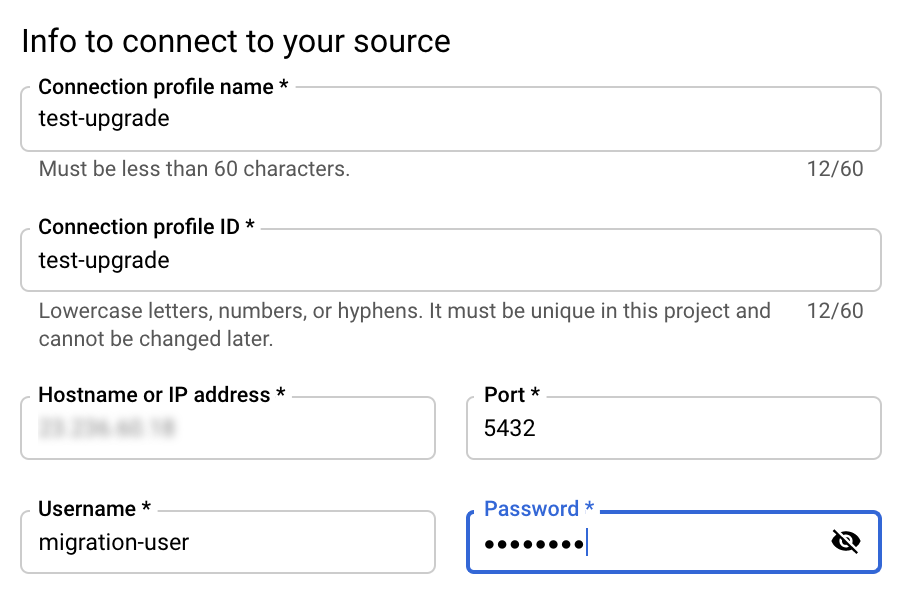
The first steps for creating a migration job in DMS are to define a source and destination. When defining a source, you'll need to create a connection profile by providing the username and password of the migration user that you granted privileges to earlier, as well as the IP address for the source instance. The latter will be auto-populated if your source is a Cloud SQL instance:
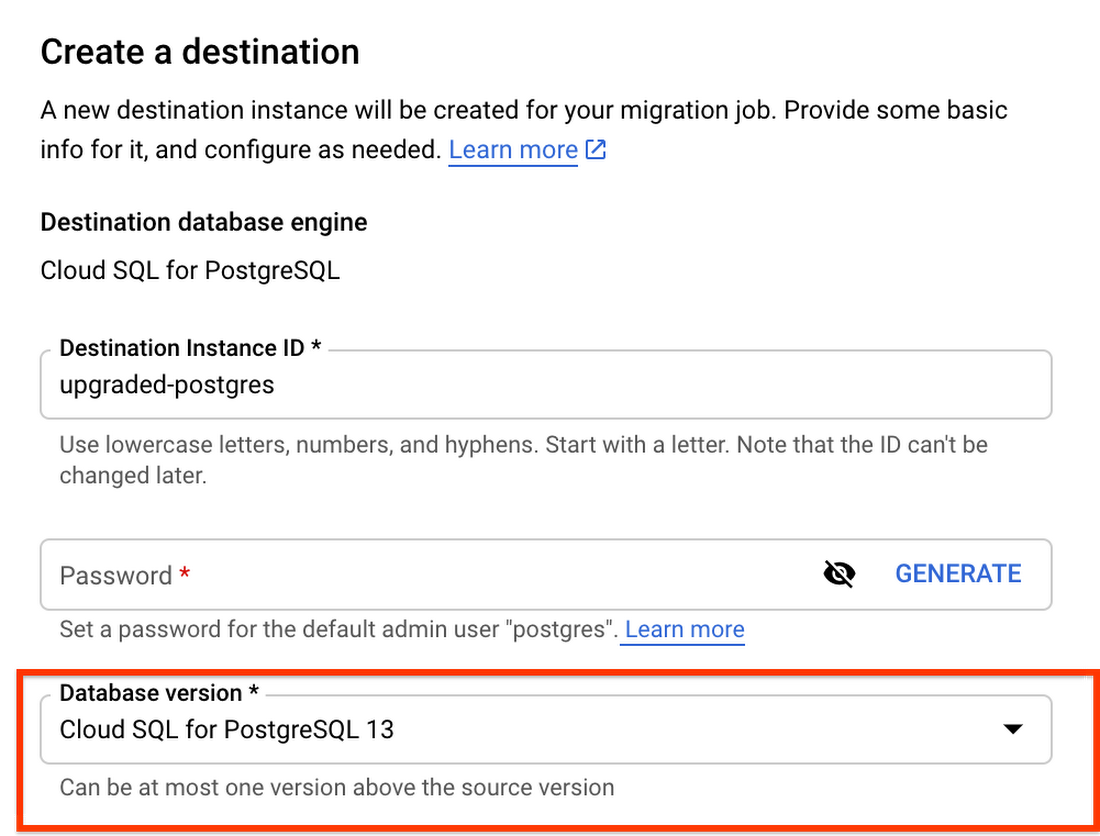
Next, when creating the destination, you'll want to make sure that you have selected your target version of Postgres:
After selecting your source and destination, you choose a connectivity method (see this very detailed post by Gabe Weiss for a deep-dive on connectivity methods) and then run a test to make sure your source can connect to your destination. Once your test is successful, you're ready to upgrade! Once you start the migration job, data stored in the two instances will begin to sync. It might take some time until the two instances are completely synced. You can periodically check to see whether all of your data has synced by following the steps linked here. All the while, you can keep serving traffic to your source database until you're ready to promote your upgraded destination instance.
Promoting your destination instance and finishing touches
Once you've run the migration, there are still a few things you need to do before your destination instance is production-ready. First, make sure any settings you have enabled on your source instance are also applied to your destination instance. For example, if your organization requires that production instances only accept SSL connections, you can turn on the enforce-SSL flag for your instance.
Some system configurations, such as high availability and read replicas, can only be set up after promoting your instance.
To reduce downtime, DMS migrations run continuously while applications still use your source database. However, before you promote your target to the primary instance, you must first shut down all client connections to the source to prevent further changes. Once all changes have been replicated to the destination instance, you can promote the destination, ending the migration job. More details on best practices when promoting can be found here.
Finally, because DMS depends on pglogical to migrate data, there are a few limitations of pglogical that DMS inherits:
- The first is that
pglogicalonly migrates tables that have a primary key. Any other tables will need to be migrated manually. To identify tables that are missing a primary key, you can run this query. There are a few strategies you can use for migrating tables without a primary key, which are described here. - Next, pglogical only migrates the schema for materialized views, but not the data. To migrate over the data, first run
SELECT schemaname,matviewnameFROM pg_matviews; to list all of the materialized view names. Then, for each view, runREFRESH MATERIALIZED VIEW <view_name> - Third, pglogical cannot migrate large objects. Tables with large objects need to be transferred manually. One way to transfer large objects is to use pg_dump to export the table or tables that contain the large objects and import them into Cloud SQL. The safest time to do this is when you know that the tables containing large objects won't change. It's recommended to import the large objects after your target instance has been promoted, but you can perform the dump and import steps at any time.
- Finally, pglogical does not automatically migrate users. To list all users on your source instance, run
\du. Then follow the instructions linked here to create each of those users on your target instance.
After promoting your target and performing any manual steps required, you'll want to update any applications, services, load balancers, etc to point to your new instance. If possible, test this out with a dev/staging version of your application to make sure everything works as expected.
If you're migrating from a self-managed or on-prem instance, you may have to adjust your applications to account for the increased latency of working with a Cloud SQL database that isn't right next to your application. You may also need to figure out how you can connect to your Cloud SQL instance. There are many paths to connecting to Cloud SQL, including the Cloud SQL Auth proxy, libraries for connecting with Python, Java, and Go, and using a private IP address with a VPC connector. You can find more info on all of these connection strategies in the Cloud SQL Connection Overview docs.
We did it! (cue fireworks)

If you made it this far, congratulations! Hopefully you now have a working, upgraded Cloud SQL Postgres instance. If you're looking for more detailed information on using DMS with Postgres, take a look at our documentation.