Introducing Lustre file system Cloud Deployment Manager scripts
Wyatt Gorman
Solutions Manager, HPC & AI Infrastructure, Google Cloud
Data is core to high performance computing (HPC), especially for workloads such as those in life sciences, financial services, and media rendering. Accessing large amounts of data at extremely high speeds and low latencies is essential to HPC, but has always been a key challenge in running HPC workloads.
The HPC community has long met this need using storage technologies like the Lustre open-source parallel file system, which is commonly used in supercomputers today. The nearly unlimited scale of the cloud unlocks powerful capabilities for users, while also increasing the demand for fast parallel storage. Unfortunately, the configuration of the Lustre parallel file system is typically a technically challenging and time-consuming task, and can require an expert to implement correctly.
In order to simplify the complex process of building and configuring a Lustre cluster for our users, the engineers at Google Cloud Platform (GCP) have developed a set of scripts to easily deploy a Lustre storage cluster on Google Compute Engine using the Google Cloud Deployment Manager. The scripts are available here in the GCP GitHub repository, under the community directory. We’ve worked to make this as simple as possible, even if you don’t have a lot of Lustre experience. We’ll briefly walk you through how to use the scripts here.
1. Create a Lustre cluster
Though it’s challenging in an on-premises environment, the process to deploy a ready-to-use Lustre cluster in GCP is very simple. First, create a project to contain the Lustre cluster, and ensure that you have GCP quota available to support your expected cluster.
Next, clone the git repository to a local device or Cloud Shell with access to gcloud and your project, and change to the lustre directory by running these commands:
Once the Lustre deployment manager scripts are downloaded, review the lustre-template.yaml, which has descriptions of each field and example valid input, as well as the description of the YAML fields in the Configuration section of README.md, to understand what each field configures. Then open the lustre.yaml file with your favorite editor (vi, nano, etc.) and edit the configuration fields to satisfy your requirements. At a minimum, ensure that the following fields are complete and valid in your environment:
cluster_namezonecidrexternal_ipsmdt_disk_typemdt_disk_size_gbost_disk_typeost_disk_size_gb
Note: The rest of this blog post assumes you use the default values populated in the lustre.yaml file for the fields cluster_name and fs_name. If you change these values, make sure to continue your changes throughout the following instructions.
This YAML file defines the configuration for a Lustre cluster. When the configuration is deployed, it will create a Lustre cluster with the Lustre file system ready to use, including these components:
VPC Network—Network to host Lustre traffic, unless an existing VPC network such as a Shared VPC is provided.
VPC Subnet—Subnet to route Lustre traffic, unless an existing VPC Subnet is provided.
Cloud NAT—NAT device to route traffic to the internet, unless external IPs are disabled.
Firewall rules—Firewall rules will be created to allow inter-node communication, and SSH into the Lustre cluster.
Lustre VMs—A set of Lustre virtual machines will be created and configured to host various roles immediately as part of the deployment:
MDS—Lustre metadata server and management server serves the independent metadata and Lustre management functionality.
OSS—Object storage server serves the file data in a distributed manner.
2. Deploy the Lustre cluster
Once the fields are configured to match your preferences, you can deploy and configure the entire Lustre cluster with a single command:
gcloud deployment-manager deployments create lustre --config lustre.yaml
You can monitor the progress of the deployment through the command line, or in the deployment manager interface:
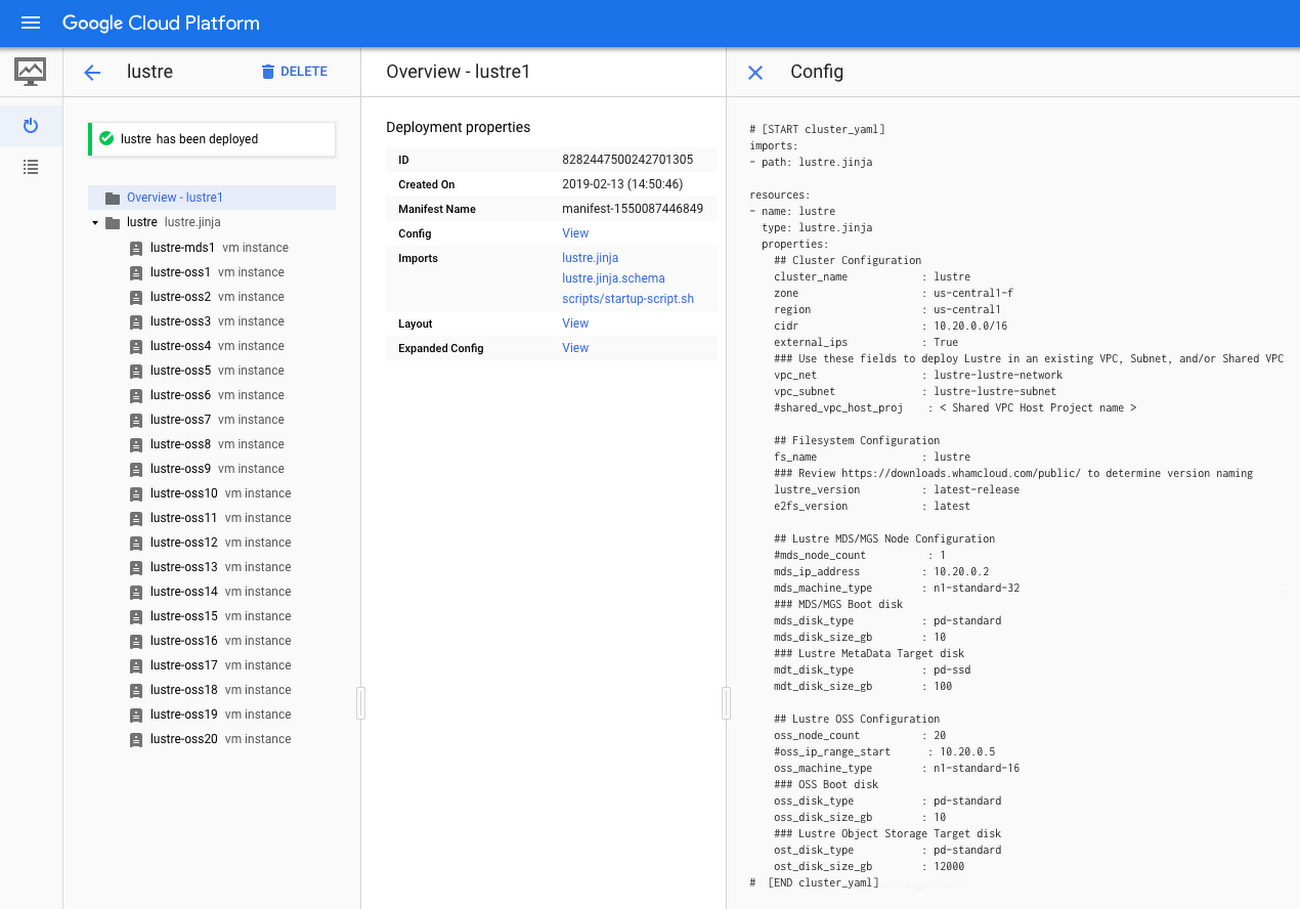
Once the deployment has completed successfully, you will see output like this, showing that a VPC network, subnet, firewall rules, and VM instances have been created according to the configuration:
Next, SSH into the lustre-mds1 instance using either gcloud or the console SSH button. Once you log in, you may see the following message:
If you do see this message, wait until the installation is complete. (If you do not see this message, then the installation has already completed.)
If you do see this message, wait until the installation is complete. (If you do not see this message, then the installation has already completed.)
3. Log in and test Lustre
Once the installation is complete, you will see the following message of the day when logging into an instance in the cluster:
This message indicates that the Lustre cluster is installed, and that the Lustre file system is mounted and available. You can now mount Lustre clients that have the Lustre client software installed. For example, you can test a mount from the lustre-mds1 node to verify that the Lustre file system is online, like this:
The mount command should return quickly with no output. If you experience an issue with this step, check out the Troubleshooting section of our README.md file.
You can confirm that Lustre is mounted on your client multiple ways. One way is to check that an entry exists in the mount command, like this:
mount | grep lustre
You should see output that includes a line similar to:
10.20.0.2@tcp:/lustre on /mnt/lustre type lustre (rw)
You can also check the output of the Lustre configuration utility, lctl, to ensure that the entire Lustre file system is mounted and available, using this command:
sudo lfs df
You should see output similar to this that shows the Lustre metadata target(s) (MDT), the Lustre object storage target(s) (OST), the mount point, the total file system size, and used and available storage.
Your Lustre file system is now mounted. You can test writing a file to the file system by running these commands:
You should see your new file testfile has been created. Change the permissions for /mnt/lustre to allow non-root users to access the file system, or enable authentication in Lustre (the Lustre User/Group Upcall is disabled in these Lustre deployment manager scripts by default, which causes Lustre to fall back to the OS authentication).
Exploring further with Lustre
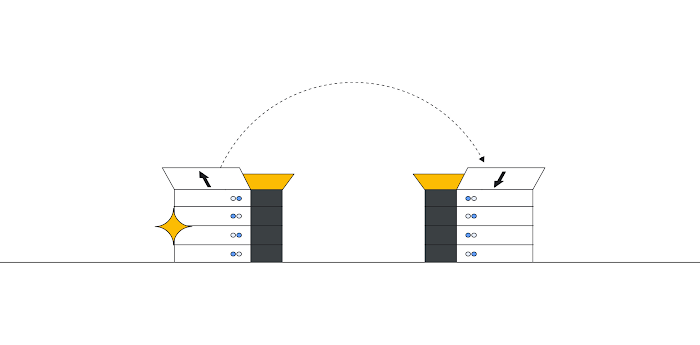
Your Lustre cluster is now online and ready to host your scratch and HPC data to solve your hardest performance problems. Check out the README.md for even more detail and to learn how to expand your Lustre cluster by adding new OSS nodes.
Visit the Google HPC Solutions page to read about other solutions, and try combining your Lustre cluster with some of our other solutions to begin running your HPC workloads in Google Cloud. For example, combine Lustre and Slurm on GCP to create an auto-scaling cluster with access to a powerful Lustre file system. You can also learn more about HPC in the cloud during this Next ‘19 session.
Get in touch with questions and feedback
To ask questions or post customizations to the community, use the Google Cloud Lustre Google discussion group. To request features, provide feedback, or report bugs, use this form.