How to automate with AppSheet Automation
Prithpal Bhogill
Product Manager, AppSheet, Business Application Platform
Build your first automation bot with AppSheet Automation.
Try Google Workspace at No Cost
Get a business email, all the storage you need, video conferencing, and more.
SIGN UPAppSheet Automation is now generally available, and in this article, we’ll explore how you can build your first automation bot, all without writing a single line of code.
This brief tutorial, using the use case of onboarding new employees, will explain how you can automate the process with AppSheet Automation. This same framework could be applied to any use case that involves auto-generating an email when a new entry is added to your data source; be it engaging new subscribers to your side hustle blog, or to schedule an email for a recent work order request.
Before you begin, you will need an app in which to frame your automation. You can use one you’ve already built or you can get started with this sample app (Select “Copy and customize” option, choose a name for your app).
Automating any process within your application, in this case onboarding new employees, involves three simple steps.
1. Creating a bot
2. Configuring the event and process
3. Testing your bot
We’ve included a video below that explains exactly what these components are and how they work together.
Step 1: Creating a bot
Follow the steps below to create a new bot:
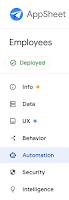
1. From the AppSheet UI, click on “Automation” from the left menu, navigate to the Bots tab and click on + New Bot.
2. Type ”employee send email” into the dialog, which will trigger suggested bots to appear, as shown in the image below.
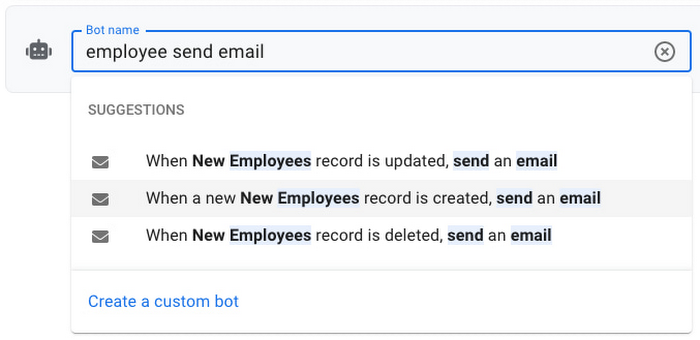
3. Select the highlighted suggestion above “When a new New Employees record is created, send an email” (Click on Create a custom bot if you don't see any suggestions and follow along instructions on the video to manually create your bot).
4. At this point a completely implemented bot is ready to get to work. Let’s tweak some settings so it sends the email to the right email address.
Step 2: Configuring the event and process
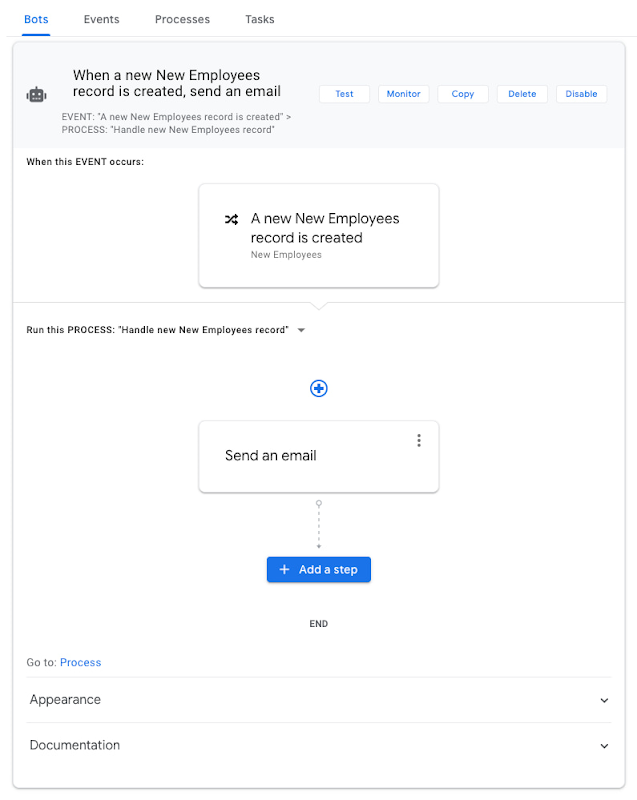
A bot has two main components: An event (when something happens) and a process (perform a sequence of tasks).
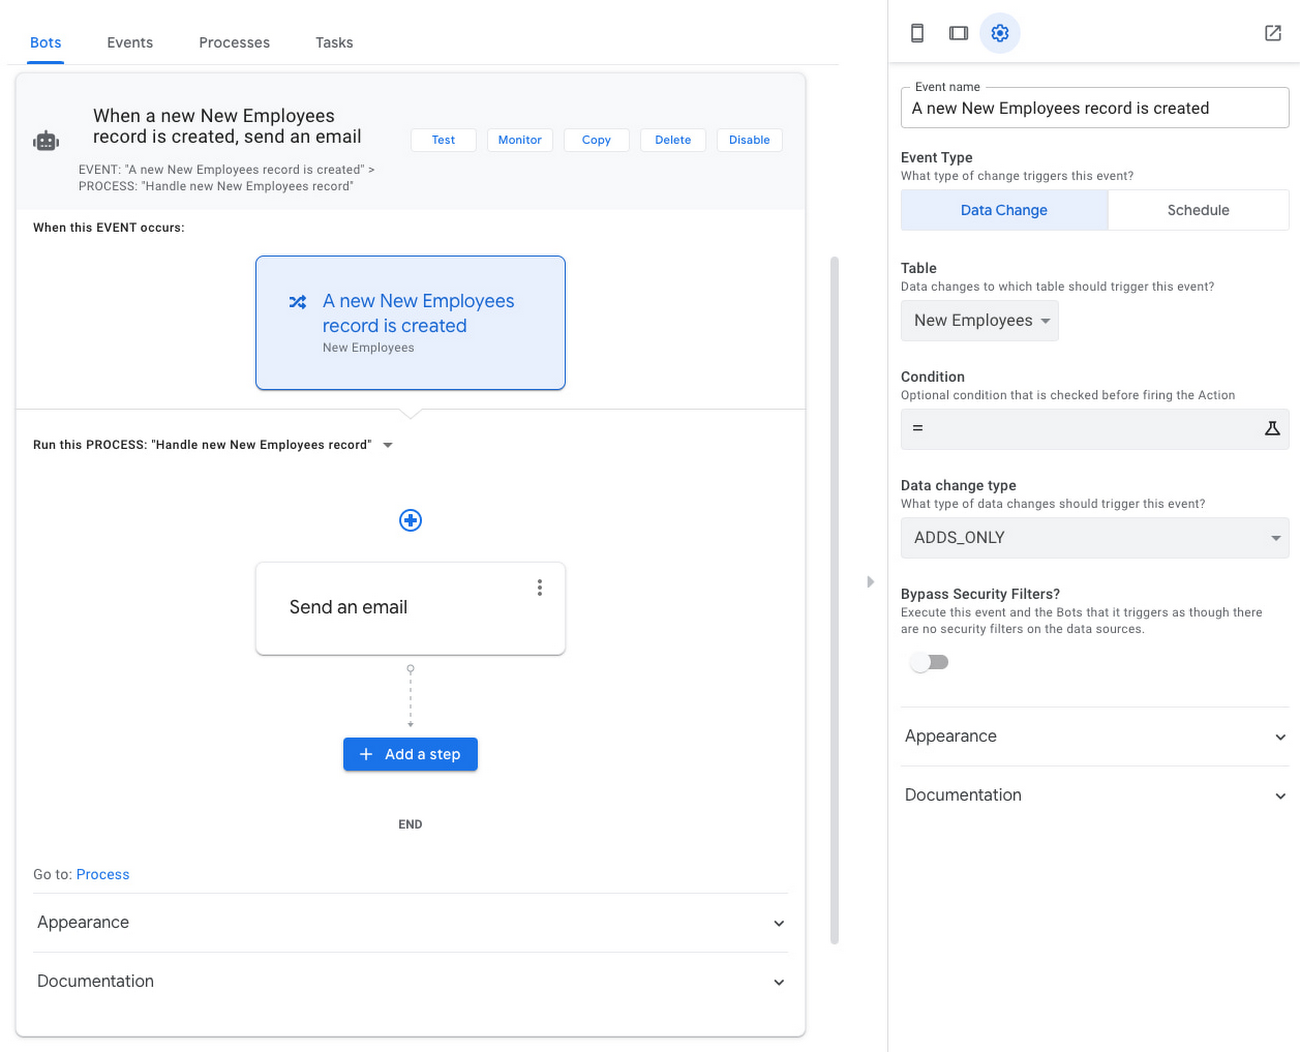
Event:
1. Click on the event and its definition should render in the settings pane to the right.
2. If it looks like this (below) you are good to go to the next step.
Process:
1. Click on the “send an email” step in the process and its definition should render in the settings pane to the right.
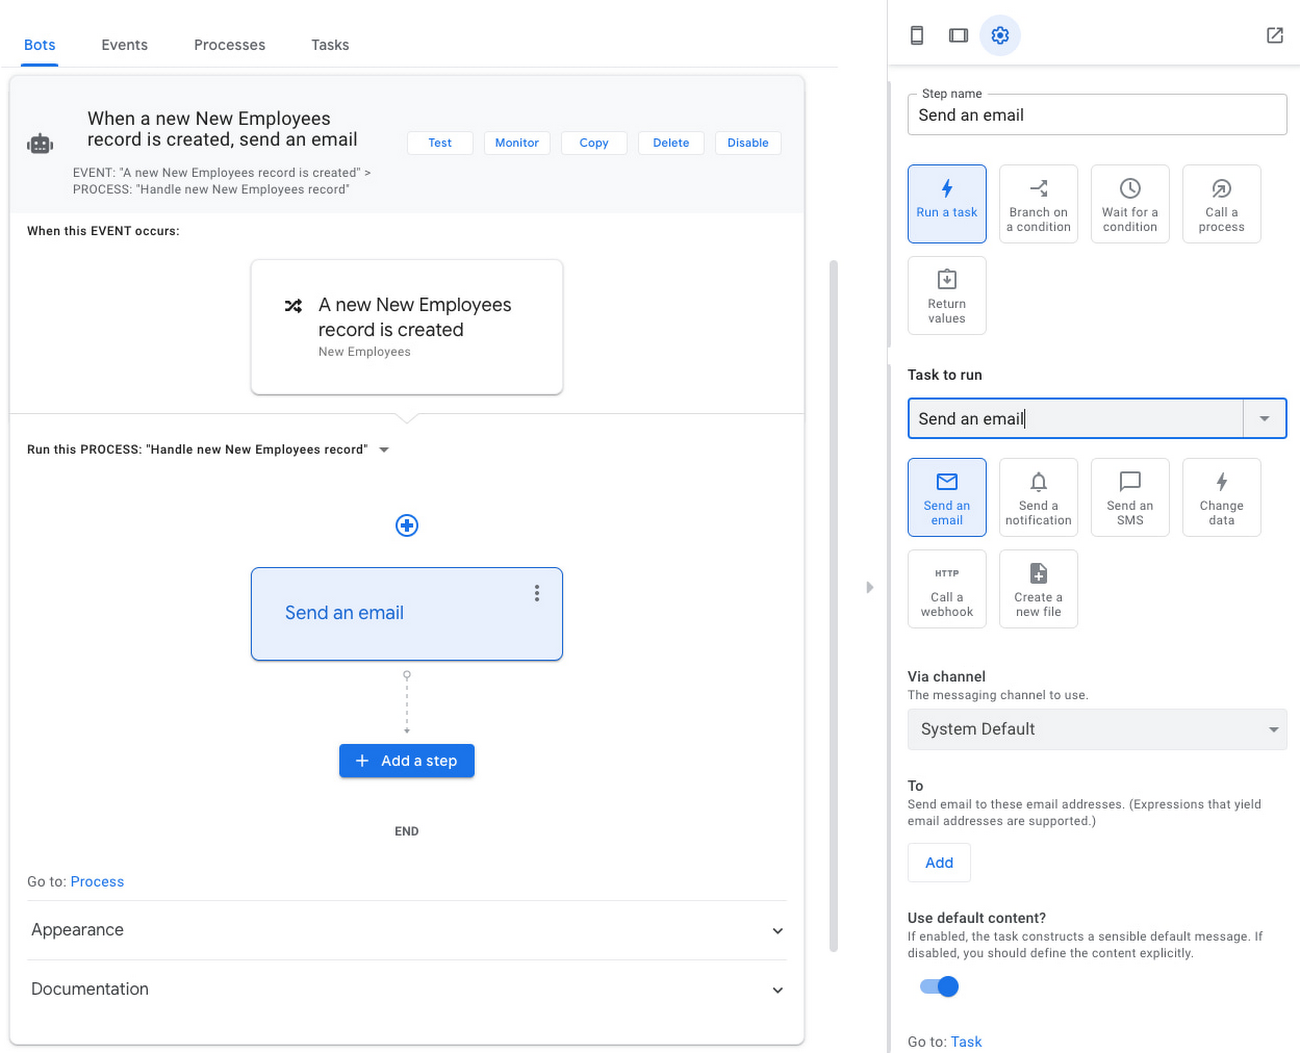
2. Click on the “Go to: Task” link at the bottom of the settings pane to navigate to the task definition.
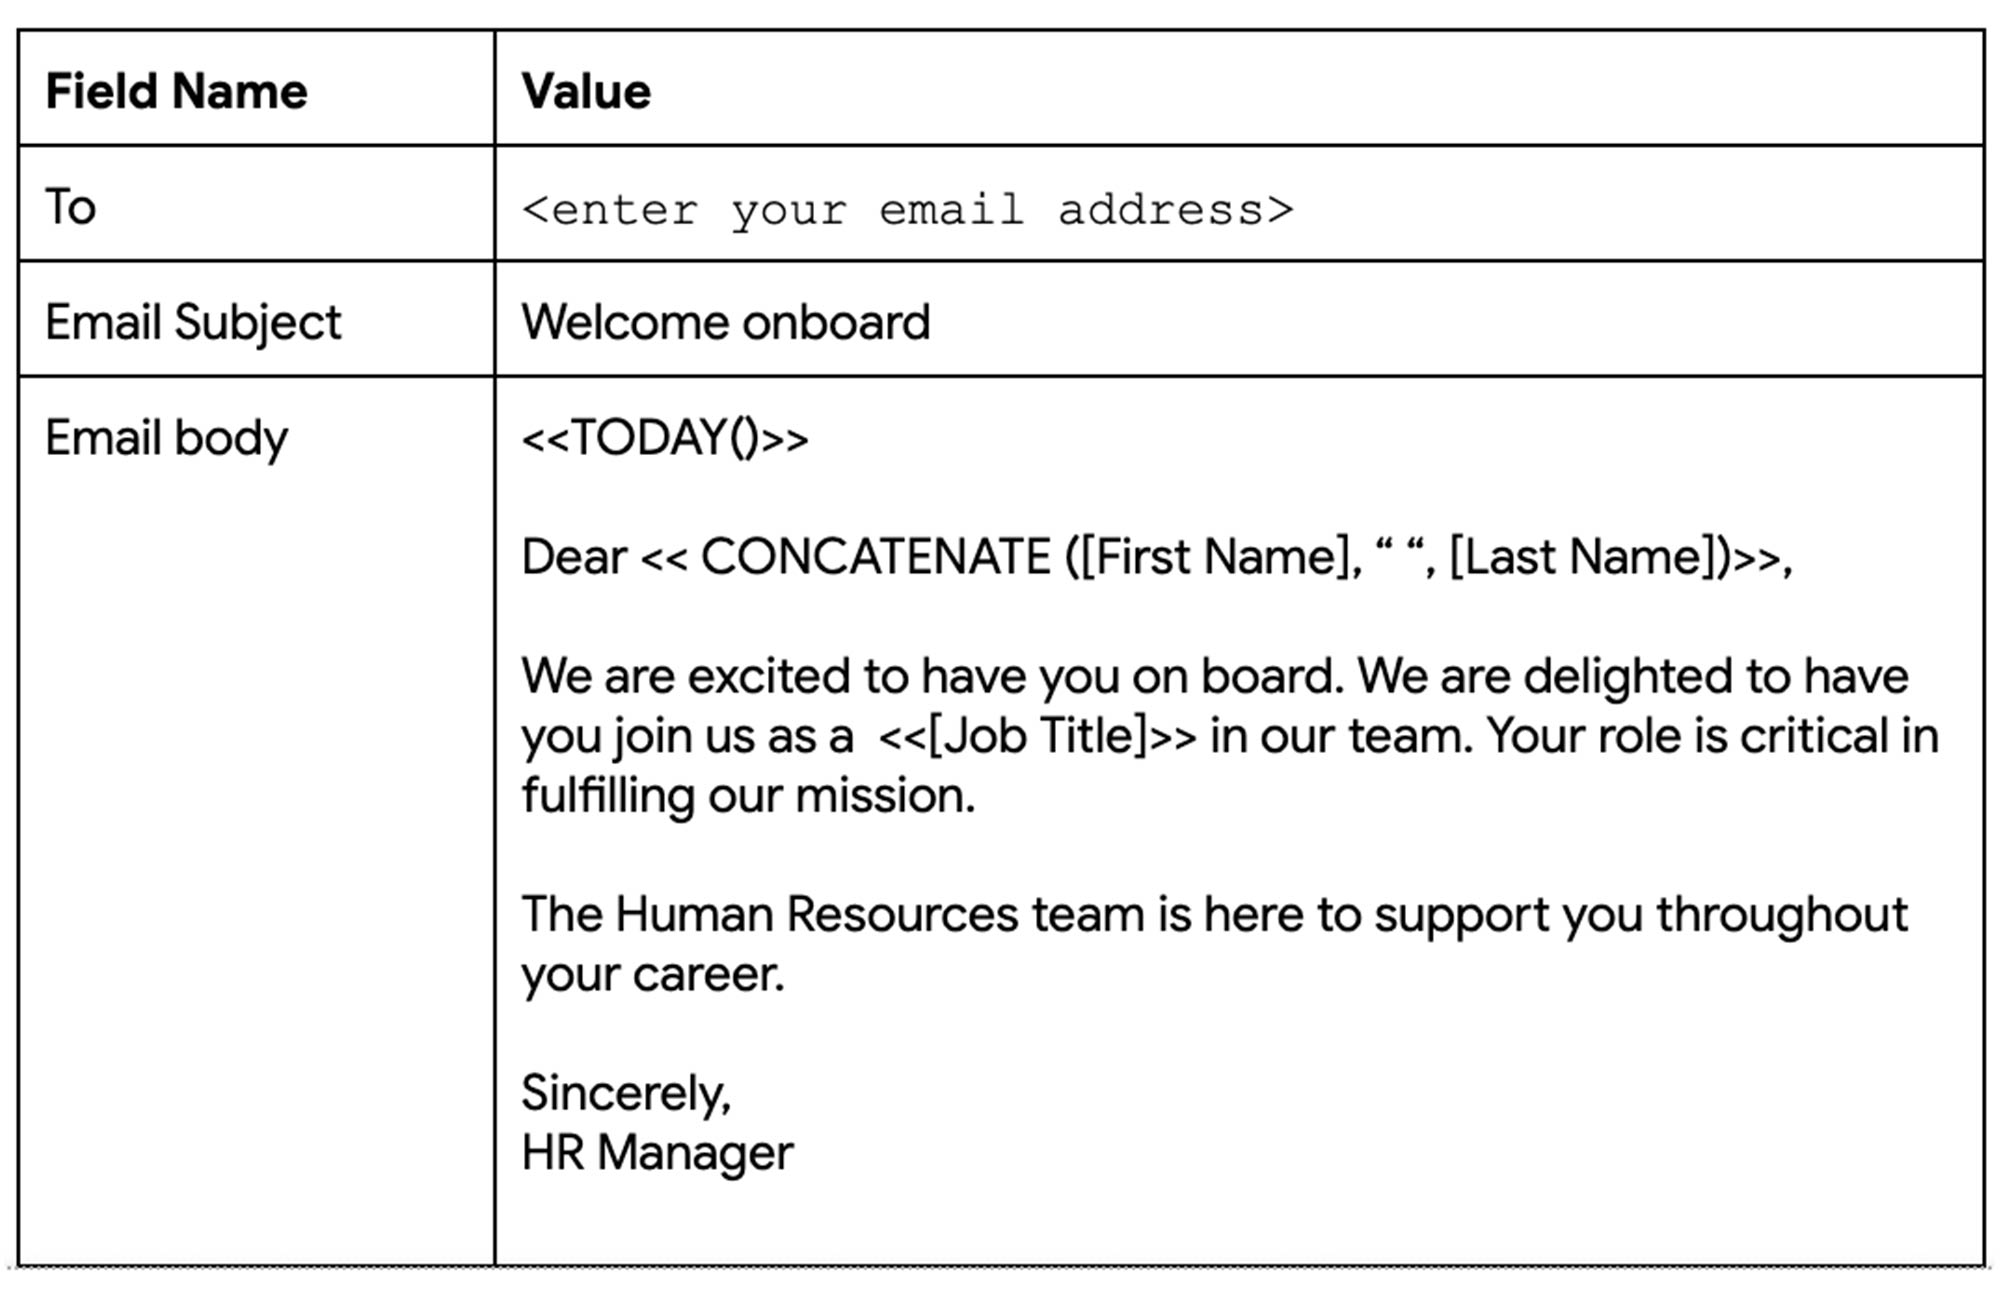
3. You can leverage the full expressive power of the platform to customize and format the email content including using templates. Refer to the table below for the rest of the task configuration:
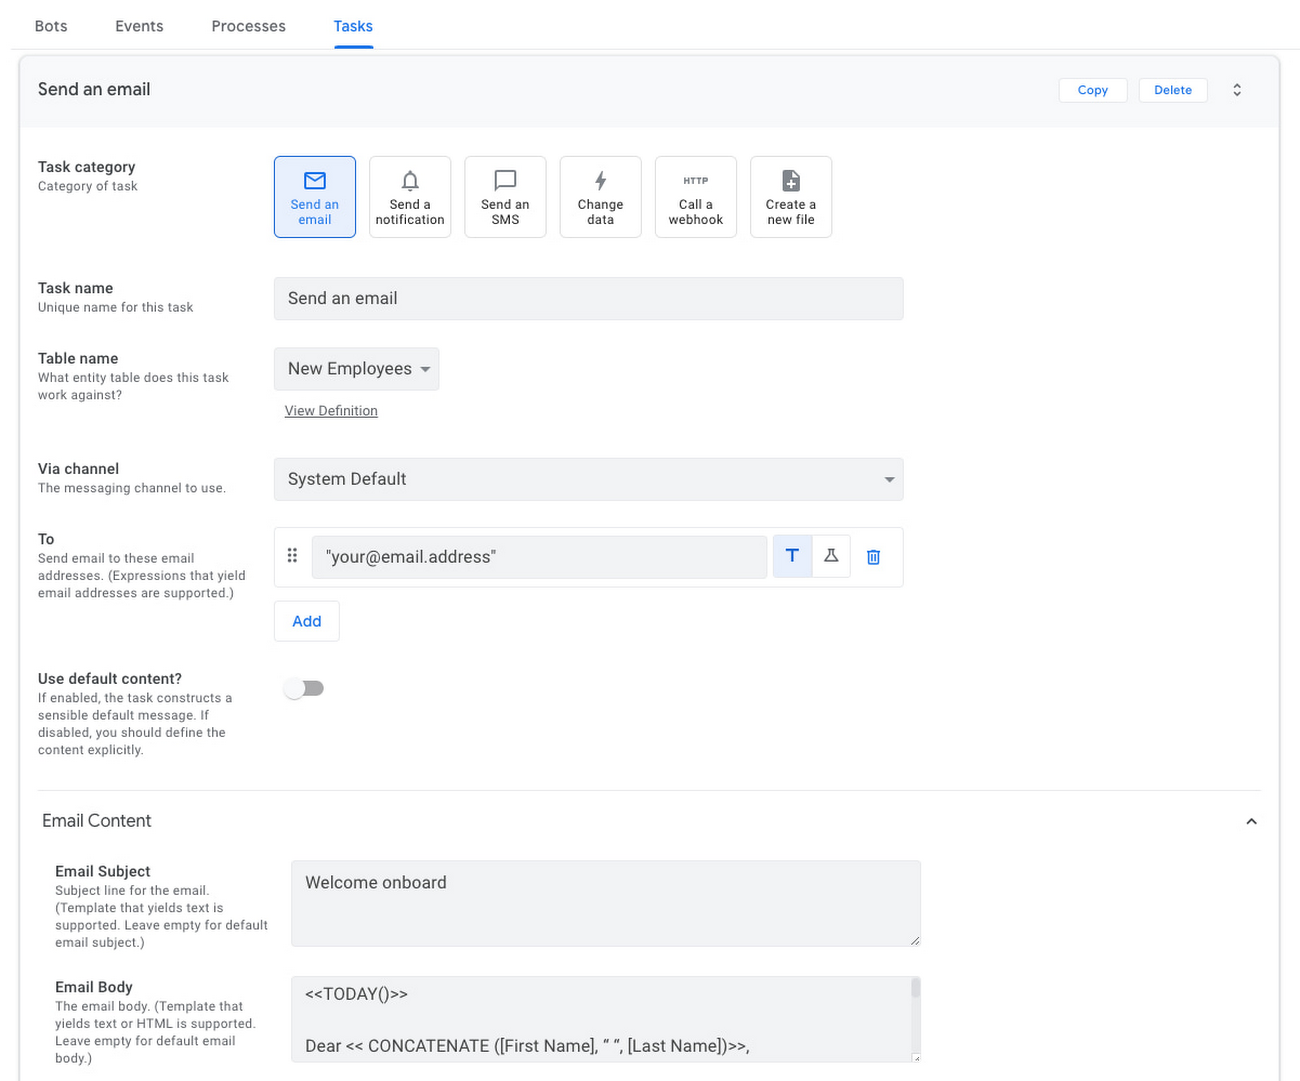
Your task should now look like this:
4. Click Save to save all your changes.
5. Let go ahead and deploy your app. Click on the blue “Not Deployed” icon on the top left of your screen and go through the deployment wizard to deploy your app. Your app should show the green “Deployed” state as follows:
6. You are all done configuring your bot.
Step 3: See your bot in action
Now that you are done building the bot, let’s take it for a spin.
1. Click the mobile device icon on the top left of the right hand pane to see the “New Employees” view (alternatively you can navigate from the left hand menu to UX → Primary Views → New Employees)
2. Click on the big blue “+” icon to create a new employees record. Add employee details (make sure to add your own email address) → Click Save → This new record should sync automatically (if not click on the red icon on the top right to perform a sync.)
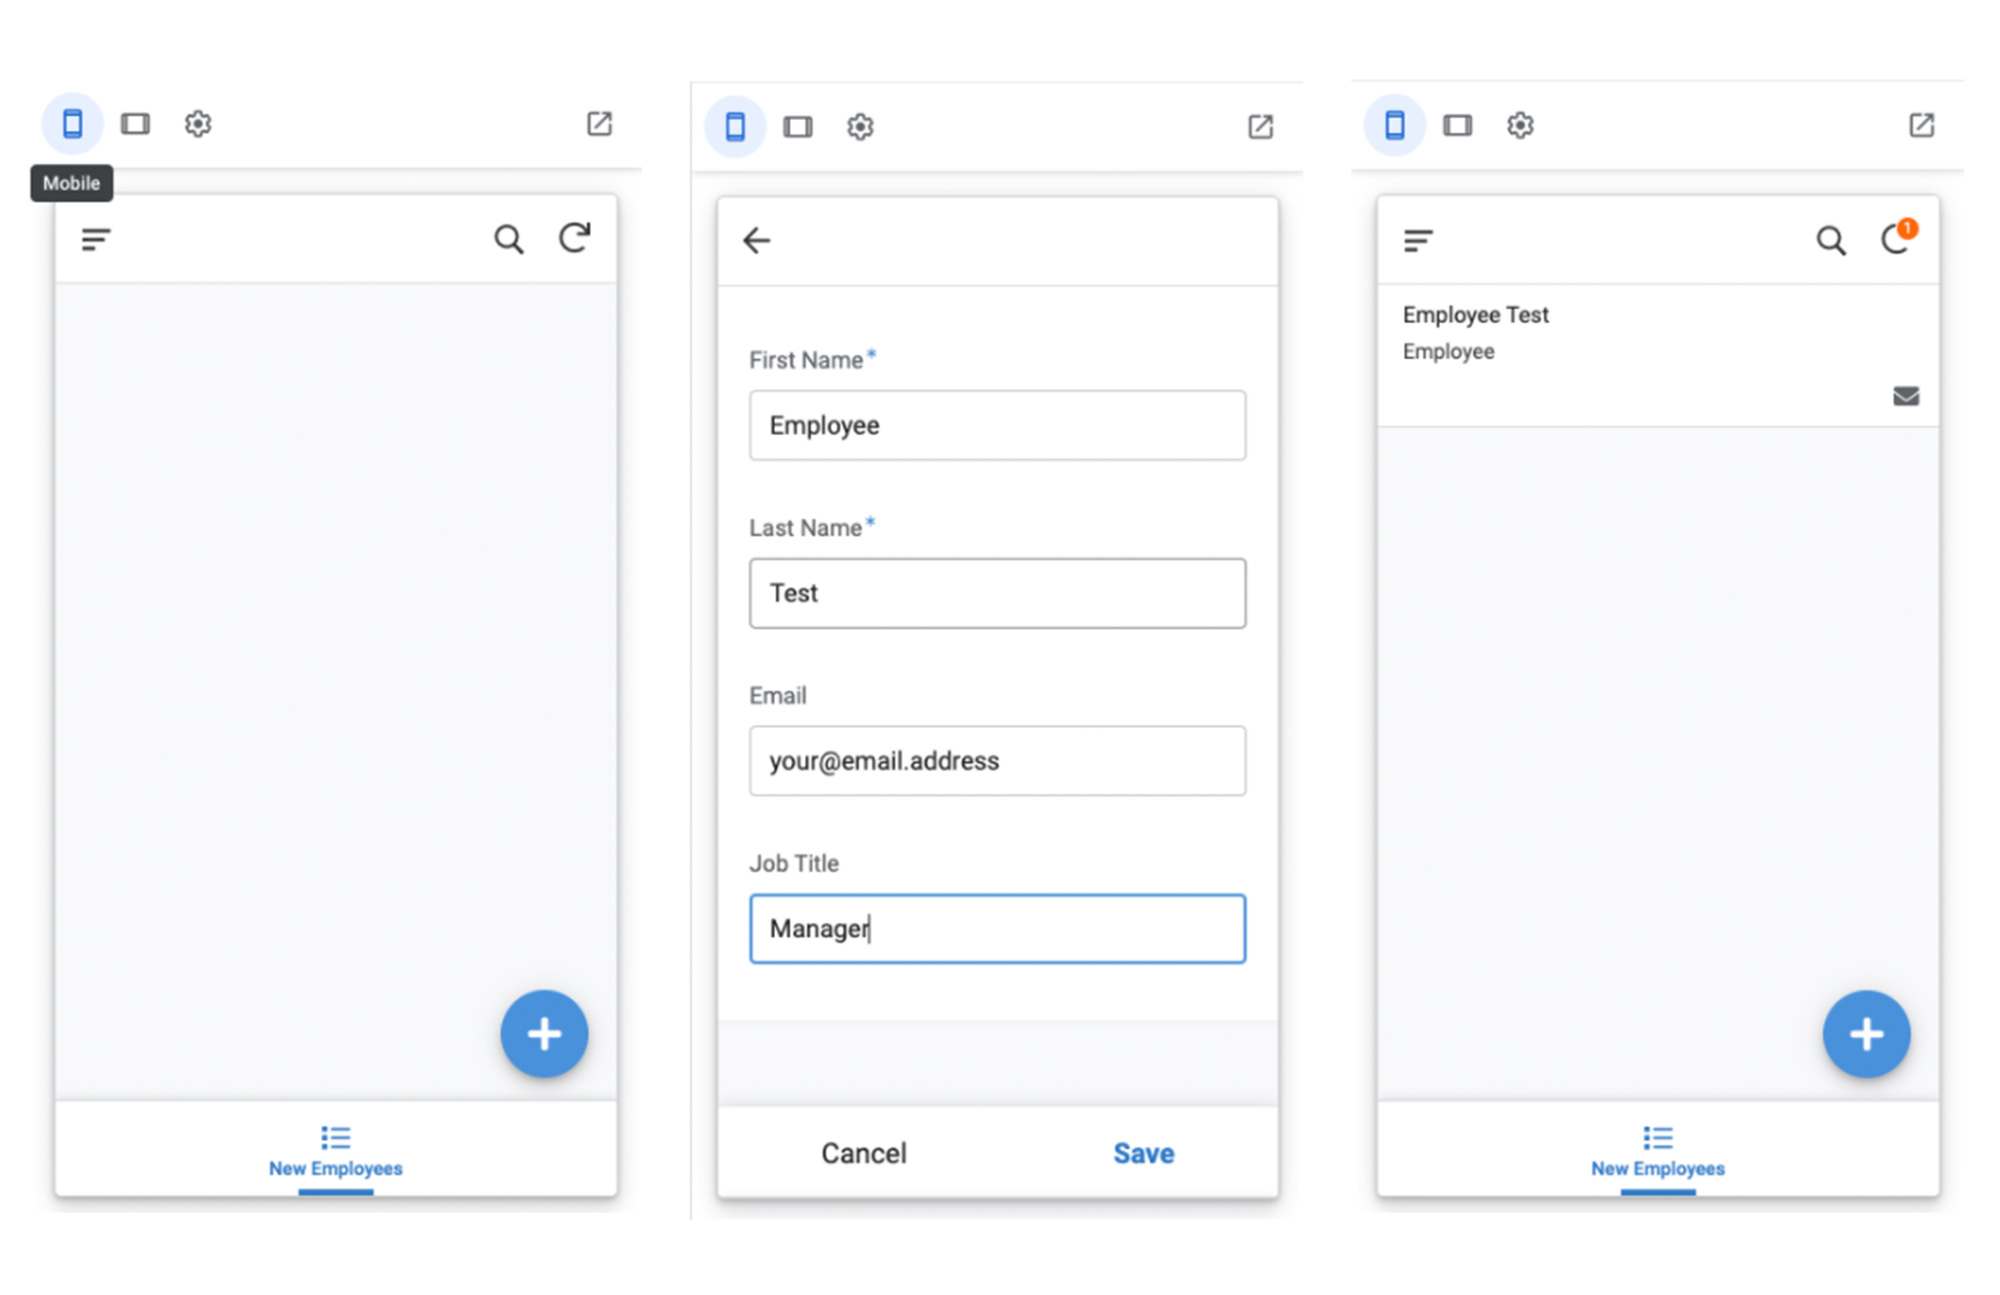
3. You should get an welcome email to the email address you entered in the previous step.
Note - In addition to adding employees via the app, you can also configure this bot to send an email if data in the underlying sheet is updated directly. To do that you will need to ensure that Sheets is configured correctly for external eventing. This video will take you through that process.
Congratulations! You have just created and enabled your very first bot, without writing a single line of code . From here, just ensure your application has been deployed, and your bots will do the rest while you reclaim your time. If you run into any issues building your automation bot, check out our help articles or ask a question on the AppSheet Community.
Ready to use AppSheet Automation? Get started now.