How to develop with PyTorch at lightning speed
Karl Weinmeister
Head of Cloud Product DevRel
Over the years, I've used a lot of frameworks to build machine learning models. However, it was only until recently that I tried out PyTorch. After going through the intro tutorial, Deep Learning with PyTorch: A 60 Minute Blitz, I started to get the hang of it. With PyTorch support built into Google Cloud, including notebooks and pre-configured VM images, I was able to get started easily.
There was one thing that held me back. All of the wonderful flexibility also meant that there were so many ways to do things. How should I load my training and test data? How should I train my model, calculating the loss and logging along the way? I got everything working properly, but I kept wondering if my approach could be improved. I was hoping for a higher level of abstraction that would take care of how to do things, allowing me to focus on solving the problem.
I was delighted to discover PyTorch Lightning! Lightning is a lightweight PyTorch wrapper that helps you organize your code and provides utilities for common functions. With Lightning, you can produce standard PyTorch models easily on CPUs, GPUs, and TPUs! Let's take a closer look at how it works, and how to get started.
To introduce PyTorch Lightning, let's look at some sample code in this blog post from my notebook, Training and Prediction with PyTorch Lightning. The dataset used, from the UCI Machine Learning Repository, consists of measurements returned from underwater sonar signals to metal cylinders and rocks. The model aims to classify which item was found based on the returned signal. Acoustic data has a wide variety of applications, including medical imaging and seismic surveys, and machine learning can help detect patterns in this data.

Organizing your notebook code with PyTorch Lightning
After installing Lightning, I started by creating a SonarDataset, inheriting from the standard PyTorch Dataset. This class encapsulates logic for loading, iterating, and transforming data. For example, it maps the raw data, with "R" for rocks and "M" for mines, into 0 and 1. That enables the data to answer the question, "is this a mine?", a binary classification problem. Here's a code snippet from that class:
Next, I created a SonarDataModule, inheriting from Lightning's LightningDataModule. This class provides a standard way to split data across training, testing, and validation sets, and then to load each set into a PyTorch DataLoader. Here's a code snippet of from the setup() method in the SonarDataModule:
Finally, I created a SonarModel, inheriting from LightningModule. This class contains the model, as well as methods for each step of the process, such as forward() for prediction, training_step() for computing training loss, and test_step() for calculating accuracy.
Training and predicting with your model
Lightning's Trainer class makes training straightforward. It manages details for you such as interfacing with PyTorch DataLoaders; enabling and disabling gradients as needed; invoking callback functions; and dispatching data and computations to appropriate devices.
Let's look at a couple of the methods in the tutorial notebook. First, you instantiate a new trainer, specifying options such as the number of GPUs to use and how long to train. You train your model with fit(), and can run a final evaluation on your test data with test(). A tune() method is also provided to tune hyperparameters.
After the training process, you can use standard PyTorch functions to save or predict with your model, for instance:
Getting started with Lightning
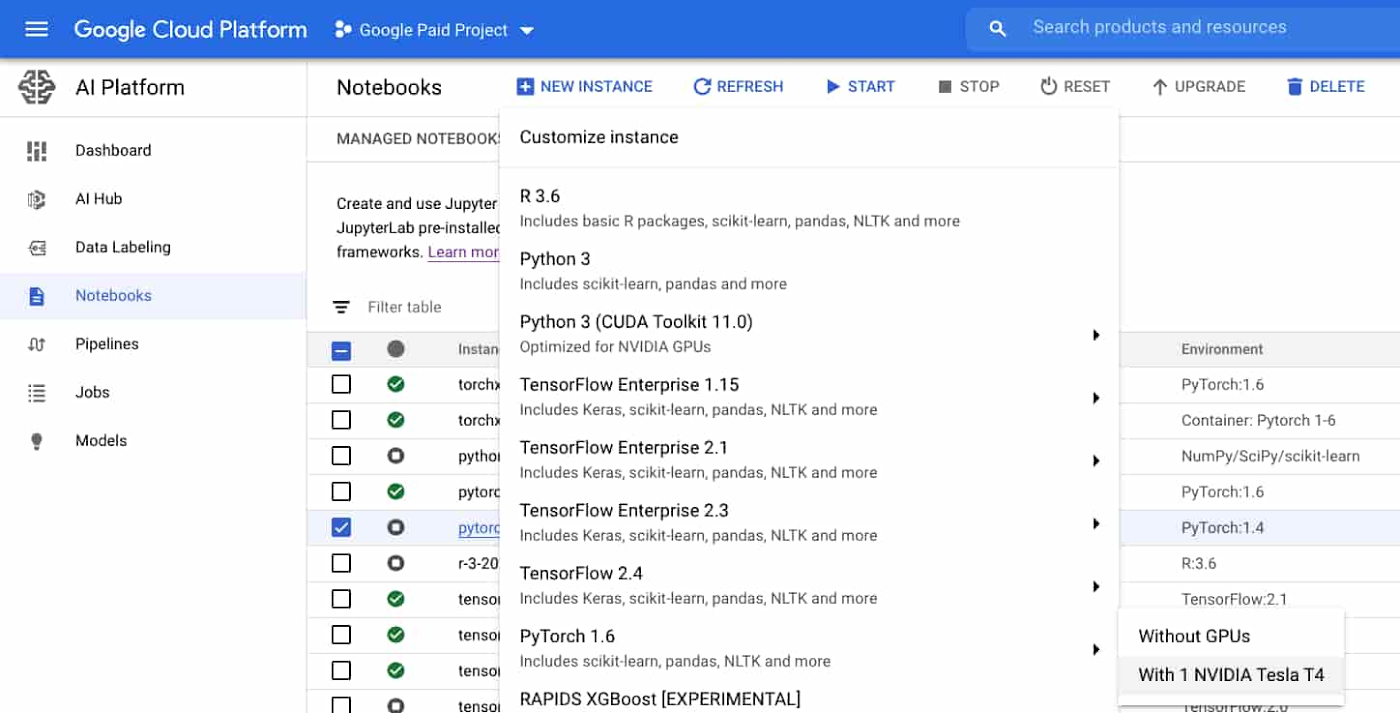
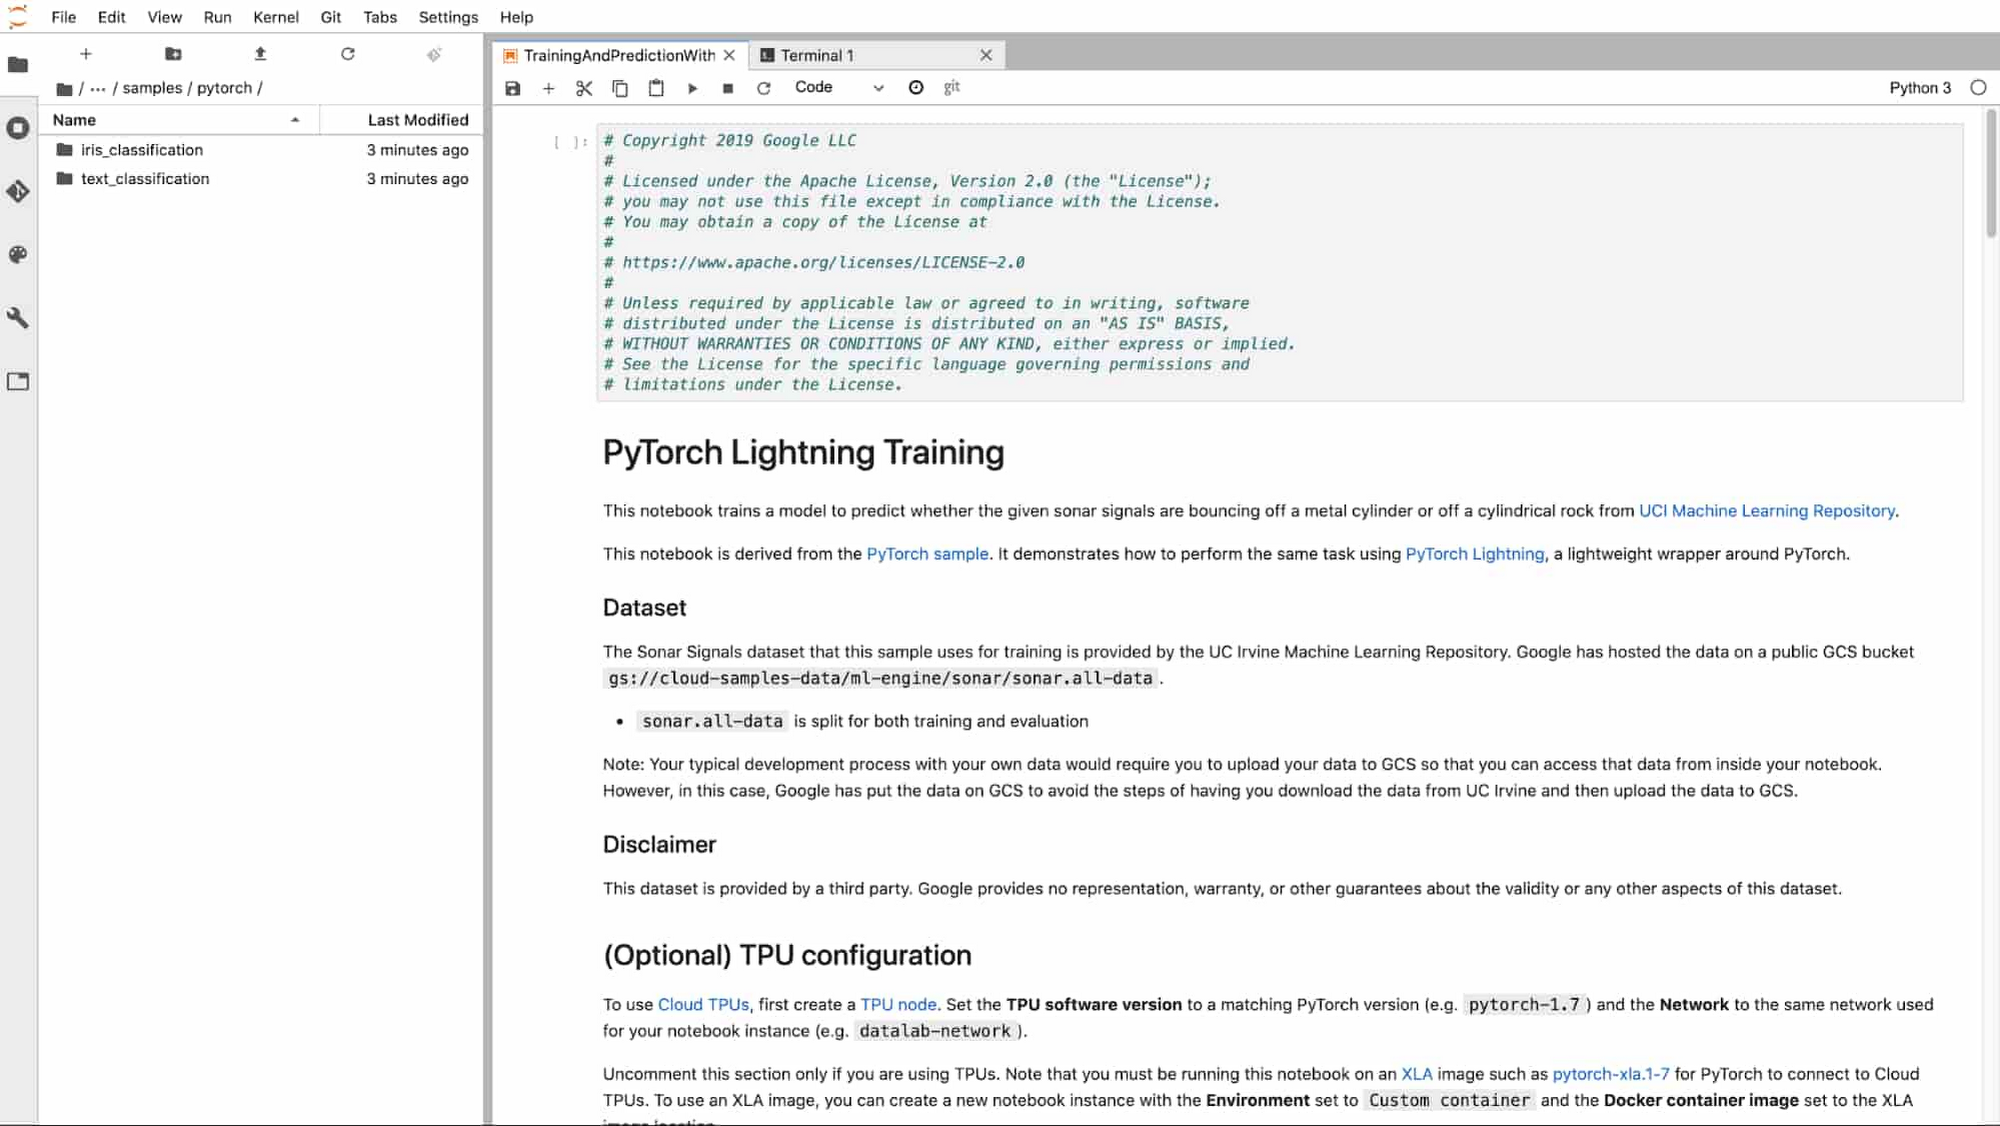
Google Cloud's support for PyTorch makes it easy to build models with Lightning. Let's walk through the steps. First, you'll want to create a notebook instance using Cloud AI Platform Notebooks. You can select a PyTorch instance that is preloaded with a PyTorch DLVM image, including GPU support if you'd like. Once your notebook instance is provisioned, simply select OPEN JUPYTERLAB to begin.
Since PyTorch dependencies are already configured, all you need to do is include one line in your notebook to start using Lightning: !pip install pytorch-lightning.
If you'd like to access the sample for this tutorial, you can open a new terminal (File > New > Terminal), and then run git clone https://github.com/GoogleCloudPlatform/ai-platform-samples. You'll find the sample in ai-platform samples > notebooks > samples > pytorch > lightning.
With Lightning, using PyTorch is more accessible than ever before. With best practices and helpful utilities embedded in the framework, you can focus on solving ML problems. Since Lightning produces standard PyTorch code, you'll be able to leverage Google Cloud's PyTorch support for developing, training, and serving your models.