オンライン予測

このページでは、AutoML Tables からオンライン(単一、低レイテンシの)予測を取得する方法について説明します。

はじめに

モデルを作成(トレーニング)した後、モデルをデプロイしてオンライン(リアルタイム)予測をリクエストできます。オンライン予測では 1 行のデータを受け入れ、そのデータのモデルに基づいて予測結果を提供します。ビジネス ロジックフローへの入力として予測が必要な場合は、オンライン予測を使用します。

オンライン予測をリクエストするには、事前にモデルをデプロイする必要があります。デプロイ済みモデルには料金が発生します。オンライン予測の終了後にモデルのデプロイ解除を行うと、追加のデプロイ料金の発生を防ぐことができます。詳細

予測の実行を継続するには、モデルを 6 か月ごとに再トレーニングする必要があります。

オンライン予測の取得

Console

通常は、オンライン予測を使用してビジネス アプリケーション内から予測を取得しますが、Google Cloud コンソールで AutoML Tables を使用すれば、特定の入力セットを用いてデータ形式やモデルをテストできます。

  1. Google Cloud コンソールの [AutoML Tables] ページに移動します。

    [AutoML テーブル] ページに移動

  2. [モデル] を選択し、使用するモデルを選択します。

  3. [テストと使用] タブを選択し、[オンライン予測] をクリックします。

  4. モデルがまだデプロイされていない場合は、[モデルをデプロイ] をクリックしてデプロイします。

    オンライン予測を使用するには、モデルをデプロイする必要があります。モデルのデプロイでは料金が発生します。詳しくは料金のページをご覧ください。

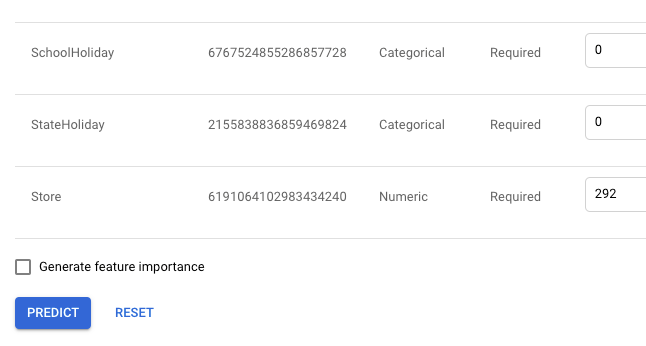
  5. 表示されたテキスト ボックスに入力値を指定します。

    または、JSON 形式で入力値を指定するには、[JSON コードビュー] を選択します。

  6. 各特徴が予測に及ぼす影響を確認するには、[特徴量の重要度を生成] を選択します。

    Google Cloud Console では、読みやすくするためにローカル特徴量の重要度の値が切り捨てられます。正確な値が必要な場合は、Cloud AutoML API を使用して予測をリクエストします。

    特徴量の重要度については、ローカル特徴量の重要度をご覧ください。

  7. [予測] をクリックして予測を取得します。

    AutoML Tables の予測ページ

    予測結果の解釈については、予測結果の解釈をご覧ください。ローカル特徴量の重要度については、ローカル特徴量の重要度をご覧ください。

  8. (省略可)オンライン予測を追加でリクエストする予定がない場合は、[モデルのデプロイ解除] をクリックしてモデルのデプロイを解除すると、追加のデプロイ料金の発生を防ぐことができます。

curl

特徴値を指定して JSON オブジェクトを作成し、一連の値の予測をリクエストします。その後、model.predict メソッドを使用して予測を取得します。

値には、トレーニングに含めたものと同じ列が含まれている必要があります。また、含まれる列のリンクをクリックして、値の順序を [評価] タブの表示順序と同じになるように変更してください。

値を並べ替える場合は、一連の列スペック ID を値の順に挿入することもできます。列スペック ID はモデル オブジェクトから取得できます。この ID は TablesModelMetadata.inputFeatureColumnSpecs フィールドで確認できます。

Row オブジェクトの各値(特徴)のデータ型は、その特徴の AutoML Tables データ型によって異なります。AutoML Tables の各データ型で使用できるデータ型の一覧については、Row オブジェクトの形式をご覧ください。

  1. モデルをまだデプロイしていない場合は、ここでデプロイします。詳細

  2. 予測をリクエストします。

    リクエストのデータを使用する前に、次のように置き換えます。

    • endpoint: グローバル ロケーションの場合は automl.googleapis.com、EU リージョンの場合は eu-automl.googleapis.com
    • project-id: Google Cloud プロジェクト ID
    • location:リソースのロケーション:グローバルの場合はus-central1、EUの場合はeu
    • model-id:モデルの ID。例: TBL543
    • valueN: 正しい順序で並べ替えた各列の値。

    HTTP メソッドと URL:

    POST https://endpoint/v1beta1/projects/project-id/locations/location/models/model-id:predict

    リクエストの本文(JSON):

    {
      "payload": {
        "row": {
          "values": [
            value1, value2,...
          ]
        }
      }
    }
    

    リクエストを送信するには、次のいずれかのオプションを選択します。

    curl

    リクエスト本文を request.json という名前のファイルに保存して、次のコマンドを実行します。

    curl -X POST \
    -H "Authorization: Bearer $(gcloud auth print-access-token)" \
    -H "x-goog-user-project: project-id" \
    -H "Content-Type: application/json; charset=utf-8" \
    -d @request.json \
    "https://endpoint/v1beta1/projects/project-id/locations/location/models/model-id:predict"

    PowerShell

    リクエスト本文を request.json という名前のファイルに保存して、次のコマンドを実行します。

    $cred = gcloud auth print-access-token
    $headers = @{ "Authorization" = "Bearer $cred"; "x-goog-user-project" = "project-id" }

    Invoke-WebRequest `
    -Method POST `
    -Headers $headers `
    -ContentType: "application/json; charset=utf-8" `
    -InFile request.json `
    -Uri "https://endpoint/v1beta1/projects/project-id/locations/location/models/model-id:predict" | Select-Object -Expand Content
    ローカル特徴量の重要度の結果を含めるには、feature_importance パラメータを含めます。ローカル特徴量の重要度の詳細については、ローカル特徴量の重要度をご覧ください。

  3. 結果を表示します。

    分類モデルの場合は、次の例のような出力が表示されます。返される 2 つの結果にはそれぞれ、信頼度の推定値(score)が付いています。信頼度の推定値は 0~1 で表され、モデルが判断した予測値の正確度を示しています。信頼度の推定値の使用方法の詳細については、予測結果の解釈をご覧ください。

    {
     "payload": [
       {
         "tables": {
           "score": 0.11210235,
           "value": "1"
         }
       },
       {
         "tables": {
           "score": 0.8878976,
           "value": "2"
         }
       }
     ]
    }
    

    回帰モデルの場合、結果には予測値と予測区間が含まれます。予測区間は、95%の確率で正しい値を含む区間を与えます(モデルがトレーニングされたデータに基づきます)。予測値は区間の中心にならない場合があります。これは、予測区間の中心が中央値であるのに対して、予測値は期待値(平均値)であるためです。

    {
     "payload": [
       {
         "tables": {
           "value": 207.18209838867188,
           "predictionInterval": {
             "start": 29.712770462036133,
             "end": 937.42041015625
           }
         }
       }
     ]
    }
    

    ローカル特徴量の重要度の結果については、ローカル特徴量の重要度をご覧ください。

  4. (省略可)オンライン予測のリクエスト終了後にモデルのデプロイ解除を行うと、追加のデプロイ料金の発生を防ぐことができます。詳細

Java

リソースが EU リージョンにある場合は、エンドポイントを明示的に設定する必要があります。詳細

import com.google.cloud.automl.v1beta1.AnnotationPayload;
import com.google.cloud.automl.v1beta1.ExamplePayload;
import com.google.cloud.automl.v1beta1.ModelName;
import com.google.cloud.automl.v1beta1.PredictRequest;
import com.google.cloud.automl.v1beta1.PredictResponse;
import com.google.cloud.automl.v1beta1.PredictionServiceClient;
import com.google.cloud.automl.v1beta1.Row;
import com.google.cloud.automl.v1beta1.TablesAnnotation;
import com.google.protobuf.Value;
import java.io.IOException;
import java.util.ArrayList;
import java.util.List;

class TablesPredict {

  public static void main(String[] args) throws IOException {
    // TODO(developer): Replace these variables before running the sample.
    String projectId = "YOUR_PROJECT_ID";
    String modelId = "YOUR_MODEL_ID";
    // Values should match the input expected by your model.
    List<Value> values = new ArrayList<>();
    // values.add(Value.newBuilder().setBoolValue(true).build());
    // values.add(Value.newBuilder().setNumberValue(10).build());
    // values.add(Value.newBuilder().setStringValue("YOUR_STRING").build());
    predict(projectId, modelId, values);
  }

  static void predict(String projectId, String modelId, List<Value> values) throws IOException {
    // Initialize client that will be used to send requests. This client only needs to be created
    // once, and can be reused for multiple requests. After completing all of your requests, call
    // the "close" method on the client to safely clean up any remaining background resources.
    try (PredictionServiceClient client = PredictionServiceClient.create()) {
      // Get the full path of the model.
      ModelName name = ModelName.of(projectId, "us-central1", modelId);
      Row row = Row.newBuilder().addAllValues(values).build();
      ExamplePayload payload = ExamplePayload.newBuilder().setRow(row).build();

      // Feature importance gives you visibility into how the features in a specific prediction
      // request informed the resulting prediction. For more info, see:
      // https://cloud.google.com/automl-tables/docs/features#local
      PredictRequest request =
          PredictRequest.newBuilder()
              .setName(name.toString())
              .setPayload(payload)
              .putParams("feature_importance", "true")
              .build();

      PredictResponse response = client.predict(request);

      System.out.println("Prediction results:");
      for (AnnotationPayload annotationPayload : response.getPayloadList()) {
        TablesAnnotation tablesAnnotation = annotationPayload.getTables();
        System.out.format(
            "Classification label: %s%n", tablesAnnotation.getValue().getStringValue());
        System.out.format("Classification score: %.3f%n", tablesAnnotation.getScore());
        // Get features of top importance
        tablesAnnotation
            .getTablesModelColumnInfoList()
            .forEach(
                info ->
                    System.out.format(
                        "\tColumn: %s - Importance: %.2f%n",
                        info.getColumnDisplayName(), info.getFeatureImportance()));
      }
    }
  }
}

Node.js

リソースが EU リージョンにある場合は、エンドポイントを明示的に設定する必要があります。詳細


/**
 * Demonstrates using the AutoML client to request prediction from
 * automl tables using csv.
 * TODO(developer): Uncomment the following lines before running the sample.
 */
// const projectId = '[PROJECT_ID]' e.g., "my-gcloud-project";
// const computeRegion = '[REGION_NAME]' e.g., "us-central1";
// const modelId = '[MODEL_ID]' e.g., "TBL000000000000";
// const inputs = [{ numberValue: 1 }, { stringValue: 'value' }, { stringValue: 'value2' } ...]

const automl = require('@google-cloud/automl');

// Create client for prediction service.
const automlClient = new automl.v1beta1.PredictionServiceClient();

// Get the full path of the model.
const modelFullId = automlClient.modelPath(projectId, computeRegion, modelId);

async function predict() {
  // Set the payload by giving the row values.
  const payload = {
    row: {
      values: inputs,
    },
  };

  // Params is additional domain-specific parameters.
  // Currently there is no additional parameters supported.
  const [response] = await automlClient.predict({
    name: modelFullId,
    payload: payload,
    params: {feature_importance: true},
  });
  console.log('Prediction results:');

  for (const result of response.payload) {
    console.log(`Predicted class name: ${result.displayName}`);
    console.log(`Predicted class score: ${result.tables.score}`);

    // Get features of top importance
    const featureList = result.tables.tablesModelColumnInfo.map(
      columnInfo => {
        return {
          importance: columnInfo.featureImportance,
          displayName: columnInfo.columnDisplayName,
        };
      }
    );
    // Sort features by their importance, highest importance first
    featureList.sort((a, b) => {
      return b.importance - a.importance;
    });

    // Print top 10 important features
    console.log('Features of top importance');
    console.log(featureList.slice(0, 10));
  }
}
predict();

Python

AutoML Tables のクライアント ライブラリには、AutoML Tables API を簡単に使用できるようにする追加の Python メソッドが含まれています。これらのメソッドは、ID ではなく名前でデータセットとモデルを参照します。データセット名とモデル名は一意である必要があります。詳細については、クライアント リファレンスをご覧ください。

リソースが EU リージョンにある場合は、エンドポイントを明示的に設定する必要があります。詳細

# TODO(developer): Uncomment and set the following variables
# project_id = 'PROJECT_ID_HERE'
# compute_region = 'COMPUTE_REGION_HERE'
# model_display_name = 'MODEL_DISPLAY_NAME_HERE'
# inputs = {'value': 3, ...}

from google.cloud import automl_v1beta1 as automl

client = automl.TablesClient(project=project_id, region=compute_region)

if feature_importance:
    response = client.predict(
        model_display_name=model_display_name,
        inputs=inputs,
        feature_importance=True,
    )
else:
    response = client.predict(model_display_name=model_display_name, inputs=inputs)

print("Prediction results:")
for result in response.payload:
    print(f"Predicted class name: {result.tables.value}")
    print(f"Predicted class score: {result.tables.score}")

    if feature_importance:
        # get features of top importance
        feat_list = [
            (column.feature_importance, column.column_display_name)
            for column in result.tables.tables_model_column_info
        ]
        feat_list.sort(reverse=True)
        if len(feat_list) < 10:
            feat_to_show = len(feat_list)
        else:
            feat_to_show = 10

        print("Features of top importance:")
        for feat in feat_list[:feat_to_show]:
            print(feat)

次のステップ