Google Cloud
High performance computing
Google Cloud's HPC solutions are easy to use, built on the latest technology, and cost-optimized to provide a flexible and powerful HPC foundation.
Overview
Powerful HPC infrastructure

Advanced HPC services and tools
Deploy HPC quickly with the Cloud HPC Toolkit's prebuilt best-practices HPC blueprints. Deploy preconfigured modules for Compute Engine, Google Kubernetes Engine, Batch, or individual VMs.
Access data on Parallelstore, Filestore, Cloud Storage, or partner storage offerings.
Speed up tightly coupled workloads with compact placement policies, gVNIC, and the HPC VM image.

Cost-optimized HPC
Manage costs as you scale with budgets and committed use discounts. Save up to 91% with Spot VMs for flexible, check-pointable, and fault-tolerant workloads. Report on costs at a granular level easily with built-in labels in the Cloud HPC Toolkit.

How It Works
Google Cloud’s HPC solutions are easy to use, built on the latest technology, and cost-optimized to provide a flexible and powerful HPC foundation.
The Cloud HPC Toolkit enables you to easily launch new HPC environments.

Common Uses
Drug discovery
Expand horizons
Drug discovery is a challenging but life-saving workload in high performance computing. Google Cloud has the tools and expertise to deliver results when it matters most.
Our HPC solutions make it easy and quick to run popular computational chemistry, molecular dynamics, and virtual drug screening workloads.
Dive in to learn how customers have accelerated their drug discovery workloads on Google Cloud, and about the Cloud HPC Toolkit's best practices blueprints for drug discovery workloads.


Check the other tabs for more information on drug discovery workloads.
Schrödinger
Pharmaceutical and drug discovery researchers rely on Google Cloud to run their research workloads.
Schrödinger uses physics-based simulations carried out on the cloud in combination with machine learning to accelerate the discovery of new medicines and materials.


How-tos
Expand horizons
Drug discovery is a challenging but life-saving workload in high performance computing. Google Cloud has the tools and expertise to deliver results when it matters most.
Our HPC solutions make it easy and quick to run popular computational chemistry, molecular dynamics, and virtual drug screening workloads.
Dive in to learn how customers have accelerated their drug discovery workloads on Google Cloud, and about the Cloud HPC Toolkit's best practices blueprints for drug discovery workloads.
Check the other tabs for more information on drug discovery workloads.
Customer examples
Schrödinger
Pharmaceutical and drug discovery researchers rely on Google Cloud to run their research workloads.
Schrödinger uses physics-based simulations carried out on the cloud in combination with machine learning to accelerate the discovery of new medicines and materials.
Financial services
Risk simulation and quantitative research
Quantitative managers are increasingly relying on access to high performance computing (HPC) resources to develop their investment strategies. While buy-side firms predominantly used on-premises infrastructure in the past, both quants and risk professionals can benefit from the computational power of the cloud.
Learn more about how Google Cloud is enabling financial services organizations to accelerate their toughest workloads.


Goldman Sachs delivers scale, agility, and trust with Google
Goldman Sachs is using Google Cloud to enable secure growth, agility, and the trust of its clients. By delivering massive compute power and infinite scale, Google Cloud is helping the global firm focus on new challenges, evolve quickly, and deliver new innovations to serve its clients’ needs in an ever-changing economy.
“As Goldman Sachs thought about scaling its own business and how much more intense that risk management activity could become in the world, Google Cloud was an obvious choice.”


How-tos
Risk simulation and quantitative research
Quantitative managers are increasingly relying on access to high performance computing (HPC) resources to develop their investment strategies. While buy-side firms predominantly used on-premises infrastructure in the past, both quants and risk professionals can benefit from the computational power of the cloud.
Learn more about how Google Cloud is enabling financial services organizations to accelerate their toughest workloads.
Customer examples
Goldman Sachs delivers scale, agility, and trust with Google
Goldman Sachs is using Google Cloud to enable secure growth, agility, and the trust of its clients. By delivering massive compute power and infinite scale, Google Cloud is helping the global firm focus on new challenges, evolve quickly, and deliver new innovations to serve its clients’ needs in an ever-changing economy.
“As Goldman Sachs thought about scaling its own business and how much more intense that risk management activity could become in the world, Google Cloud was an obvious choice.”
Electronics design automation
Chip design and verification in the cloud
Google Cloud HPC solutions can help electronics design automation (EDA) companies accelerate their design and verification cycles, improve product quality, and reduce costs. Google Cloud offers a wide range of HPC services and solutions, including the Cloud HPC Toolkit, Batch, and partner integrations. These solutions can be used to create powerful and flexible HPC environments that can run EDA workloads in a license-optimized manner.


How-tos
Chip design and verification in the cloud
Google Cloud HPC solutions can help electronics design automation (EDA) companies accelerate their design and verification cycles, improve product quality, and reduce costs. Google Cloud offers a wide range of HPC services and solutions, including the Cloud HPC Toolkit, Batch, and partner integrations. These solutions can be used to create powerful and flexible HPC environments that can run EDA workloads in a license-optimized manner.
Computer-aided engineering
Fluid dynamics, structural mechanics, energy exploration
Whether you're running computational fluid dynamics, finite element analysis, or reservoir simulations, computer-aided engineering (CAE) is at the heart of what you do. Running these simulations efficiently and in a timely manner is critical.
Google Cloud has the HPC solutions to meet your needs, and deliver on-time performance to edge out the competition.


AirShaper
AirShaper is a cloud-based CFD platform that helps designers and engineers to easily run aerodynamic simulations to improve the performance and efficiency of cars, drones, motorbikes, and even athletes themselves.


How-tos
Fluid dynamics, structural mechanics, energy exploration
Whether you're running computational fluid dynamics, finite element analysis, or reservoir simulations, computer-aided engineering (CAE) is at the heart of what you do. Running these simulations efficiently and in a timely manner is critical.
Google Cloud has the HPC solutions to meet your needs, and deliver on-time performance to edge out the competition.
Customer examples
AirShaper
AirShaper is a cloud-based CFD platform that helps designers and engineers to easily run aerodynamic simulations to improve the performance and efficiency of cars, drones, motorbikes, and even athletes themselves.
Weather forecasting
Climate modeling on Google Cloud
Weather forecasters can run popular climate models, like the Weather Research and Forecasting (WRF) modeling system, GFS FV3, ECMWF, and more, easily on Google Cloud using the Google Cloud HPC Toolkit, and achieve the performance of an on-premises supercomputer for a fraction of the price.
Get your climate simulations up and running on Google Cloud in minutes, and respond to new data in record time.


How-tos
Climate modeling on Google Cloud
Weather forecasters can run popular climate models, like the Weather Research and Forecasting (WRF) modeling system, GFS FV3, ECMWF, and more, easily on Google Cloud using the Google Cloud HPC Toolkit, and achieve the performance of an on-premises supercomputer for a fraction of the price.
Get your climate simulations up and running on Google Cloud in minutes, and respond to new data in record time.
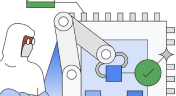
Life sciences and genomics
Make new discoveries
Google Cloud's HPC solutions can help researchers in genomics and life sciences make new discoveries. By providing access to powerful computing resources, Google Cloud can help researchers analyze large datasets, run simulations, and develop new medical treatments more quickly and efficiently. Google Cloud also offers a variety of HPC- and life sciences-specific tools and services, such as Batch and the Google Multiomics Suite.


Stanford Center for Genomics and Personalized Medicine
Building a mega-scale genetic variation analysis pipeline using Google Genomics and Google BigQuery, SCGPM can analyze hundreds of entire genomes in days and return query results in seconds while providing reliable security for DNA data.


How-tos
Make new discoveries
Google Cloud's HPC solutions can help researchers in genomics and life sciences make new discoveries. By providing access to powerful computing resources, Google Cloud can help researchers analyze large datasets, run simulations, and develop new medical treatments more quickly and efficiently. Google Cloud also offers a variety of HPC- and life sciences-specific tools and services, such as Batch and the Google Multiomics Suite.
Customer examples
Stanford Center for Genomics and Personalized Medicine
Building a mega-scale genetic variation analysis pipeline using Google Genomics and Google BigQuery, SCGPM can analyze hundreds of entire genomes in days and return query results in seconds while providing reliable security for DNA data.
Energy
Accelerating energy workloads
Google Cloud helps power and utility companies return results faster with a range of industry-leading and energy-specific solutions, partners, and services.
Customers like PGS, TGS, and Schlumberger rely on Google Cloud to handle their mission-critical, time-sensitive workloads. Check out the Customer examples tab to learn how PGS replaced their 260,000 core Cray supercomputers with Google Cloud.


PGS replaces 260,000 core Cray supercomputers
By leveraging the power of cloud computing and the flexibility of choosing between different multiple types of compute and storage setups, PGS has taken their HPC on a digital transformation going from Capex heavy on-premises owned supercomputers to a scalable opex-oriented setup on Google Cloud.

How-tos
Accelerating energy workloads
Google Cloud helps power and utility companies return results faster with a range of industry-leading and energy-specific solutions, partners, and services.
Customers like PGS, TGS, and Schlumberger rely on Google Cloud to handle their mission-critical, time-sensitive workloads. Check out the Customer examples tab to learn how PGS replaced their 260,000 core Cray supercomputers with Google Cloud.
Customer examples
PGS replaces 260,000 core Cray supercomputers
By leveraging the power of cloud computing and the flexibility of choosing between different multiple types of compute and storage setups, PGS has taken their HPC on a digital transformation going from Capex heavy on-premises owned supercomputers to a scalable opex-oriented setup on Google Cloud.
Cloud HPC Toolkit
Learn how the toolkit works, then deploy a blueprint
Read the latest HPC blogs
Architect your HPC environment
Learn the best practices
Deploy a blueprint
Partners & Integration
Google Cloud HPC partners


Schedulers and platforms
Integrators
Independent software vendors
FAQ
How should I choose between these Google Cloud services to run high performance computing (HPC) workloads: Compute Engine, Google Kubernetes Engine, Batch, and Cloud Run?
The best Google Cloud service for running HPC workloads depends on your specific needs. There are a number of factors to consider when architecting your HPC environment. Some of those factors include:
Control: How much control do you need over your HPC environment?
Scalability: How scalable does your HPC environment need to be?
Cost: How much are you willing to spend on your HPC environment?
Ease of use: How easy do you need your HPC environment to be to use?
Once you have considered these factors, you can choose the Google Cloud service that is best for you. Here is a brief overview of each service, and how they relate to the above factors:
Compute Engine: Compute Engine is an infrastructure as a service (IaaS) offering that provides virtual machines (VMs) that can be used to run HPC workloads. Compute Engine gives you the most control and scalability over your HPC environment.
Google Kubernetes Engine: Google Kubernetes Engine is a managed Kubernetes service that can be used to run containerized HPC workloads. Google Kubernetes Engine is a good option if you want to use containerized applications, or want the ease of use that Kubernetes brings to managing your compute resources.
Batch: Batch is a managed service for running batch jobs. Batch is a good option if you want to run on Compute Engine, have a large number of HPC jobs that you need to run on a regular basis, and don't need deep customization of the infrastructure or scheduling policies.
Cloud Run: Cloud Run is a serverless platform that can be used to run small, simple HPC workloads. Cloud Run is a good option if you want to run HPC workloads without having to manage infrastructure. See the Cloud Run resource limits to understand the limitations.
Don't hesitate to reach out to the Google Cloud HPC team to discuss your requirements in depth.
How should I choose between the Cloud HPC Toolkit and an HPC as a service platform partner for my HPC workloads?
The choice between the Cloud HPC Toolkit and an HPC as a service platform partner depends on your specific needs. Here are some factors to consider when choosing between the Cloud HPC Toolkit and an HPC as a service platform partner:
Control: How much control do you need over your HPC environment?
Ease of use: How easy do you need your HPC environment to be to use?
Cost: How much are you willing to spend on your HPC environment?
Expertise: How much expertise do you have in HPC?
Once you have considered these factors, you can choose the option that is best for you. Here is a brief overview of each option:
Cloud HPC Toolkit
The Cloud HPC Toolkit is a set of open source tools that can be used to deploy and manage HPC workloads on Google Cloud. The toolkit provides a number of features, including being open source, Terraform and Cloud Foundation Toolkit based, composable, and integrated with Google Cloud services and popular HPC tooling and applications. The Cloud HPC Toolkit can be used through a web-based user interface with the open front end.
The Cloud HPC Toolkit is a good option if you want to have a high degree of control over your HPC environment. The Cloud HPC Toolkit was built to provide better ease of use than building DIY HPC environments. It both provides more configurability and requires more configuration than an HPC as a service platform from a partner, and therefore is best suited for users with more HPC expertise.
HPC as a service platform partner
An HPC as a service platform partner is a third-party company that provides a managed HPC platform on Google Cloud. These platforms typically provide a number of features, including preconfigured HPC environments, user-friendly interfaces, and technical support.
An HPC as a service platform partner is a good option if you want to get started with HPC quickly and easily, or want to provide users a simple, GUI-based user experience. However, they can be less flexible, or include extra costs.
In general, the Cloud HPC Toolkit is a good option for users who have a high degree of expertise in HPC and want a high degree of control over their HPC environment. HPC as a service platform partners are a good option for users who want to get started with HPC quickly and easily.


