Protect your Compute Engine resources with keys managed in Cloud Key Management Service
Sundar Pichai
CEO of Google and Alphabet
In Google Cloud Platform, customer data stored at rest is always encrypted by default using multiple layers of encryption technology. We also offer a continuum of encryption key management options to help meet the security requirements of your organization.
Did you know there is now beta functionality you can use to further increase protection of your Compute Engine disks, images and snapshots using your own encryption keys stored and managed with Cloud Key Management Service (KMS)? These customer-managed encryption keys (CMEKs) provide you with granular control over which disks, images and snapshots will be encrypted.
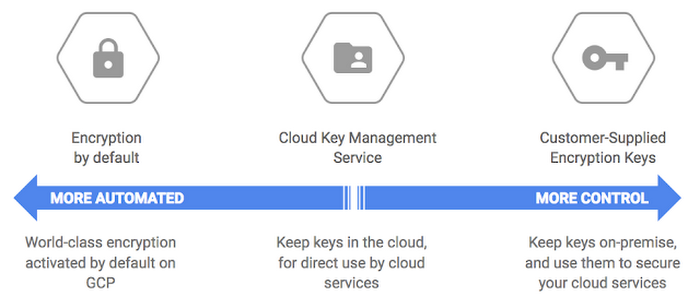
You can see below that on one end of the spectrum, Compute Engine automatically encrypts disks and manages keys on your behalf. On the other end, you can continue using your customer-supplied encryption keys (CSEK) for your most sensitive or regulated workloads, if you desire.
This feature helps you strike a balance between ease of use and control: Your keys are in the cloud, but still under your management. This option is ideal for organizations in regulated industries that need to meet strict requirements for data protection, but which don’t want to deal with the overhead of creating custom solutions to generate and store keys, manage and record key access, etc.
Setting up CMEK in Compute Engine helps quickly deliver peace of mind to these organizations, because they control access to the disk by virtue of controlling the key.
How to create a CMEK-supported disk
Getting started with the CMEK feature is easy. Follow the steps below to create and attach a Compute Engine disk that is encrypted with a key that you control.You’ll need to create a key ring and key in KMS. This—and all the rest of the steps below—can be accomplished in several ways: through the Developer Console, APIs and gcloud. In this tutorial, we’ll be using the developer console. We’ll start on the Cryptographic Keys page, where we’ll select “Create Key Ring.”
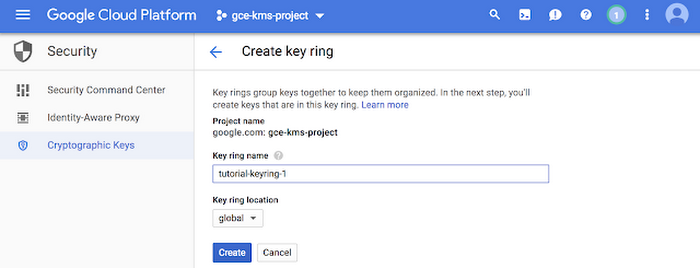
Give your keyring a name. Do the same with the key the next page. For this tutorial, feel free to leave all the other fields as-is.
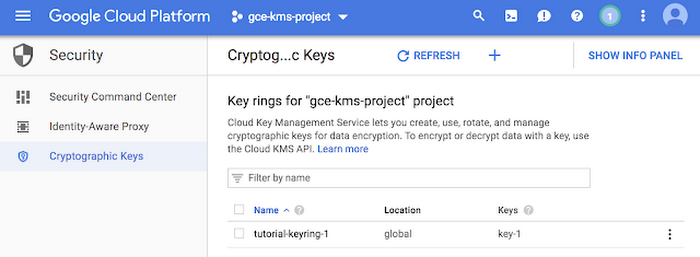
Having finished those steps, you now have a keyring with a single AES-256 encryption key. In the screenshot below, you can see it as “tutorial-keyring-1.” And since the keyring is managed by KMS, it is already fully integrated with Cloud Identity and Access Management (IAM) and Cloud Audit Logging, so you can easily manage permissions and monitor how it’s used.
With the key in place, you can start encrypting disks with CMEK keys. The instructions below are for creating a new instance and protecting its boot disk with a CMEK key. Note that it is also possible to create new encrypted disks from snapshots and images and attach them to existing VMs, or even to encrypt the underlying snapshots and images themselves.
First we’ll go to the VM instances page, and create a new VM instance.
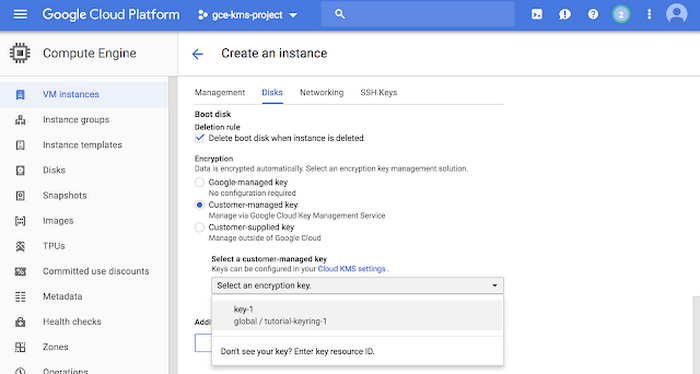
On the instance creation page, expand the “Management, Disks, Networking and SSH keys” section and go to the “Disks” tab. There, you’ll see options for the three different encryption options described above. Select “Custom-managed key” and select the appropriate key from the dropdown menu.
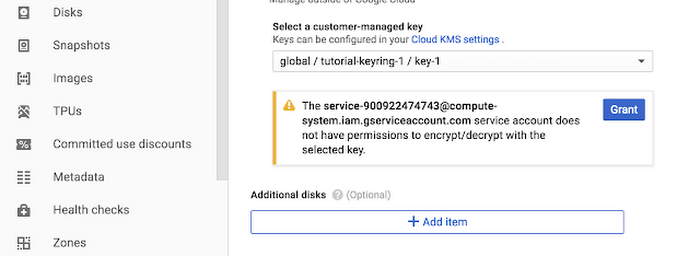
Note that if this is your first time doing this, you may see the following dialogue. This is expected - you’ll need to grant this service account permissions. In turn, this service account is used by Compute Engine to do the actual encryption and decryption of disks, images and snapshots.
Once you’ve done this, confirm the VM creation by selecting “Create”.
And there you have it! With a few easy steps, you can create a key in Cloud KMS, encrypt a disk with the key and mount it to a VM. Since you manage the key, you can choose at any time to suspend or delete the key. If that happens, resources protected by that key won’t start until key access is restored.