[[["이해하기 쉬움","easyToUnderstand","thumb-up"],["문제가 해결됨","solvedMyProblem","thumb-up"],["기타","otherUp","thumb-up"]],[["이해하기 어려움","hardToUnderstand","thumb-down"],["잘못된 정보 또는 샘플 코드","incorrectInformationOrSampleCode","thumb-down"],["필요한 정보/샘플이 없음","missingTheInformationSamplesINeed","thumb-down"],["번역 문제","translationIssue","thumb-down"],["기타","otherDown","thumb-down"]],["최종 업데이트: 2025-08-18(UTC)"],[[["\u003cp\u003eThis guide focuses on setting up navigation for Apigee and Apigee hybrid portals by updating both the header and footer navigation bars.\u003c/p\u003e\n"],["\u003cp\u003eThe primary action is adding a "Get Started" menu item to the top and bottom navigation bars.\u003c/p\u003e\n"],["\u003cp\u003eUsers will utilize the portal's Menus page to create and arrange the new "Get Started" menu item.\u003c/p\u003e\n"],["\u003cp\u003eOnce added, the "Get Started" menu item should be repositioned to precede the "APIs" section in both navigation bars.\u003c/p\u003e\n"],["\u003cp\u003eThe process concludes by publishing these navigation changes to the live portal and verifying the placement of the "Get Started" page.\u003c/p\u003e\n"]]],[],null,["# Step 5: Set up navigation\n\n*This page\napplies to **Apigee** and **Apigee hybrid**.*\n\n\n*View [Apigee Edge](https://docs.apigee.com/api-platform/get-started/what-apigee-edge) documentation.*\n\nNext, you'll update the top (header) and bottom (footer) navigation bars to include the **Get Started** page.\n\nTo set up navigation:\n\n1. Click **Menus** on the portals details page. \n First you'll update the top (header) navigation bar to add **Get Started** as a menu item. Notice that **Header** is selected by default in the menu drop-down.\n2. Open the navigation menu dialog.\n\n ### Cloud Console UI\n\n Click **+ Menu Items**.\n\n ### Classic UI\n\n Click **+ Menu Item**.\n3. In the navigation menu dialog, enter the following details:\n\n \u003cbr /\u003e\n\n4. Click **Create**.\n\n5. Rearrange the **Get Started** menu item.\n\n ### Cloud Console UI\n\n 1. Click the arrow_upward **Up arrow** on the **Get started** row to move it up.\n 2. Click it repeatedly until **Get started** is after **Home** and before **APIs**.\n\n ### Classic UI\n\n 1. Position your cursor over the **Get Started** menu item to display the actions.\n 2. Click and hold the mouse button over the handle () that appears to the left of the menu item name.\n 3. Drag the menu item to position it before APIs and release the mouse button. \n6. Click **Footer** in the menu drop-down to update the bottom (footer)\n navigation bar.\n\n7. Repeat steps 2 through 5 to add **Get Started** as a menu item in the\n bottom (footer) navigation bar.\n\n8. Publish your changes to the live portal.\n\n ### Cloud Console UI\n\n Click **Publish menu**.\n\n ### Classic UI\n\n\n Click **Publish**.\n9. Open the live portal in a new browser tab\n (or refresh the tab in which it is already open).\n\n ### Cloud Console UI\n\n Click **View Live Portal**.\n\n ### Classic UI\n\n Click **Live Portal**.\n10. Click **Get Started** in the top navigation bar to display the\n Get Started page.\n\nNext, you'll publish an API to the portal.\n\n\n[1](/apigee/docs/api-platform/publish/portal/get-started/create-portal)\n\n\n[2](/apigee/docs/api-platform/publish/portal/get-started/customize-color-palette)\n\n\n[3](/apigee/docs/api-platform/publish/portal/get-started/customize-logo)\n\n\n[4](/apigee/docs/api-platform/publish/portal/get-started/edit-page)\n\n\n[5](/apigee/docs/api-platform/publish/portal/get-started/set-up-navigation)\n\n\n[(NEXT) Step 6: Publish an API](/apigee/docs/api-platform/publish/portal/get-started/publish-api)\n\n\u003cbr /\u003e"]]

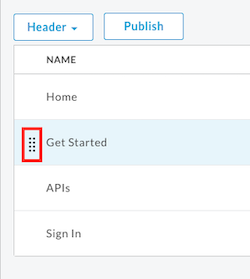
 ) 위로 마우스 버튼을 길게 클릭합니다.