Auf dieser Seite finden Sie eine Anleitung zum Erstellen einer lokalen Entwicklungsumgebung für Apigee API Management in Cloud Code für VS Code, die Gemini Code Assist für das Design und die Entwicklung von OpenAPI-Spezifikationen unterstützt.
Informationen zu den Funktionen in der lokalen Entwicklungsumgebung finden Sie unter
Übersicht über die lokale Entwicklung mit Apigee.
Für die Einrichtung müssen Sie beide Abschnitte dieser Anleitung durcharbeiten:
Für die Einrichtung und Verwendung von Apigee in VS Code benötigen Sie Folgendes:
Ein Google Cloud -Projekt, in das Sie sich in Ihrer lokalen Entwicklungsumgebung einloggen können. Das Projekt muss nicht für Apigee bereitgestellt werden, damit Sie Gemini Code Assist zum Entwickeln von API-Spezifikationen verwenden können. Es muss jedoch für Apigee bereitgestellt werden, damit Sie einen lokalen Apigee-Arbeitsbereich erstellen können, in dem Sie API-Proxys entwickeln und testen können. Die Apigee-Bereitstellung ist auch erforderlich, um
Apigee API-Hub-APIs im Apigee-Bereich von Cloud Code zu sehen.
(Empfohlen) API-Hub, der für Ihr Projekt bereitgestellt wurde. Für diese Funktionen ist API-Hub erforderlich:
Wenn Sie den API-Hub nicht Ihrem Projekt hinzufügen möchten, können Sie das Projekt stattdessen einem anderen Projekt zuordnen, für das der API-Hub aktiviert ist. Informationen zum Anhängen eines Projekts an einen API-Hub finden Sie unter
Laufzeitprojekt an einen API-Hub anhängen.
Sie sind mit VS Code vertraut und wissen, wie Sie VS Code verwalten und gängige Aktionen ausführen, z. B. auf Einstellungen zugreifen und Erweiterungen installieren. Weitere Informationen finden Sie in der VS Code-Dokumentation.
VS Code und die Cloud Code-Erweiterung installieren
In diesem Abschnitt finden Sie die Installationsanleitung für VS Code und die Cloud Code-Erweiterung in VS Code. Dies ist der erste Schritt beim Einrichten der lokalen Entwicklung für Apigee. Er ist erforderlich, um alle Funktionen der lokalen Entwicklung von Apigee zu verwenden, einschließlich Gemini Code Assist.
So installieren Sie VS Code und die Cloud Code-Erweiterung:
Laden Sie den
Visual Studio Code (VS Code) auf Ihren lokalen Computer herunter und installieren Sie ihn, falls er noch nicht installiert ist.
Installieren Sie die Cloud Code-Erweiterung, wie unter
Cloud Code-Erweiterung installieren beschrieben. Wenn Sie
API-Proxys in Ihrer lokalen Umgebung verwalten möchten, installieren Sie Docker im Rahmen des Prozesses.
(Empfohlen) Aktivieren Sie automatische Updates für die Cloud Code-Erweiterung. Suchen Sie in den Einstellungen nach Erweiterungen: Automatische Aktualisierung und aktivieren Sie die Option für alle Erweiterungen oder für die Cloud Code-Erweiterung.
Installieren Sie die Gemini Code Assist-Erweiterung in VS Code.
(Empfohlen) Aktivieren Sie automatische Updates für die Gemini Code Assist-Erweiterung. Suchen Sie in den Einstellungen nach Erweiterungen: Automatische Aktualisierung und aktivieren Sie die Option für alle Erweiterungen oder für die Gemini Code Assist-Erweiterung.
Installieren Sie die
gcloud CLI, falls noch nicht geschehen.
Aktivieren Sie die Gemini for Google Cloud API für das Projekt. Für diesen Schritt benötigen Sie die Rolle Service Usage Admin (Administrator für Dienstnutzung).
Melden Sie sich in VS Code in beiden Erweiterungen, Gemini Code Assist und Cloud Code, in Ihrem Google Cloud Projekt an. Dazu haben Sie folgende Möglichkeiten:
Fügen Sie das Projekt manuell in die Datei settings.json ein:
Wählen Sie das Projekt aus, wenn Sie dazu aufgefordert werden:
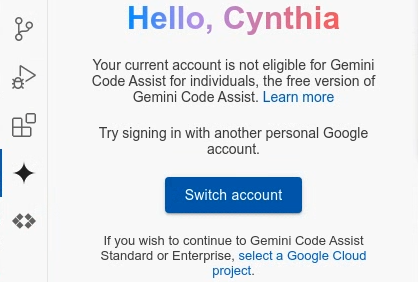
Wenn Sie den Gemini Code Assist-Chat öffnen und nicht in einem Projekt angemeldet sind, für das Gemini aktiviert ist, wird eine entsprechende Meldung mit einer Möglichkeit zur Anmeldung angezeigt.
Wählen Sie Google Cloud -Projekt auswählen aus, um das Projekt hinzuzufügen.
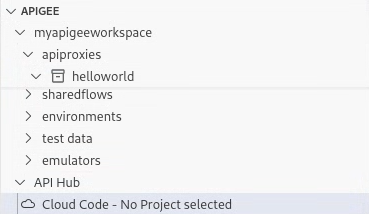
Wenn Sie ein Projekt für Google Cloud im Apigee-Bereich von Cloud Code auswählen möchten, erweitern Sie den API-Hub-Bereich und klicken Sie auf Cloud Code – kein Projekt ausgewählt:
Alternativ können Sie in der Cloud Code-Statusleiste auf den Projektnamen klicken und das neue Projekt auswählen:
API-Proxy-Entwicklung für die lokale Apigee-Entwicklung einrichten
Führen Sie die Schritte in diesem Abschnitt aus, wenn Sie Ihre lokale Entwicklungsumgebung für die Entwicklung und das Testen von Apigee-API-Proxy verwenden möchten. Führen Sie diese Schritte auch aus, um einen API-Proxy aus einer OpenAPI-Spezifikation erstellen zu können.
[[["Leicht verständlich","easyToUnderstand","thumb-up"],["Mein Problem wurde gelöst","solvedMyProblem","thumb-up"],["Sonstiges","otherUp","thumb-up"]],[["Schwer verständlich","hardToUnderstand","thumb-down"],["Informationen oder Beispielcode falsch","incorrectInformationOrSampleCode","thumb-down"],["Benötigte Informationen/Beispiele nicht gefunden","missingTheInformationSamplesINeed","thumb-down"],["Problem mit der Übersetzung","translationIssue","thumb-down"],["Sonstiges","otherDown","thumb-down"]],["Zuletzt aktualisiert: 2025-09-03 (UTC)."],[[["\u003cp\u003eThis page provides instructions for setting up Cloud Code for Apigee and Apigee hybrid API management in Visual Studio Code (VS Code).\u003c/p\u003e\n"],["\u003cp\u003eInstallation involves downloading VS Code, installing the Cloud Code extension with Docker, restarting VS Code, and setting up an Apigee workspace and emulator.\u003c/p\u003e\n"],["\u003cp\u003eGemini Code Assist, a preview feature, can be used with Cloud Code and Apigee by enabling the Gemini for Google Cloud API and granting appropriate Identity and Access Management roles.\u003c/p\u003e\n"],["\u003cp\u003eVS Code supports integration with various source control management providers like Git for managing code versions, also allowing for more extension in the marketplace.\u003c/p\u003e\n"],["\u003cp\u003eAfter setting up cloud code, you can access and explore API management, build and deploy API proxies, or seek support through GitHub or Stack Overflow.\u003c/p\u003e\n"]]],[],null,["# Set up Apigee API Management in Cloud Code for VS Code\n\n*This page\napplies to **Apigee** and **Apigee hybrid**.*\n\n\n*View [Apigee Edge](https://docs.apigee.com/api-platform/get-started/what-apigee-edge) documentation.*\n\n\nThis page provides instructions for creating an Apigee API Management local development\nenvironment in [Cloud Code for VS Code](/code/docs/vscode), which supports\nGemini Code Assist for OpenAPI spec design and development.\nSee [Overview of local development with Apigee](/apigee/docs/api-platform/local-development/overview) for features in the local development environment.\n\nThe setup process requires completion of both of these sections of this guide:\n\n- [Before you begin](#before-you-begin)\n- [Install VS Code and the Cloud Code extension](#install)\n\n\nDepending on your use cases, also complete one or both of these sections:\n\n- [Set up Gemini Code Assist for Apigee in\n Cloud Code](#set-up-gemini)\n- [Set up API proxy development for Apigee\n local development](#set-up-proxy-development)\n\nBefore you begin\n----------------\n\nTo set up and use Apigee in VS Code, you need:\n\n1. A Google Cloud project to log into in your local development environment. The project does not need to be provisioned for Apigee in order to use Gemini Code Assist to develop API specs, but does need to be provisioned for Apigee to create an Apigee local workspace where you can develop and test API proxies. Apigee provisioning is also required to see any [Apigee API hub](/apigee/docs/apihub/what-is-api-hub) APIs in the Apigee section of Cloud Code.\n2. (Recommended) [API hub](/apigee/docs/apihub/what-is-api-hub) provisioned on your project. API hub is required for these features:\n - [Enterprise context](/apigee/docs/api-platform/local-development/vscode/develop-design-edit-apis#enterprise-context) when generating OpenAPI specs.\n - Creation of a [remote mock server](/apigee/docs/api-platform/local-development/vscode/develop-design-edit-apis#use-remote-mock-server) for testing API specs.\n\n If you do not want to add API hub to your project, you could associate the project with another project that has API hub enabled instead. See [Attach a runtime project to an API hub](/apigee/docs/apihub/auto-register-apigee-proxies#attach-a-runtime-project) for information on attaching a project to an API hub.\n3. The [Required roles to use\n Gemini Code Assist in Apigee](#required-roles-to-use-gemini-code-assist-in-apigee) for actions you plan to perform. You must have the [Service Usage Admin](/service-usage/docs/access-control#predefined_roles) role on your user account for the project to set up Gemini Code Assist.\n4. Familiarity with VS Code, how to manage VS Code, and how to perform common actions such as accessing settings and installing extensions. See the [VS Code documentation](https://code.visualstudio.com/docs).\n\nInstall VS Code and the Cloud Code extension\n--------------------------------------------\n\nThis section provides the installation instructions for installing VS Code and the\nCloud Code extension in VS Code. This is the first step in setting up local development for\nApigee and is required to use any of the Apigee local development\nfeatures, including Gemini Code Assist.\n\nTo install VS Code and the Cloud Code extension:\n\n1. Download and install **[Visual Studio Code (VS Code)](https://code.visualstudio.com)** on your local machine, if it is not already installed.\n2. Install the Cloud Code extension, as described in [Install the Cloud Code extension](/code/docs/vscode/install). If you plan to manage [API proxies](/apigee/docs/api-platform/fundamentals/understanding-apis-and-api-proxies#howdoyoucreateanapiproxy) in your local environment, install Docker as part of the process.\n3. (Recommended) Enable automatic updates for the Cloud Code extension. In **Settings** , search for **Extensions: Auto Update** and enable it for all extensions or for the Cloud Code extension individually.\n4. Restart VS Code.\n\nSet up Gemini Code Assist for Apigee\n------------------------------------\n\nFollow these steps to set up\n[Gemini Code Assist for Apigee](/apigee/docs/api-platform/local-development/overview#gemini-apigee-local-dev) in your local\ndevelopment environment. Note the [Required roles to use Gemini Code Assist in Apigee](#required-roles-to-use-gemini-code-assist-in-apigee).\n\n1. Make sure you've completed the steps in [Install VS Code and the Cloud Code extension](/apigee/docs/api-platform/local-development/setup#install), if not already completed.\n2. Install the Gemini Code Assist extension in VS Code.\n3. (Recommended) Enable automatic updates for the Gemini Code Assist extension. In **Settings** , search for **Extensions: Auto Update** and enable it for all extensions or for the Gemini Code Assist extension individually.\n4. If not already installed, install the [gcloud CLI](https://cloud.google.com/sdk/docs/install).\n5. Enable the Gemini for Google Cloud API for the project. You need the [Service Usage Admin](/service-usage/docs/access-control#predefined_roles) role to perform this step. \n\n ```scdoc\n gcloud services enable cloudaicompanion.googleapis.com --project=YOUR_PROJECT\n ```\n6. In VS Code, log in to your Google Cloud project in *both* the Gemini Code Assist and Cloud Code extensions. You can do this using either of these methods:\n - Manually add the project in your `settings.json` file: \n\n ```\n {\n \"cloudcode.apigee.gemini.options\": {\n \"cloudcode.project\": \"YOUR_PROJECT\",\n \"geminicodeassist.project\": \"YOUR_PROJECT\"\n ...\n }\n }\n ```\n - Select the project when prompted: \n\n If you open Gemini Code Assist chat and are not logged in to a project with Gemini enabled, you'll see a message to that effect with a way to log in. Select **select a Google Cloud project** to add the Project. \n\n \u003cbr /\u003e\n\n To select a project for Google Cloud from within the **Apigee** section of Cloud Code, expand the **API hub** section and click **Cloud Code - No Project selected** : \n\n \u003cbr /\u003e\n\n Or, click the project name in the Cloud Code status bar and select the new project:\n7. Add any needed [Required roles to use Gemini Code Assist in Apigee](#required-roles-to-use-gemini-code-assist-in-apigee) to your user account.\n8. If you want to be able to create an API proxy bundle from an OpenAPI spec and manage it in your local development environment, complete the steps in [Set up your local\n development environment for API proxy development](#set-up-proxy-development).\n\n### Required roles to use Gemini Code Assist in Apigee\n\nYou'll need the roles listed below to perform API design and testing steps using\nGemini Code Assist:\n\nSet up API proxy development for Apigee\nlocal development\n---------------------------------------------------------\n\nComplete the steps in this section if you want to use your local development environment for\nApigee API proxy development and testing. Also complete these steps to be able to create\nan API proxy from an OpenAPI spec.\n\n1. [Create an Apigee workspace](/apigee/docs/api-platform/local-development/vscode/manage-apigee-workspace#creating_an_apigee_workspace).\n2. [Install the Apigee Emulator](/apigee/docs/api-platform/local-development/vscode/manage-apigee-emulator#install).\n3. [Add a container](/apigee/docs/api-platform/local-development/vscode/manage-apigee-emulator#adding_a_container_for_the_apigee_emulator) for deploying to the Apigee Emulator.\n\nWhat's next\n-----------\n\nAfter completing the installation and setup steps, get started using Cloud Code:\n\n- Complete the Gemini Code Assist tutorial for Apigee: [Tutorial: Use Gemini Code Assist to design, develop, and test APIs in Apigee and Cloud Code](/apigee/docs/api-platform/local-development/vscode/tutorial-gemini)\n- [Access and explore API Management in Cloud Code](/apigee/docs/api-platform/local-development/vscode/explore)\n- [Build and deploy your first API proxy in local development](/apigee/docs/api-platform/local-development/vscode/get-started)"]]