Assicurati che il nome della tua organizzazione sia selezionato dal selettore di progetti
nel riquadro Google Cloud. Il nome dell'organizzazione è lo stesso
del nome del tuo Google Cloud progetto.
Fai clic su + Crea.
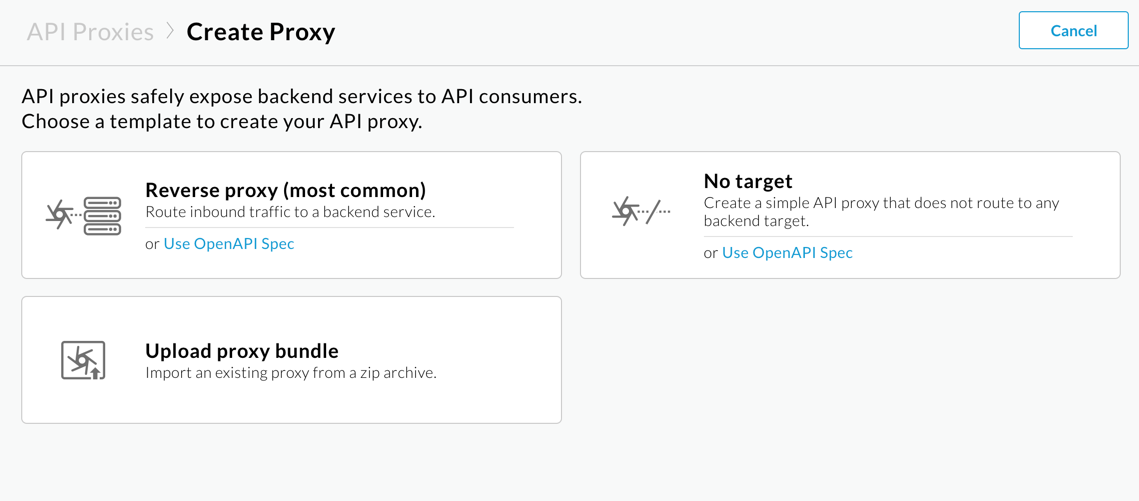
Nel riquadro Crea un proxy, in Modello di proxy,
seleziona Proxy inverso (più comune). Un reverse proxy instrada semplicemente il traffico in entrata a un servizio di backend.
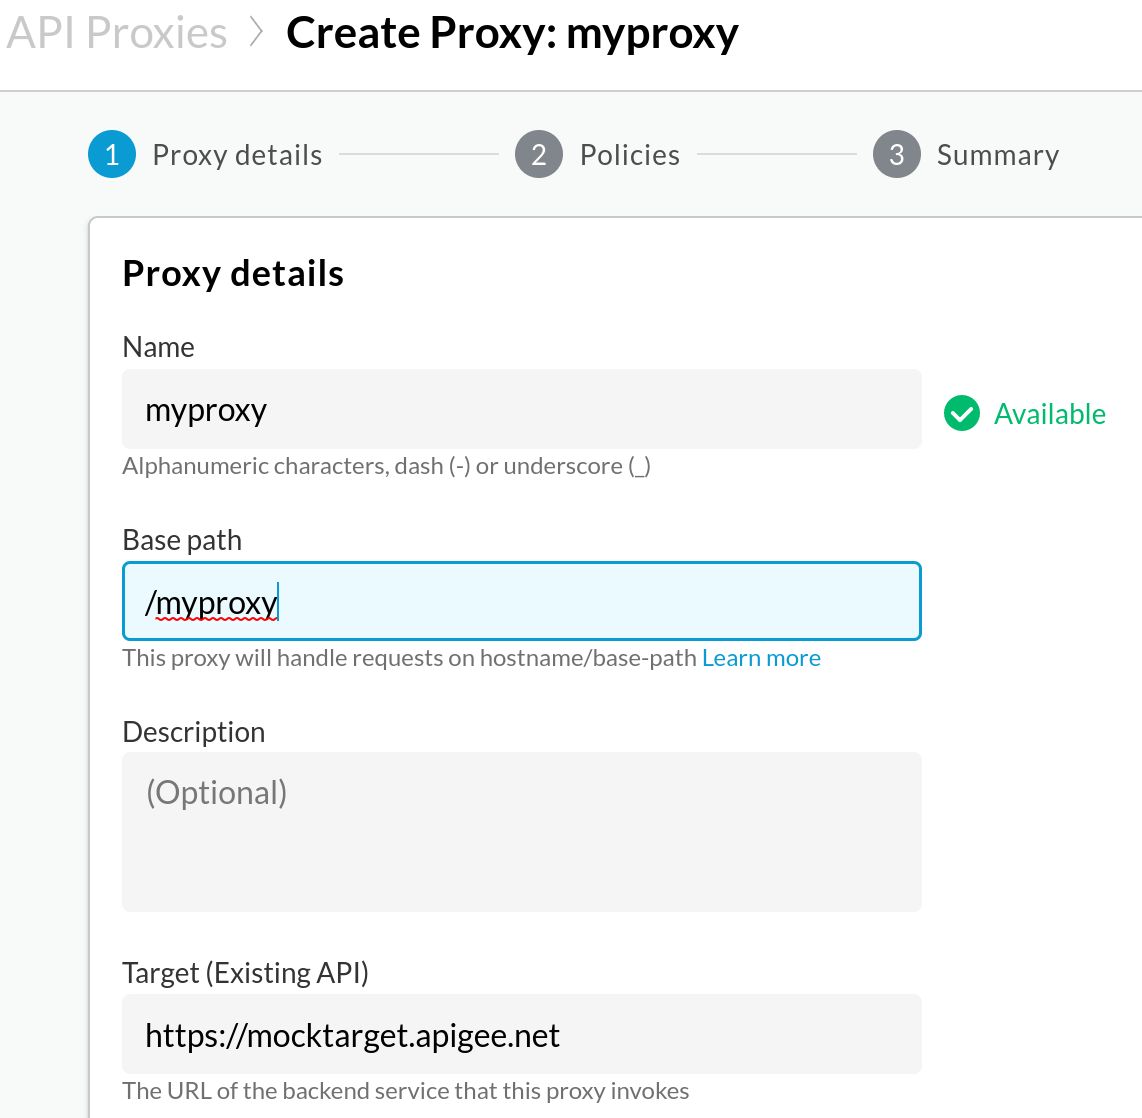
Nella sezione Dettagli proxy, inserisci quanto segue:
Nome proxy:inserisci myproxy. I passaggi rimanenti di questa
sezione presuppongono che questo sia il nome del proxy.
Base Path (Percorso di base): impostato automaticamente sul valore inserito per
Proxy name. Il percorso
di base fa parte dell'URL utilizzato per effettuare richieste alla tua API. Apigee utilizza l'URL per
corrispondere e instradare le richieste in entrata al proxy API corretto.
Descrizione (facoltativo): inserisci una descrizione per il nuovo proxy API, ad esempio "Test di Apigee con un proxy semplice".
Destinazione (API esistente): inserisci https://mocktarget.apigee.net.
Definisce l'URL di destinazione che Apigee richiama in una richiesta al proxy API. Il servizio mocktarget è
ospitato su Apigee e restituisce dati semplici. Non richiede una chiave API o un token di accesso.
Spazio (facoltativo): se la tua organizzazione ha attivato Apigee Spaces, puoi associare il proxy API a uno spazio selezionato dall'elenco delle opzioni disponibili.
Per saperne di più, vedi Panoramica di Apigee Spaces.
Fai clic su Avanti.
In Deployment (facoltativo), lascia invariato il campo
Deployment environments (Ambienti di deployment). In questo
esempio, crei solo il proxy senza eseguirne il deployment in questa
fase. Puoi anche ignorare il campo Account di servizio. Lascia vuoto il campo.
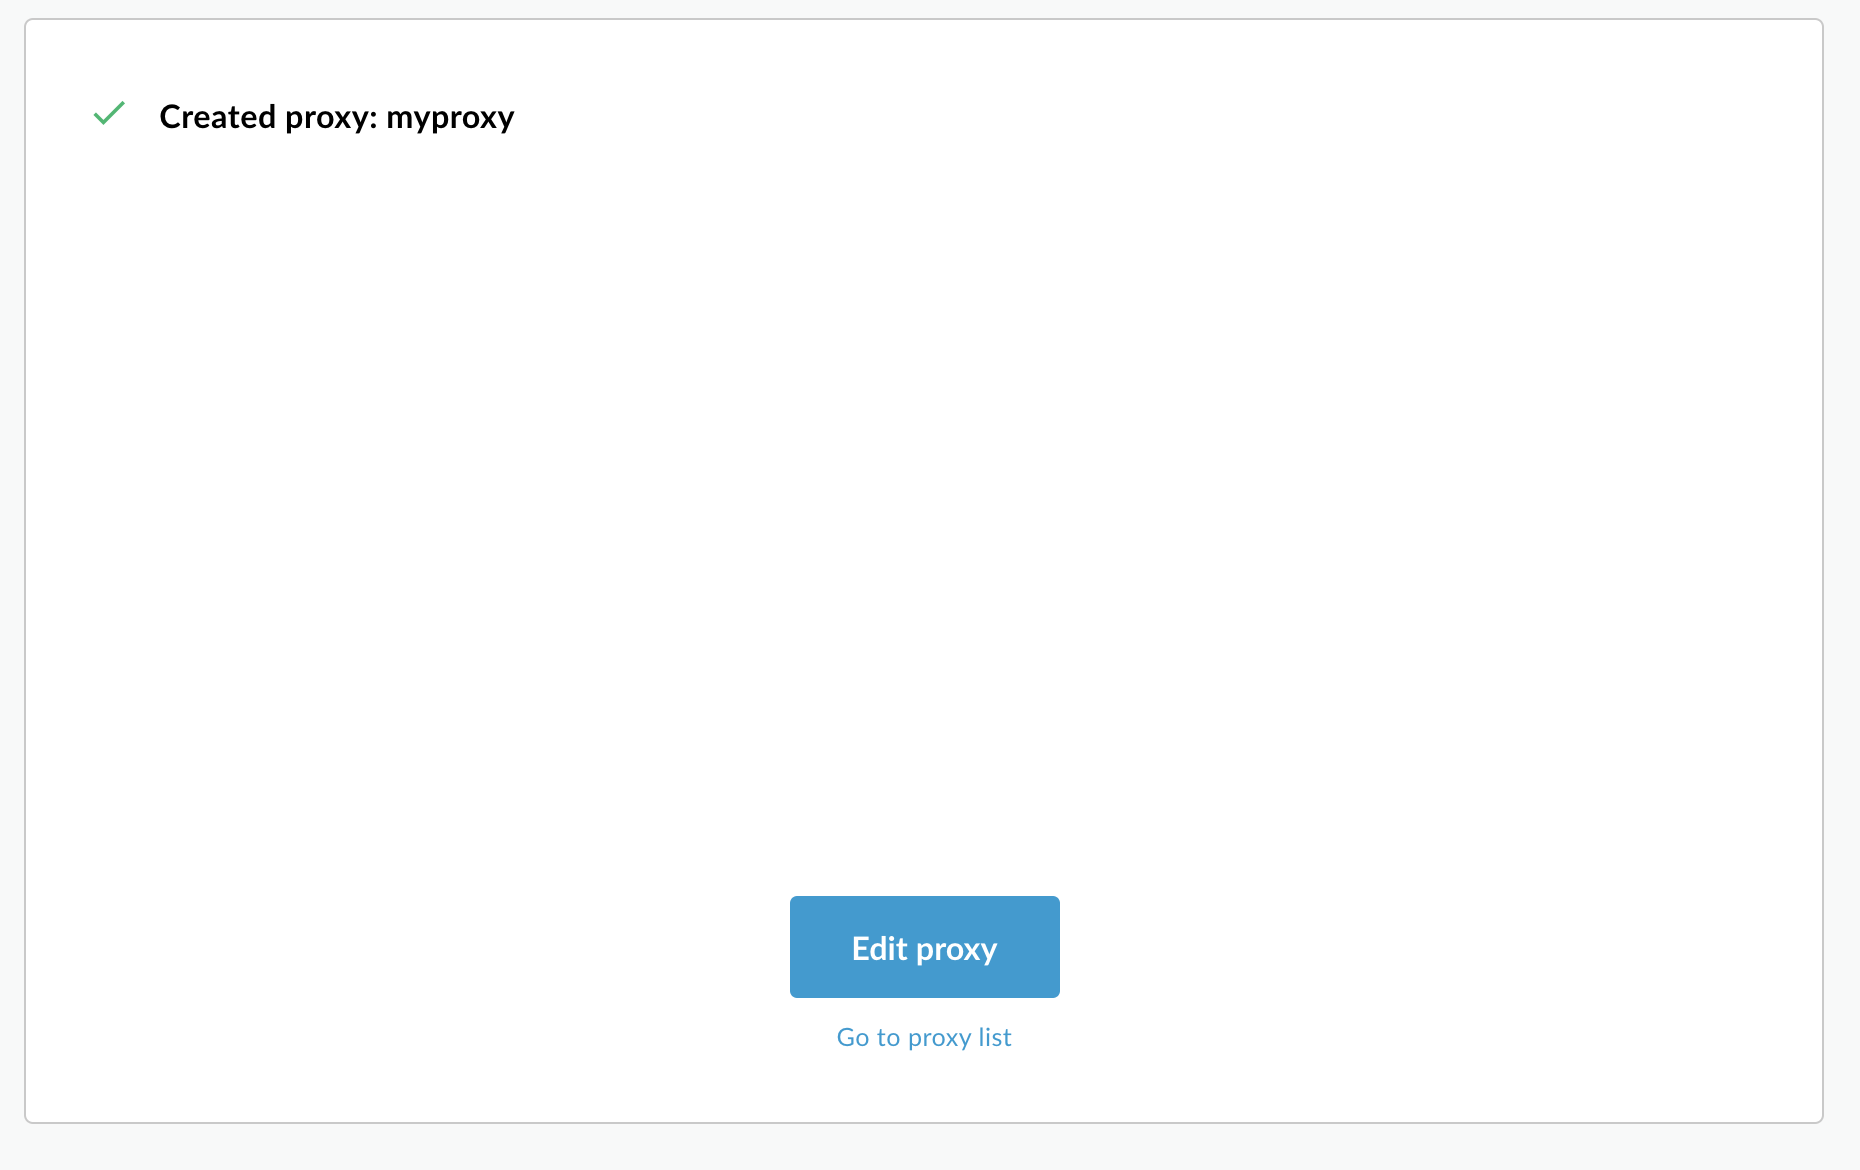
Fai clic su Crea.
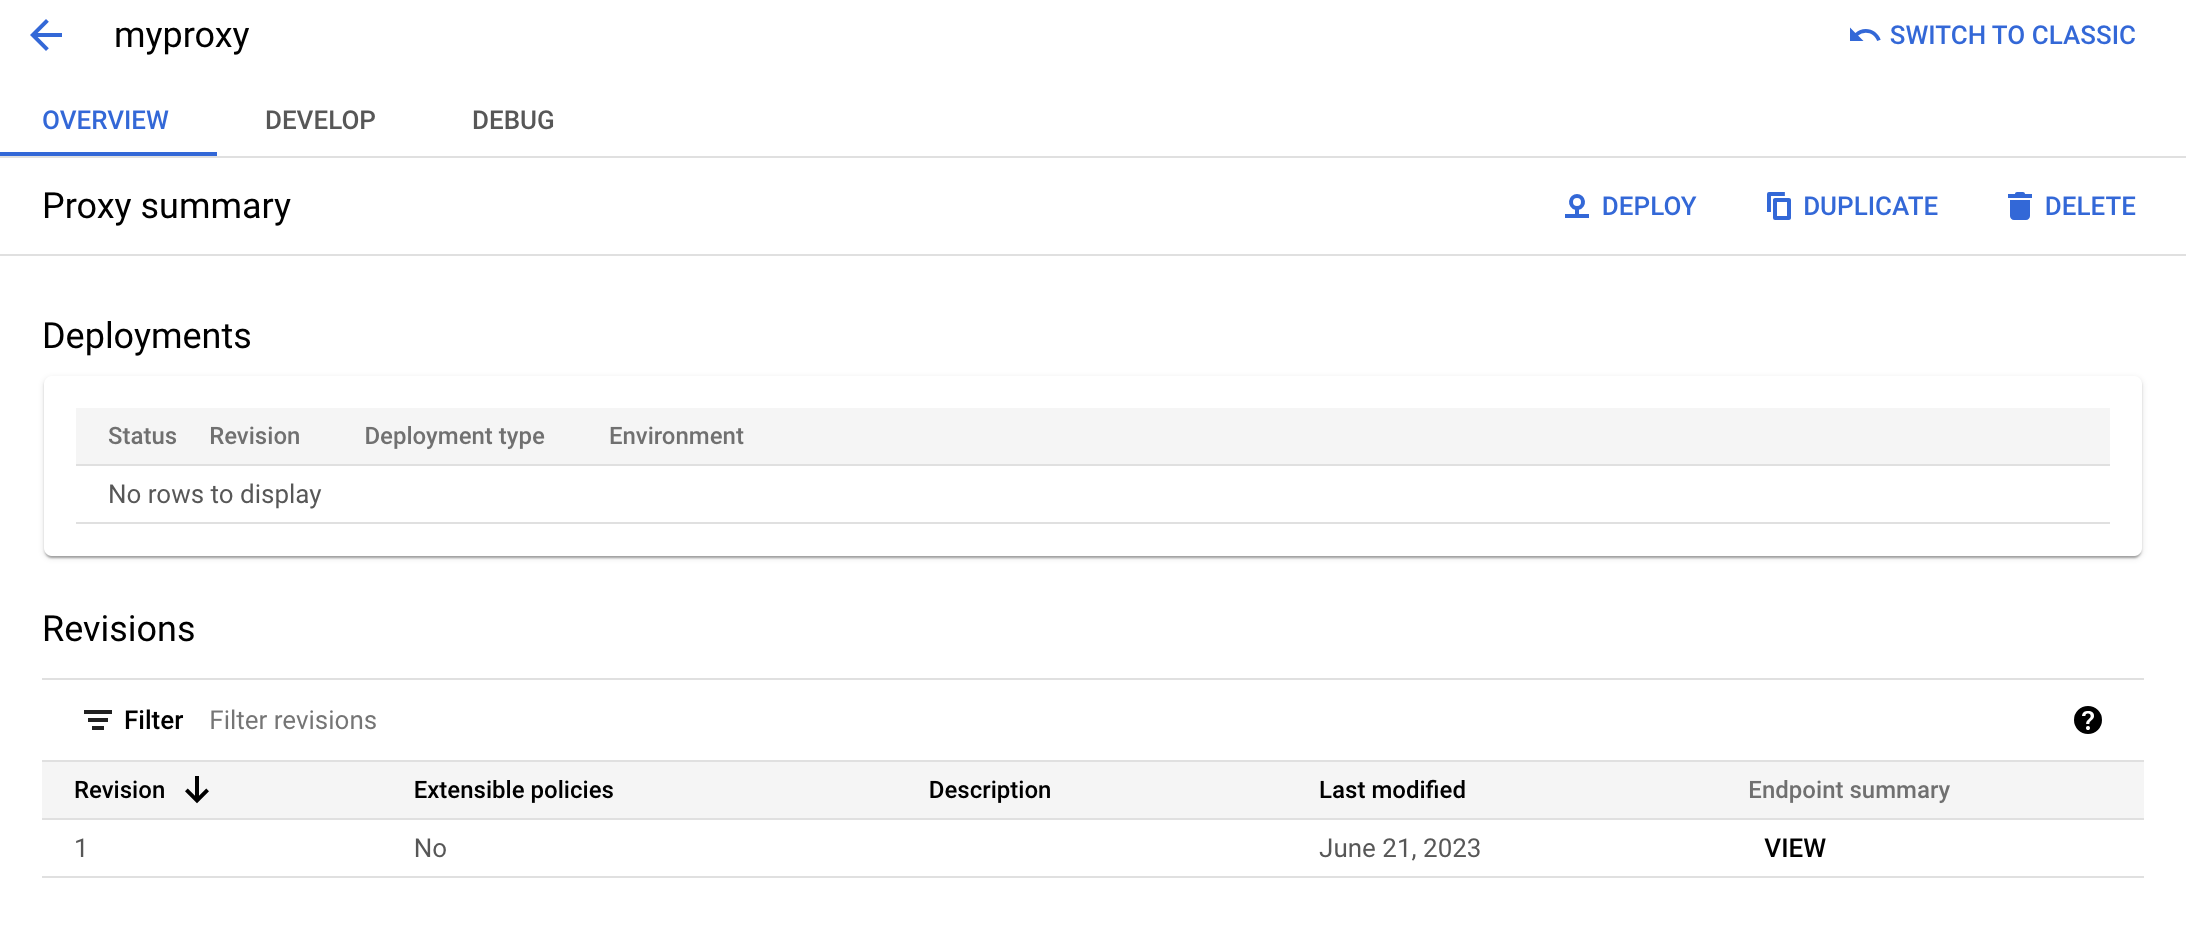
Apigee crea il nuovo proxy e mostra un riepilogo dei dettagli del proxy nel riquadro
Riepilogo proxy.
La sezione Deployment è vuota perché
il proxy non è ancora stato eseguito il deployment.
Nella sezione Revisioni in Riepilogo endpoint, fai clic su Visualizza.
Il riquadro della visualizzazione degli endpoint mostra:
Endpoint proxy: il percorso di base impostato per il proxy, che in questo esempio
è /myproxy.
Endpoint di destinazione: il percorso di base che hai impostato per la destinazione, che in questo
esempio è https://mocktarget.apigee.net.
Fai clic su Chiudi per tornare alla pagina di riepilogo del proxy.
Apigee classico
Per creare un proxy API semplice nella UI Apigee classica:
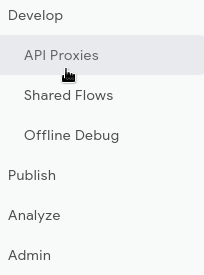
Fai clic su Sviluppa > Proxy API nella visualizzazione principale dell'interfaccia utente.
Dall'elenco a discesa Seleziona ambiente, seleziona l'ambiente in cui vuoi
creare un nuovo proxy API.
L'UI di Apigee mostra un elenco di proxy API per quell'ambiente. Se non hai ancora creato
proxy, l'elenco è vuoto.
Fai clic su Crea nuovo.
Viene avviata la procedura guidata Crea proxy:
Seleziona Proxy inverso (il più comune).
Viene visualizzata la visualizzazione Dettagli proxy.
Configura il proxy con le seguenti impostazioni:
Nome proxy:inserisci myproxy. I passaggi rimanenti di questa sezione presuppongono
che questo sia l'ID del tuo proxy.
Proxy Base Path (Percorso di base del proxy):impostato automaticamente su /myproxy. Il percorso base
del proxy fa parte dell'URL utilizzato per effettuare richieste alla tua API. Apigee utilizza l'URL per
corrispondere e instradare le richieste in entrata al proxy API corretto.
(Facoltativo) Descrizione: inserisci una descrizione per il nuovo proxy API, ad esempio
Test di Apigee con un proxy semplice.
Destinazione (API esistente): inserisci https://mocktarget.apigee.net.
Definisce l'URL di destinazione che Apigee richiama in una richiesta al proxy API. Il servizio mocktarget è
ospitato su Apigee e restituisce dati semplici. Non richiede una chiave API o un token di accesso.
I dettagli del proxy API dovrebbero essere simili ai seguenti:
Fai clic su Avanti.
Nella schermata Norme comuni, seleziona Pass-through (nessuna autorizzazione) come
opzione di sicurezza.
Fai clic su Avanti.
Nella schermata Riepilogo, fai clic su Crea. (Lascia deselezionata
l'opzione Deployment facoltativo.)
Apigee genera il proxy (a volte chiamato pacchetto proxy):
Fai clic su Vai all'elenco dei proxy.
Apigee mostra la visualizzazione Proxy, che mostra un elenco di proxy API. Il
nuovo proxy ha un indicatore di stato grigio, il che significa che non è ancora stato implementato.
Dopodiché, eseguirai il deployment del proxy API. Un proxy deve essere sottoposto a deployment prima di poter essere utilizzato da un client.
[[["Facile da capire","easyToUnderstand","thumb-up"],["Il problema è stato risolto","solvedMyProblem","thumb-up"],["Altra","otherUp","thumb-up"]],[["Difficile da capire","hardToUnderstand","thumb-down"],["Informazioni o codice di esempio errati","incorrectInformationOrSampleCode","thumb-down"],["Mancano le informazioni o gli esempi di cui ho bisogno","missingTheInformationSamplesINeed","thumb-down"],["Problema di traduzione","translationIssue","thumb-down"],["Altra","otherDown","thumb-down"]],["Ultimo aggiornamento 2025-08-18 UTC."],[[["\u003cp\u003eThis guide provides instructions for creating a simple API proxy in both Apigee and Apigee hybrid environments using either the new Apigee in Cloud console or the classic Apigee UI.\u003c/p\u003e\n"],["\u003cp\u003eThe primary focus is on creating a "Reverse proxy," which routes incoming traffic to a backend service, specifically using the \u003ccode\u003ehttps://mocktarget.apigee.net\u003c/code\u003e URL for testing.\u003c/p\u003e\n"],["\u003cp\u003eThe API proxy creation process involves specifying details such as the proxy name, base path, description, and target URL, with the base path being a part of the URL used for API requests.\u003c/p\u003e\n"],["\u003cp\u003eThe created proxy can be reviewed in the proxy summary, where you can see the proxy and target endpoints, however it will not be deployed initially.\u003c/p\u003e\n"],["\u003cp\u003eThe created proxy is ready to be deployed, which will make it accessible to clients.\u003c/p\u003e\n"]]],[],null,["*This page\napplies to **Apigee** and **Apigee hybrid**.*\n\n\n*View [Apigee Edge](https://docs.apigee.com/api-platform/get-started/what-apigee-edge) documentation.*\n\nIn this step, you will create a simple API proxy that calls a mock target service. \n\nApigee in Cloud console\n\n1. In the Google Cloud console, go to the **Proxy development \\\u003e API proxies** page.\n\n [Go to API proxies](https://console.cloud.google.com/apigee/proxies)\n2. Be sure that your organization name is selected from the project picker in the **Google Cloud** pane. The organization name is the same as your Google Cloud project name.\n3. Click **+ Create**.\n4. In the **Create a proxy** pane, under **Proxy template** , select **Reverse proxy (Most common)**. A reverse proxy simply routes incoming traffic to a backend service.\n5. Under **Proxy details** , enter the following:\n - **Proxy name:** Enter `myproxy`. The remaining steps in this section assume that this is your proxy's name.\n - **Base Path** : Automatically set to the value you enter for `Proxy name`. The **Base\n Path** is part of the URL used to make requests to your API. Apigee uses the URL to match and route incoming requests to the proper API proxy.\n - **Description (Optional)**: Enter a description for your new API proxy, such as \"Testing Apigee with a simple proxy.\"\n - **Target (Existing API)** : Enter `https://mocktarget.apigee.net`. This defines the target URL that Apigee invokes on a request to the API proxy. The mocktarget service is hosted at Apigee and returns simple data. It requires no API key or access token.\n - **Space (Optional)** : If your organization has Apigee Spaces enabled, you can associate the API proxy with a Space selected from the list of available options. For more information, see [Apigee Spaces overview](/apigee/docs/api-platform/system-administration/spaces/apigee-spaces-overview).\n - Click **Next**.\n6. Under **Deploy (optional)** leave the **Deployment environments** field unchanged. In this example, you just create the proxy without deploying it at this stage. You can also ignore the **Service Account** field. Leave it blank.\n7. Click **Create** .\n\n Apigee creates the new proxy and displays a summary of the proxy details in the\n **Proxy summary** pane.\n\n The **Deployments** section is empty because\n the proxy has not yet been deployed.\n8. In the **Revisions** section under **Endpoint summary** , click **View** .\n\n The endpoints view pane displays:\n - **Proxy endpoints** : The basepath you set for the proxy, which in this example is `/myproxy`.\n - **Target endpoints** : The basepath you set for the target, which in this example is `https://mocktarget.apigee.net`.\n9. Click **Close** to return to the Proxy summary page.\n\nClassic Apigee\n\nTo create a simple API proxy in the classic Apigee UI:\n\n1. Open the [Apigee UI](https://apigee.google.com) in a browser.\n2. Click **Develop \\\u003e API Proxies** in the main view of the UI.\n\n3. From the **Select Environment** drop-down list, select the environment in which you want\n to create a new API proxy.\n\n The Apigee UI displays a list of API proxies for that environment. If you haven't created any\n proxies yet, the list is empty.\n4. Click **Create New** . \n\n The **Create Proxy** wizard starts:\n\n5. Select **Reverse proxy** (most common).\n\n The **Proxy details** view is displayed.\n6. Configure your proxy with the following settings:\n - **Proxy Name:** Enter `myproxy`. The remaining steps in this section assume that this is your proxy's ID.\n - **Proxy Base Path:** Automatically set to `/myproxy`. The **Proxy Base\n Path** is part of the URL used to make requests to your API. Apigee uses the URL to match and route incoming requests to the proper API proxy.\n - **Description** (Optional): Enter a description for your new API proxy, such as **Testing Apigee with a simple proxy**.\n - **Target (Existing API)** : Enter `https://mocktarget.apigee.net`. This defines the target URL that Apigee invokes on a request to the API proxy. The mocktarget service is hosted at Apigee and returns simple data. It requires no API key or access token.\n\n Your API proxy's details should look like the following:\n\n7. Click **Next**.\n8. On the **Common policies** screen, select **Pass through (no authorization)** as the security option.\n9. Click **Next**.\n10. On the **Summary** screen, click **Create** . (Leave the **Optional Deployment** unselected.)\n\n Apigee generates the proxy (sometimes referred to as *the proxy bundle*):\n\n11. Click **Go to proxy list** .\n\n Apigee displays the **Proxies** view, which displays a list of API proxies. The\n new proxy has a gray status indicator, meaning that it has not yet been deployed.\n\nNext you'll deploy the API proxy. A proxy must be deployed before it can be used by a client.\n[1](/apigee/docs/api-platform/get-started/create-proxy) [(NEXT) Step 2: Deploy the API proxy](/apigee/docs/api-platform/get-started/deploy-proxy) [3](/apigee/docs/api-platform/get-started/test-proxy) [4](/apigee/docs/api-platform/get-started/change-endpoint) [5](/apigee/docs/api-platform/get-started/add-policy)\n\n\u003cbr /\u003e"]]