Usa la IU o la API de Apigee para editar un proxy de API. Cuando editas un proxy de API, puedes decidir qué hacer con los cambios resultantes:
Guardar los cambios en el servidor, pero sin guardar una revisión nueva. Esto se hace cuando no deseas implementar los cambios guardados, pero quieres asegurarte de que no se pierdan si finalizas la sesión.
O
Crear una revisión nueva del proxy de API y, luego, implementarla en el clúster. No puedes implementar cambios en un proxy de API sin crear una revisión nueva de él.
Editor de proxies nuevo
Para editar un proxy de API y guardar los cambios con el Editor de proxies nuevo, haz lo siguiente:
Si usas la IU clásica de Apigee, selecciona Desarrollar > Proxies de API y, en el panel Proxies, selecciona el entorno para el proxy.
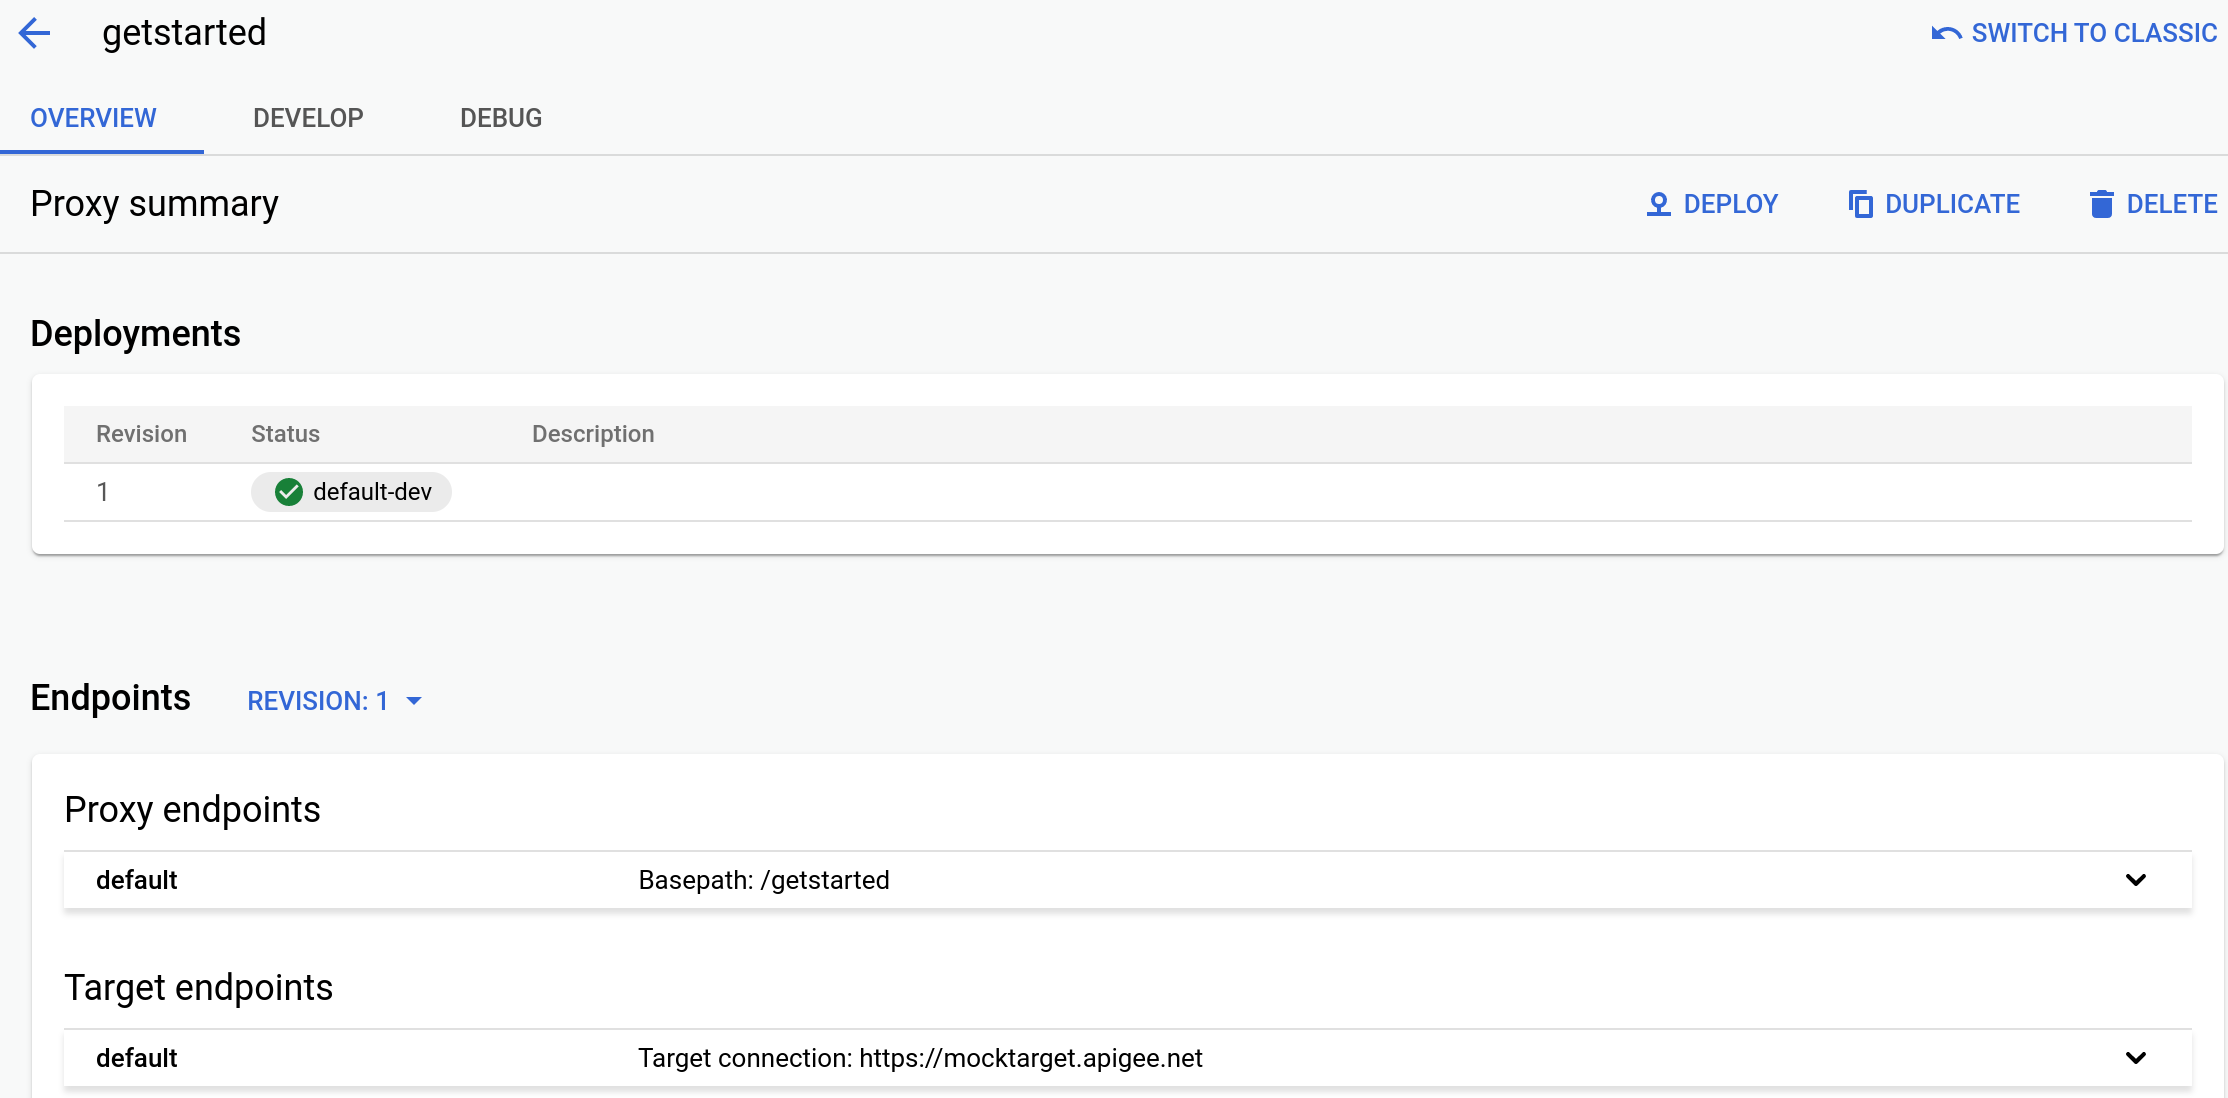
Selecciona el proxy que deseas editar de la lista de proxies.
La IU muestra la pestaña Descripción general para ese proxy en el Editor de proxies.
Haz clic en la pestaña Desarrollar:
Usa el editor de proxy para realizar los cambios en el proxy. Cuando finalices de hacer cambios, puedes realizar una de las siguientes acciones:
Para guardar los cambios, pero no crear una revisión nueva, haz clic en el botón Guardar. (Debes hacerlo de forma periódica para asegurarte de que los cambios no se pierdan si finalizas la sesión).
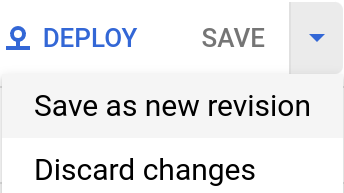
Para guardar los cambios como una revisión nueva (cuando estés listo para implementar y probar), haz clic en el menú desplegable junto al botón Guardar y selecciona Guardar como revisión nueva:
La IU de Apigee guarda tus cambios y genera una nueva revisión del proxy por ti. No implementa el nuevo paquete en el entorno de ejecución. Debes hacerlo de forma explícita, como se describe en Implementa un proxy de API.
Editor de proxies clásico
Para editar un proxy de API y guardar los cambios con el Editor de proxies clásico, haz lo siguiente:
Como alternativa, puedes seleccionar Desarrollar > Proxies de API en el menú de navegación de la izquierda.
Selecciona el entorno que contiene el proxy que deseas editar.
La IU de Apigee muestra una lista de proxies de API para el entorno seleccionado:
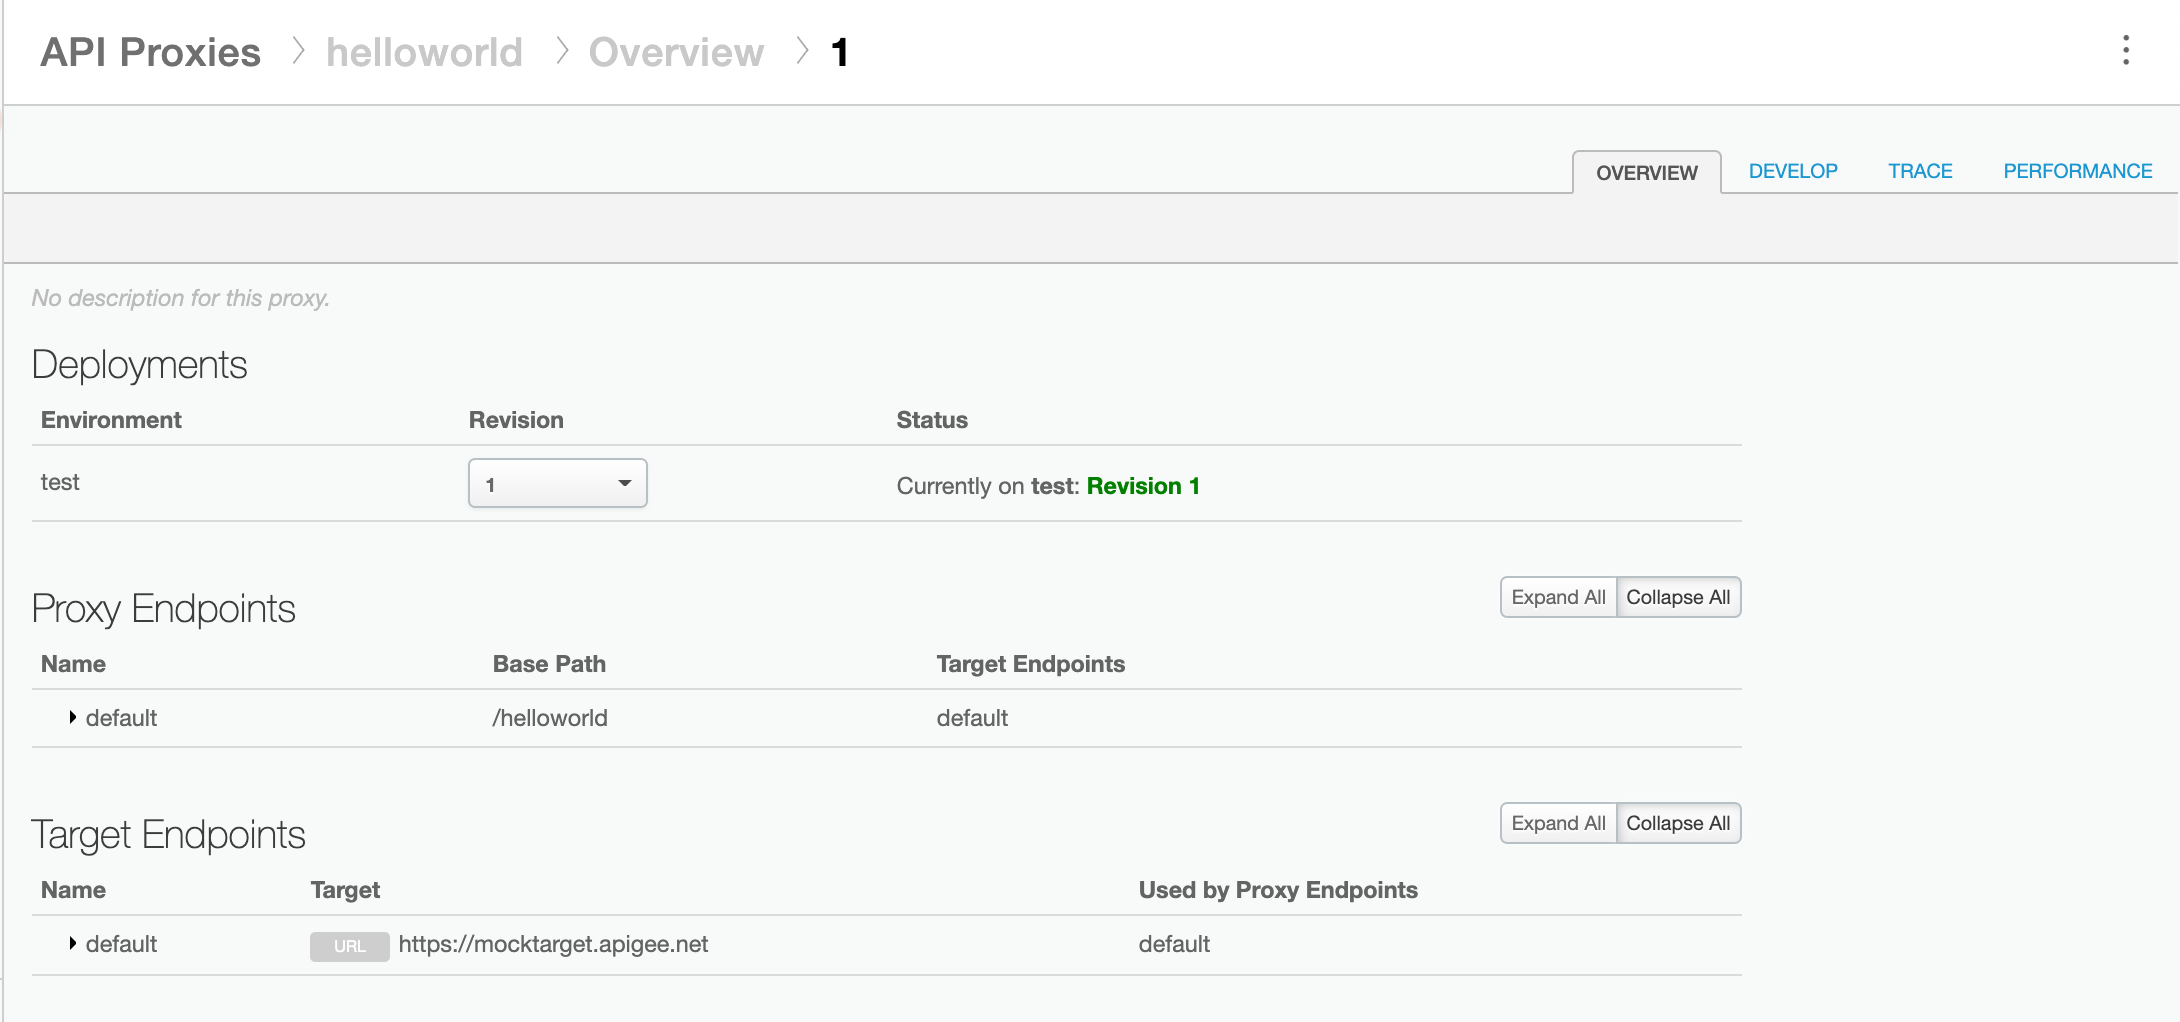
Haz clic en el proxy que quieres editar. La IU muestra la pestaña Descripción general para ese proxy en el Editor de proxies:
Haz clic en la pestaña Develop en la parte superior derecha de la vista.
Usa el editor de proxy para realizar los cambios en el proxy. Cuando finalices de hacer cambios, puedes realizar una de las siguientes acciones:
Guarda los cambios, pero no crees una revisión nueva (lo más común; debes hacerlo periódicamente para garantizar que no se pierdan tus cambios si finalizas la sesión).
Guarda los cambios como una revisión nueva (cuando estés listo para implementar y probar).
Para guardar, pero sin crear una revisión nueva, haz clic en Guardar
en la esquina superior derecha de la IU:
La IU de Apigee guarda los cambios para que puedas salir de la página y reanudar el trabajo más tarde.
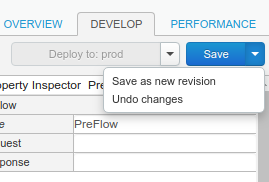
Para guardar los cambios como una revisión nueva, haz clic en la flecha desplegable junto al botón
Guardar y selecciona Guardar como revisión nueva:
La IU de Apigee guarda tus cambios y genera un nuevo paquete de proxy por ti. No implementa el nuevo paquete en el entorno de ejecución. Debes hacerlo de forma explícita, como se describe en Implementa un proxy de API.
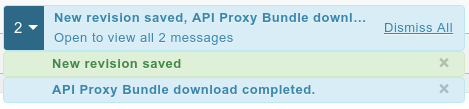
En la IU, se muestra el mensaje Nueva revisión guardada:
Después de crear una revisión nueva, por lo general, la implementas en tu clúster, como se describe en la sección sobre cómo implementar un proxy de API.
API de Apigee
Para editar un proxy de API y crear una revisión en tu organización de Apigee, envía una solicitud POST al siguiente recurso:
Debes definir el nombre del proxy de API mediante el parámetro de búsqueda name. Restringe los caracteres que se usan en el nombre a lo siguiente: A-Za-z0-9._\-$ %
De manera opcional, puedes importar un paquete de configuración de proxy de API mediante los siguientes pasos:
Establece el parámetro de consulta action en import.
Configura el encabezado Content-type como multipart/form-data.
Pasa el nombre del paquete de configuración del proxy de API a tu sistema de archivos local.
En el siguiente ejemplo, se muestra cómo editar un proxy de API mediante la importación de un paquete de configuración de proxy de API (helloworld-config.zip) en tu sistema de archivos local mediante la API.
Para obtener más información sobre cómo editar un proxy de API, consulta el método apis.create en la API de Apigee. Si deseas ver todos los métodos disponibles para los proxies de API, consulta la API de proxies de API.
[[["Fácil de comprender","easyToUnderstand","thumb-up"],["Resolvió mi problema","solvedMyProblem","thumb-up"],["Otro","otherUp","thumb-up"]],[["Difícil de entender","hardToUnderstand","thumb-down"],["Información o código de muestra incorrectos","incorrectInformationOrSampleCode","thumb-down"],["Faltan la información o los ejemplos que necesito","missingTheInformationSamplesINeed","thumb-down"],["Problema de traducción","translationIssue","thumb-down"],["Otro","otherDown","thumb-down"]],["Última actualización: 2025-09-04 (UTC)"],[[["\u003cp\u003eThis guide provides instructions on how to edit API proxies within Apigee and Apigee hybrid environments, offering methods through the Apigee UI and API.\u003c/p\u003e\n"],["\u003cp\u003eWhen editing an API proxy, you can save changes without creating a new revision or save changes as a new revision, which is necessary for deployment.\u003c/p\u003e\n"],["\u003cp\u003eThe guide details the use of both the new and classic Proxy Editors within the Apigee UI, showing how to access and utilize each interface.\u003c/p\u003e\n"],["\u003cp\u003eEditing via the Apigee API involves sending a POST request to a specific URL, with the option to import an API proxy configuration bundle.\u003c/p\u003e\n"],["\u003cp\u003eDeploying a new revision of an API proxy after saving it is a separate step, requiring explicit action as outlined in the "Deploying an API proxy" documentation.\u003c/p\u003e\n"]]],[],null,["# Editing an API proxy (create a proxy revision)\n\n*This page\napplies to **Apigee** and **Apigee hybrid**.*\n\n\n*View [Apigee Edge](https://docs.apigee.com/api-platform/get-started/what-apigee-edge) documentation.*\n\n| **More Information** \n|\n| For more information, see:\n|\n| - [Best practices for API proxy design and development](/apigee/docs/api-platform/fundamentals/best-practices-api-proxy-design-and-development)\n\nUse the Apigee UI or API to edit an API proxy. Editing an API proxy can include configuring\n[policies](/apigee/docs/api-platform/reference/policies/reference-overview-policy),\nconfiguring\n[proxy endpoints](/apigee/docs/api-platform/fundamentals/understanding-routes#determiningtheurloftheapiproxyendpoint),\n[target endpoints](/apigee/docs/api-platform/fundamentals/understanding-routes#determiningtheurlofthetargetendpoint), and\n[integration endpoints](/apigee/docs/api-platform/integration/getting-started-apigee-target-endpoint),\nadding or removing\n[flow hooks](/apigee/docs/api-platform/fundamentals/flow-hooks), and\n[deploying the proxy](/apigee/docs/api-platform/deploy/ui-deploy-new).\n\nWhen you edit an API proxy, you can decide which\nof the following to do with the resulting changes:\n\n1. Save your changes on the server but do not create a new revision. You do this when you do not want to deploy your saved changes, but just want to ensure that they are not lost if you end the session. \n\n **OR**\n2. Create a new API proxy revision and deploy it to the cluster. You cannot deploy changes to an API proxy without creating a new revision of it.\n\n### Apigee in Cloud console\n\nTo edit an API proxy and save your changes using the Apigee Cloud console:\n\n1. In the Google Cloud console, go to the **Proxy development \\\u003e API proxies** page.\n\n [Go to API proxies](https://console.cloud.google.com/apigee/proxies)\n2. Select the proxy that you want to edit from the list of proxies.\n The UI displays the **Overview** tab for that proxy in the Google Cloud console.\n\n3. Click the **Develop** tab to make your changes to the proxy. \n\n For example, to add a policy, click the **+** icon next to **Policies** , select the policy to add, enter a name and an optional display name, click **Create** , and configure the policy in the interface. \n4. When you are done making changes, you can do one of the following:\n - To save your changes but *not* create a new revision, click the **Save** button. (You should do this periodically to ensure that your changes are not lost if you end the session).\n - To save your changes as a new revision (when you are getting ready to deploy and test), click the drop-down menu next to the **Save** button and select **Save as new revision** :\n\n The Apigee UI saves your changes and generates a new revision of the proxy for you. It\n does not deploy\n the new bundle to the runtime; you must explicitly do that, as described in\n [Deploying an API proxy](/apigee/docs/api-platform/deploy/ui-deploy-new).\n\n### Classic Apigee\n\nTo edit an API proxy and save your changes using the classic Proxy Editor:\n\n1. Sign in to the [Apigee UI](https://apigee.google.com).\n2. Click **API Proxies** in the main view.\n\n Alternatively, you can select **Develop \\\u003e API Proxies** in the left navigation\n menu.\n3. Select the environment that contains the proxy you want to edit.\n\n The Apigee UI displays a list of API proxies for the selected environment:\n\n4. Click the proxy that you want to edit. The UI displays the **Overview** tab for that proxy in the Proxy Editor:\n\n5. Click the **Develop** tab in the upper right of the view.\n6. Use the proxy editor to make your changes to the proxy. When you are done making changes, you can do one of the following:\n - Save your changes but do not create a new revision (most common; you should do this periodically to ensure that your changes are not lost if you end the session).\n - Save your changes as a new revision (when you are getting ready to deploy and test).\n7. To save but *not* create a new revision, click **Save** in the upper right of the UI:\n\n The Apigee UI saves your changes so that you can leave the page and resume working later.\n8. To save your changes as a new revision, click the drop-down arrow next to **Save** and select **Save as new revision** :\n\n The Apigee UI saves your changes and generates a new proxy bundle for you. It does not deploy\n the new bundle to the runtime; you must explicitly do that, as described in\n [Deploying an API proxy](/apigee/docs/api-platform/deploy/ui-deploy-new).\n\n The UI displays a **New revision saved** message:\n\n After you create a new revision, you typically deploy it to your cluster, as described in\n [Deploying an API proxy](/apigee/docs/api-platform/deploy/ui-deploy-new).\n\n### Apigee API\n\nEdit an API proxy to create a revision in your Apigee organization by issuing a `POST`\nrequest to the following resource: \n\n```\nhttps://apigee.googleapis.com/v1/organizations/$ORG/apis\n```\n\nYou must define the name of the API proxy using the `name` query parameter. Restrict\nthe characters used in the name to the following: `A-Za-z0-9._\\-$ %`\n\nOptionally, you can import an API proxy configuration bundle by performing the following steps:\n\n- Set the `action` query parameter to `import`\n- Set the `Content-type` header to `multipart/form-data`\n- Pass the name of the API proxy configuration bundle on your local file system\n\nThe following example demonstrates how to edit an API proxy by importing an API proxy\nconfiguration bundle (`helloworld-config.zip`) on your local file system using the\nAPI. \n\n```\nexport TOKEN=$(gcloud auth print-access-token)\nexport ORG=ORGANIZATION_NAME\ncurl \"https://apigee.googleapis.com/v1/organizations/$ORG/apis?name=helloworld&action=import\" \\\n -X POST \\\n -H \"Authorization: Bearer $TOKEN\" \\\n -H \"Content-type: multipart/form-data\" \\\n -F \"file=@helloworld-config.zip\"\n```\n\nWhere `$TOKEN` is set to your OAuth 2.0 access token, as described in\n[Obtaining an OAuth 2.0 access token](/apigee/docs/api-platform/get-started/api-get-started#oauth20). For information about the `curl` options used in this example, see\n[Using curl](/apigee/docs/api-platform/get-started/api-get-started#curl). For a description of environment variables you can use, see\n[Setting\nenvironment variables for Apigee API requests](/apigee/docs/api-platform/get-started/api-get-started#api-environment-variables).\n\nThe following provides an example of the response output: \n\n```carbon\n{\n \"basepaths\": [\n \"/helloworld\"\n ],\n \"configurationVersion\": {\n \"majorVersion\": 4\n },\n \"createdAt\": \"1559145292799\",\n \"displayName\": \"helloworld\",\n \"entityMetaDataAsProperties\": {\n \"bundle_type\": \"zip\",\n \"subType\": \"Proxy\",\n \"lastModifiedAt\": \"1559145292799\",\n \"createdAt\": \"1559145292799\"\n },\n \"lastModifiedAt\": \"1559145292799\",\n \"name\": \"helloworld\",\n \"policies\": [\n \"verify-api-key\",\n \"remove-query-param-apikey\",\n \"OAuth-v20-1\"\n ],\n \"proxies\": [\n \"default\"\n ],\n \"proxyEndpoints\": [\n \"default\"\n ],\n \"resourceFiles\": {},\n \"targetEndpoints\": [\n \"default\"\n ],\n \"targets\": [\n \"default\"\n ],\n \"type\": \"Application\",\n \"revision\": \"1\",\n \"description\": \"Hello world\"\n}\n```\n\nFor more information on editing an API proxy, see the [`apis.create` method](/apigee/docs/reference/apis/apigee/rest/v1/organizations.apis/create)\nin the Apigee API. To see all the methods available for API proxies, see the [API proxies API](/apigee/docs/reference/apis/apigee/rest/v1/organizations.apis)."]]